Vintage Flute Shop
Articles
“From Lamp to Flute: The Restoration
of Louis Lot #4339”
Aristotle’s philosophy of
the Four Causes provide a way for understanding why things exist or change.
Material Cause - What
material is the thing made of? (Wood, silver, etc.)
Formal Cause - What is it? (A Boehm wood flute.)
Efficient Cause - Who made it? (Louis Lot.)
Final Cause - What is its purpose? (To play music.)
Years after the restoration of Lot #4339 for a customer, thinking about these Four Causes now gives me clarity of why I rescued this “goner” and ended up loving it. During the restoration, my mind was mostly focused on the logistics and authenticity of the repair. I relied on common sense, which did not stray far from Aristotle’s Four Causes. Putting philosophy aside and with many photos, I am here to tell my story of the restoration journey of Louis Lot #4339. Some of the details are borderline technical, which would be interesting to a flutemaker or conservator, but I hope they are also engaging for the general reader.
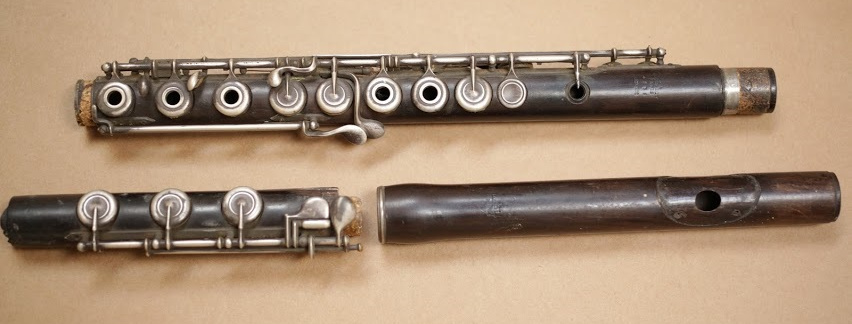
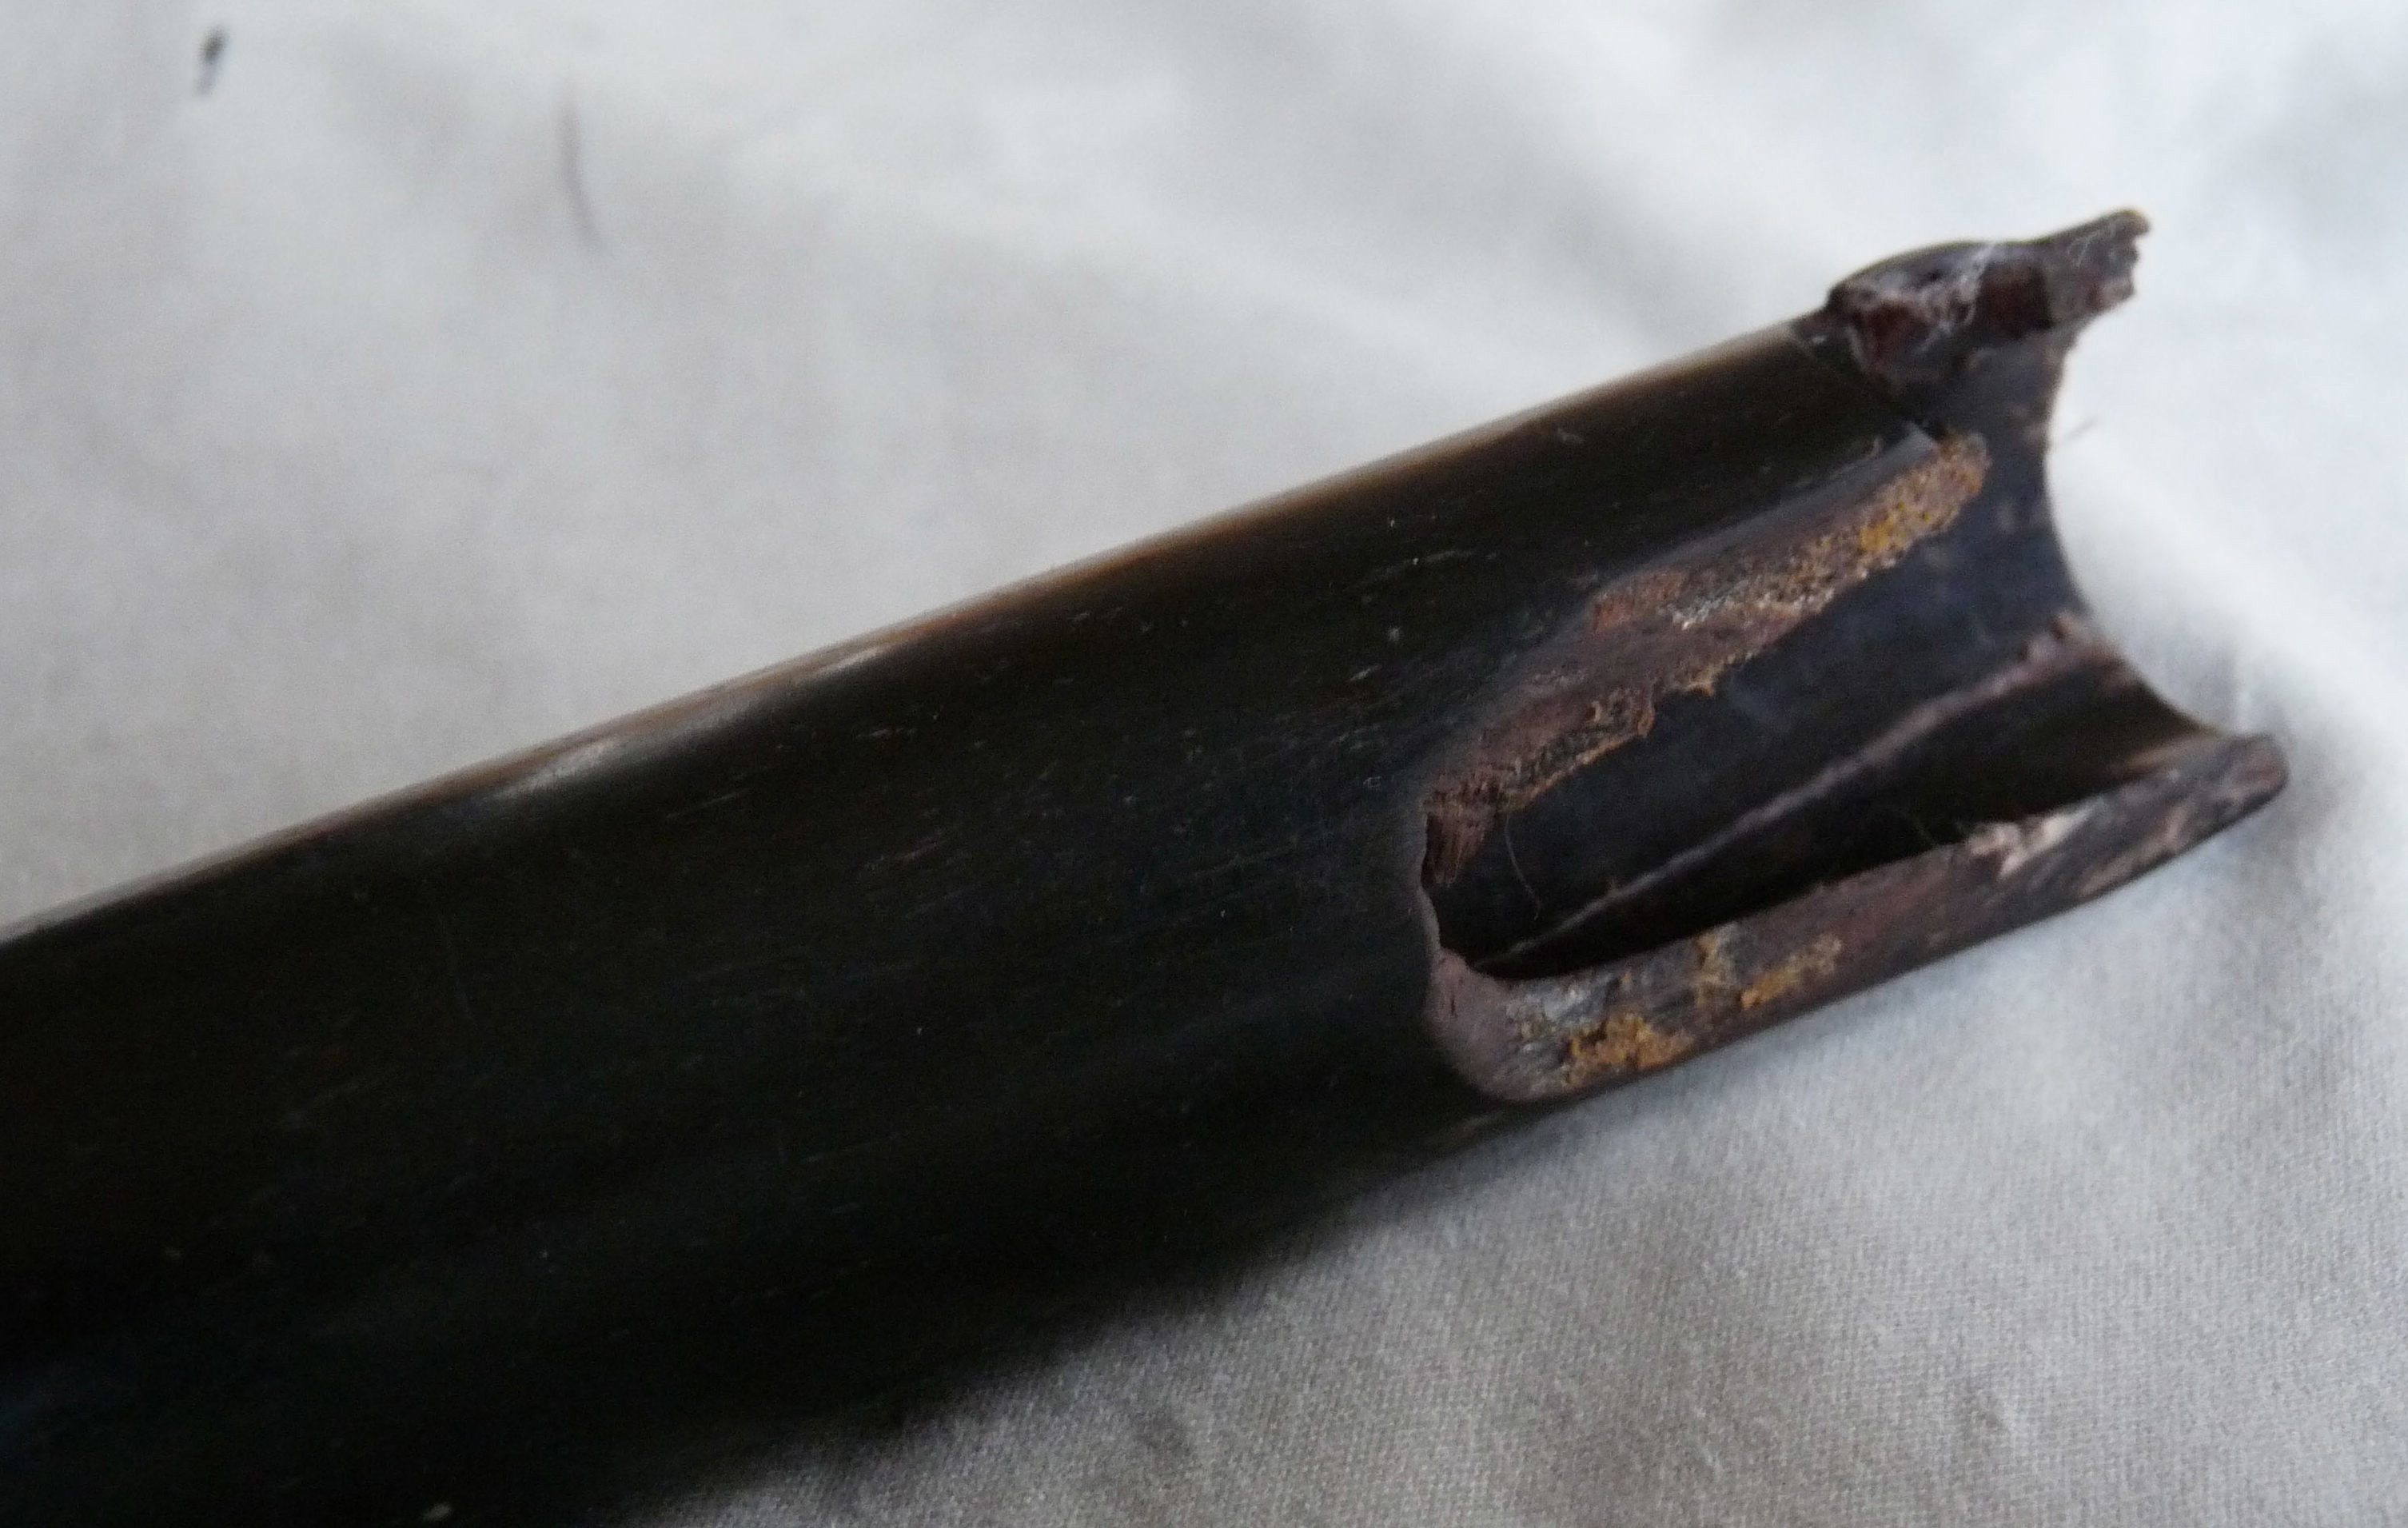
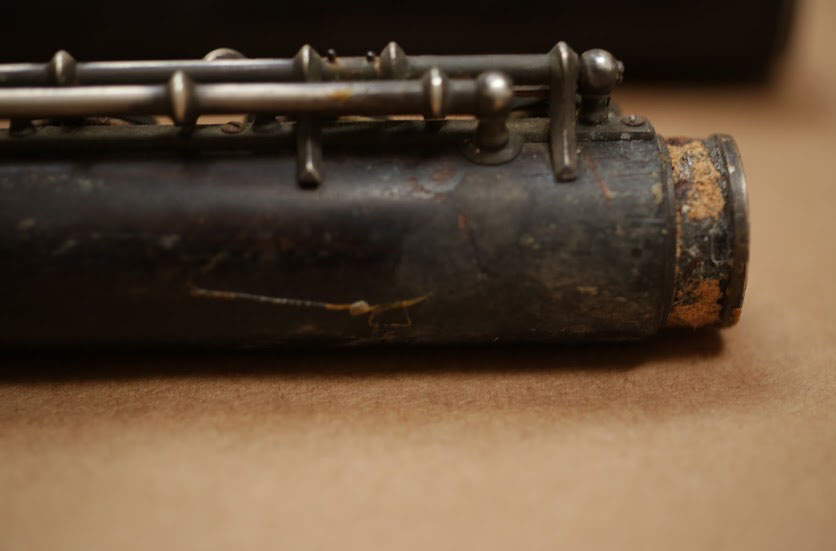
Lot #4339’s usefulness as a flute ended when it was repurposed as a lamp. The fatal blow was a broken footjoint tenon. In addition, there is a long list of major and minor issues, such as a missing C# cup, some stuck steels and missing connecting hardware and rings, a missing silver lipplate, and a sizeable crack on the headjoint. The centerjoint seems to be more or less intact and the silver keys have acquired a beautiful patina and smooth feel, possibly from years of daily practicing. This wood Louis Lot is over one hundred years old. If its demise happened twenty years ago, it had already done its duty and served many owners. Somehow, for this flute, I could imagine a glorious past and a bright future. Believing in a viable end game gave me hope and motivation to begin and complete the project.
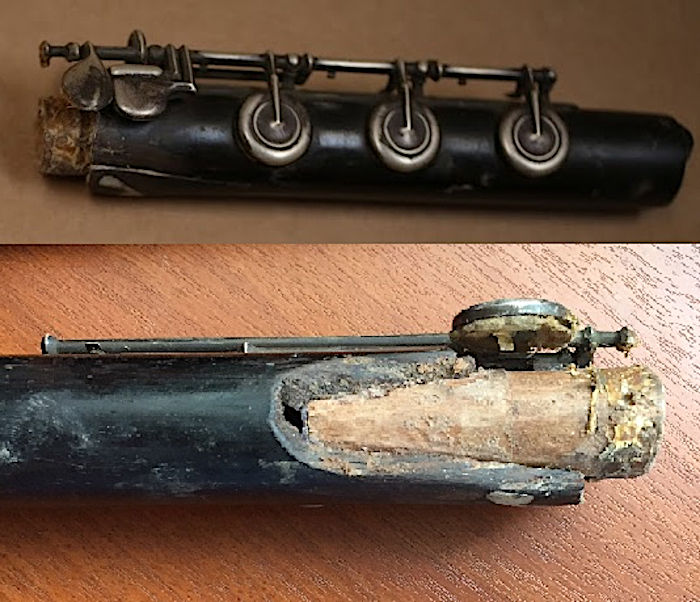
To start, I decided to tackle the seemingly impossible task: the footjoint. It was missing quite a bit of wood, extending past the D# tone hole, the end ring, and the entire metal socket joint that carries the post and another ring. The keys and rib were intact, except for a few missing rib screws and needle springs. The steel was rusted solid inside the mechanical tubing.
The mechanism needed to be soaked in penetrating oil in order for the steel to loosen itself. I didn’t want to soak the wood in the process, so I had to remove the long rib while the mechanism was still attached. It was quite challenging because the screwdriver could not reach the rib screws at the correct angle. To solve this, I fashioned a small right-angle screwdriver blade to carefully back out the screws, one by one.
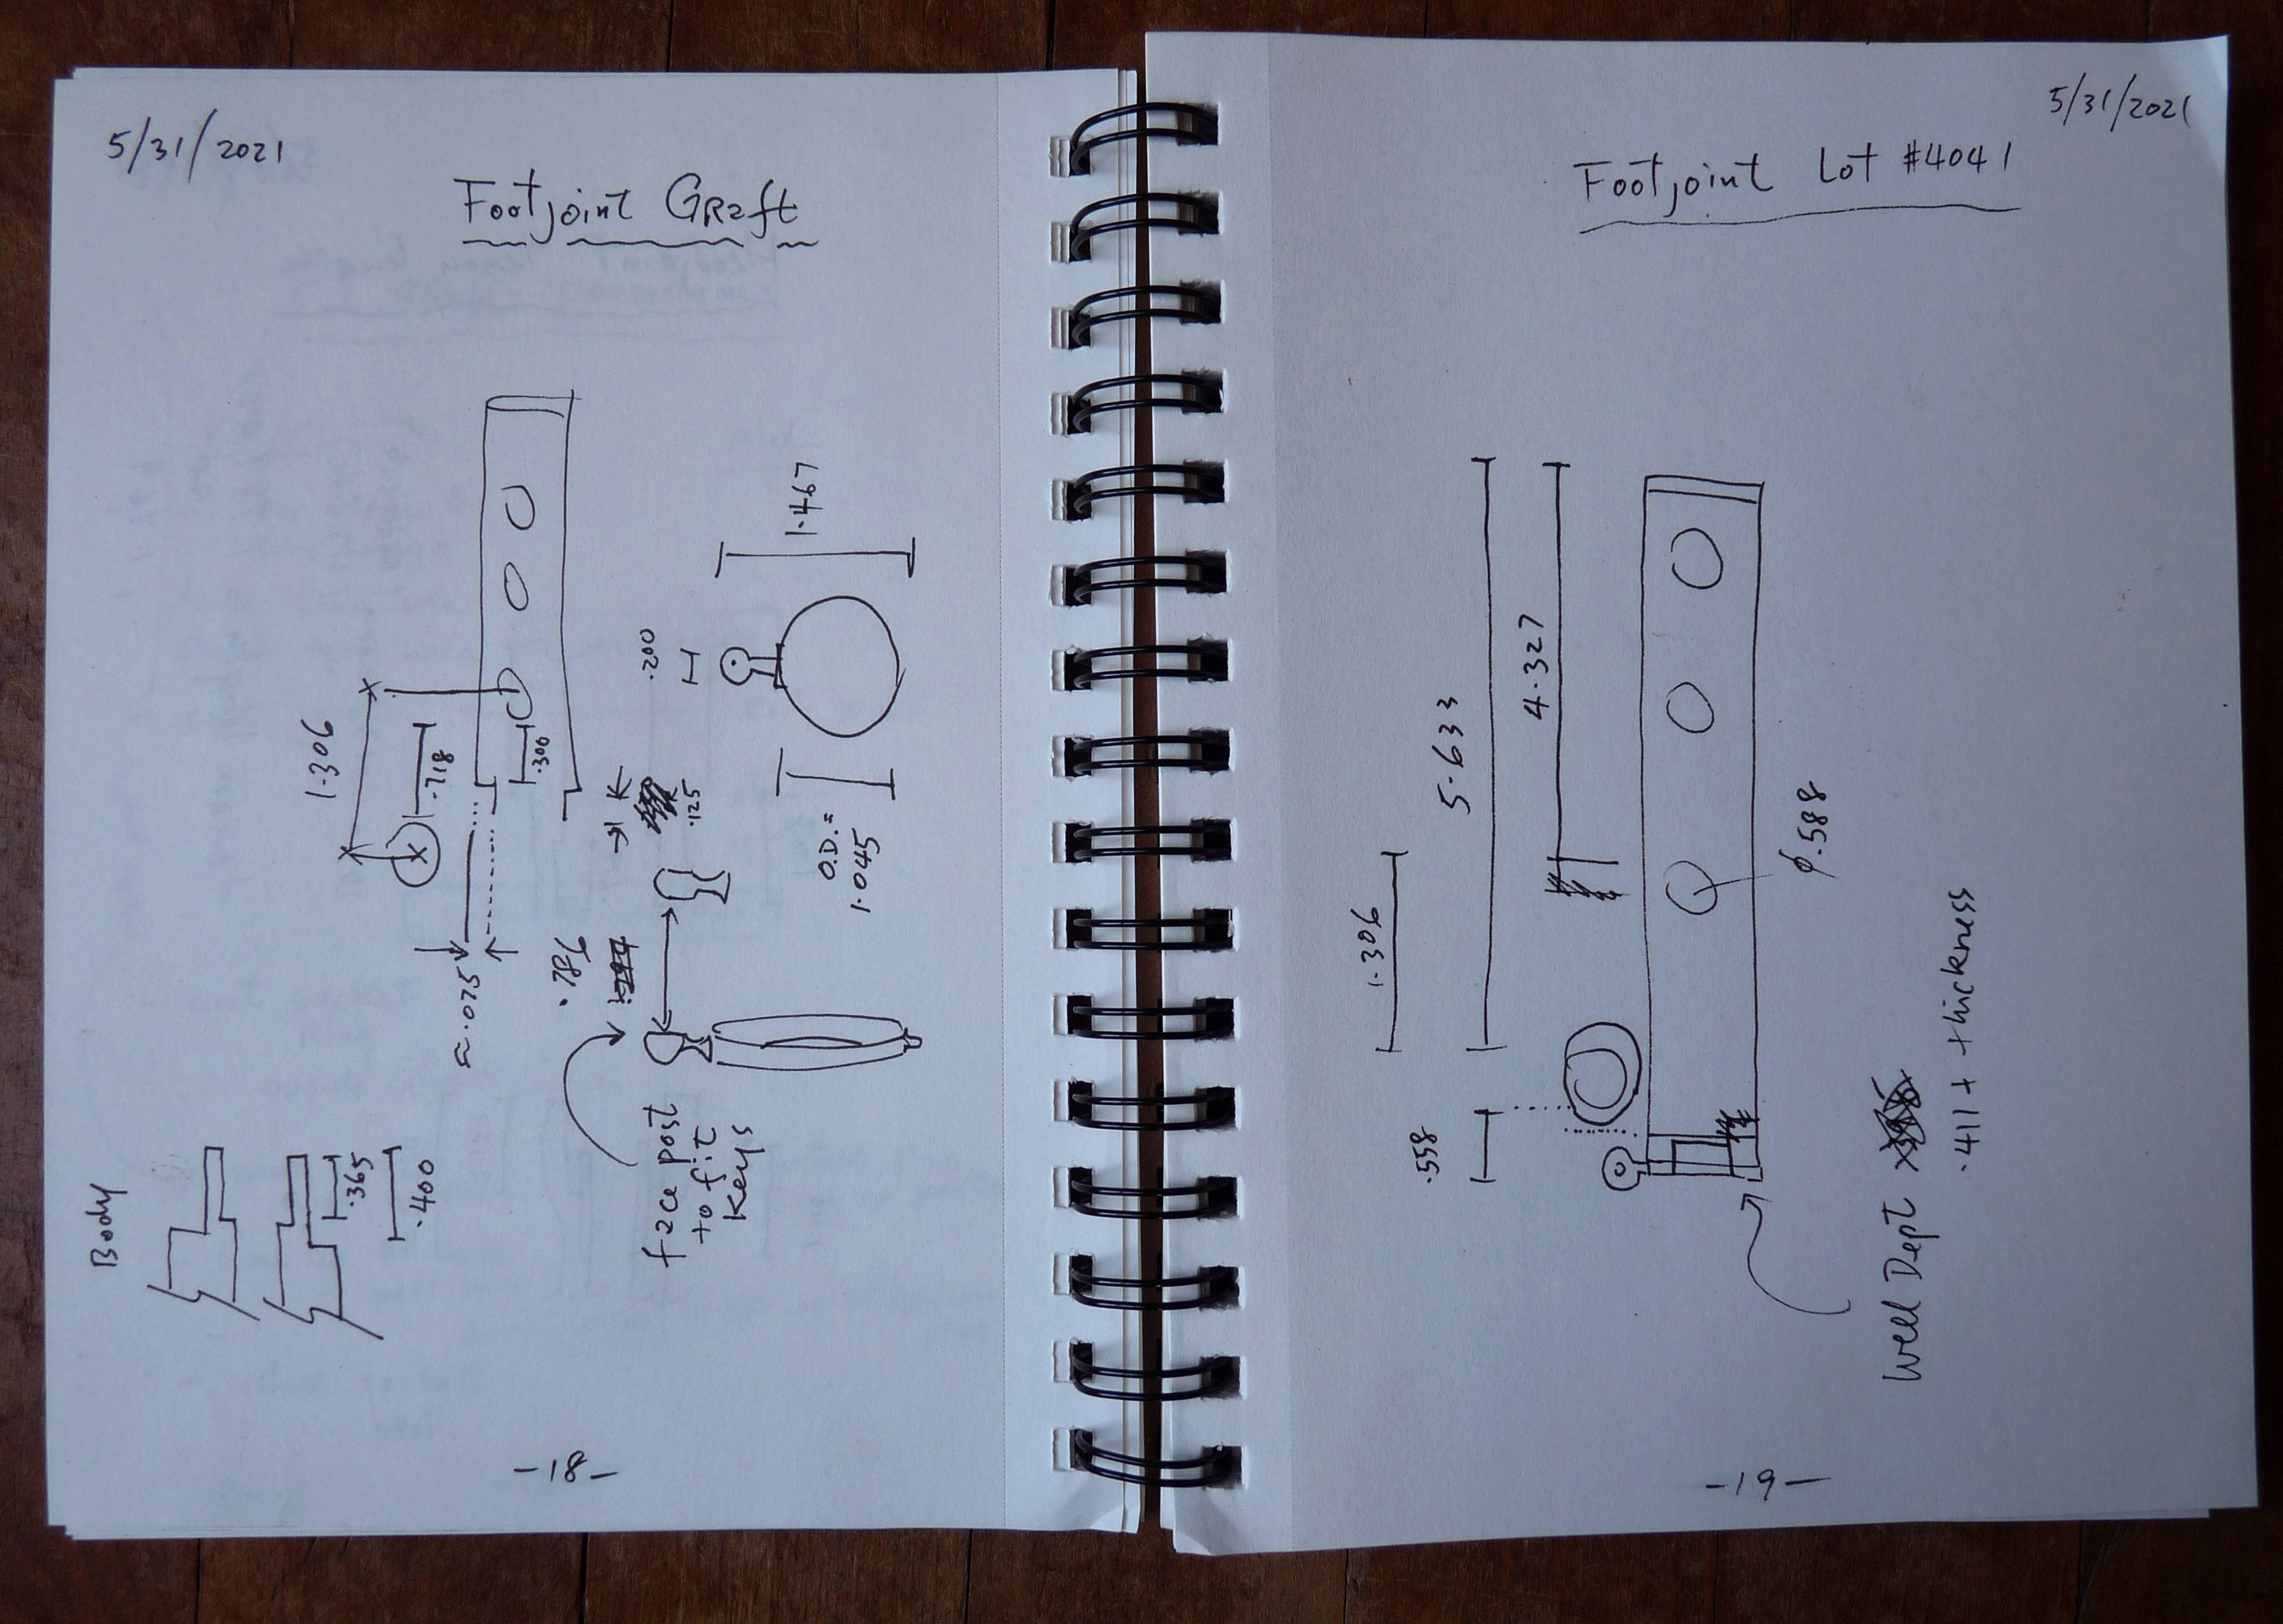
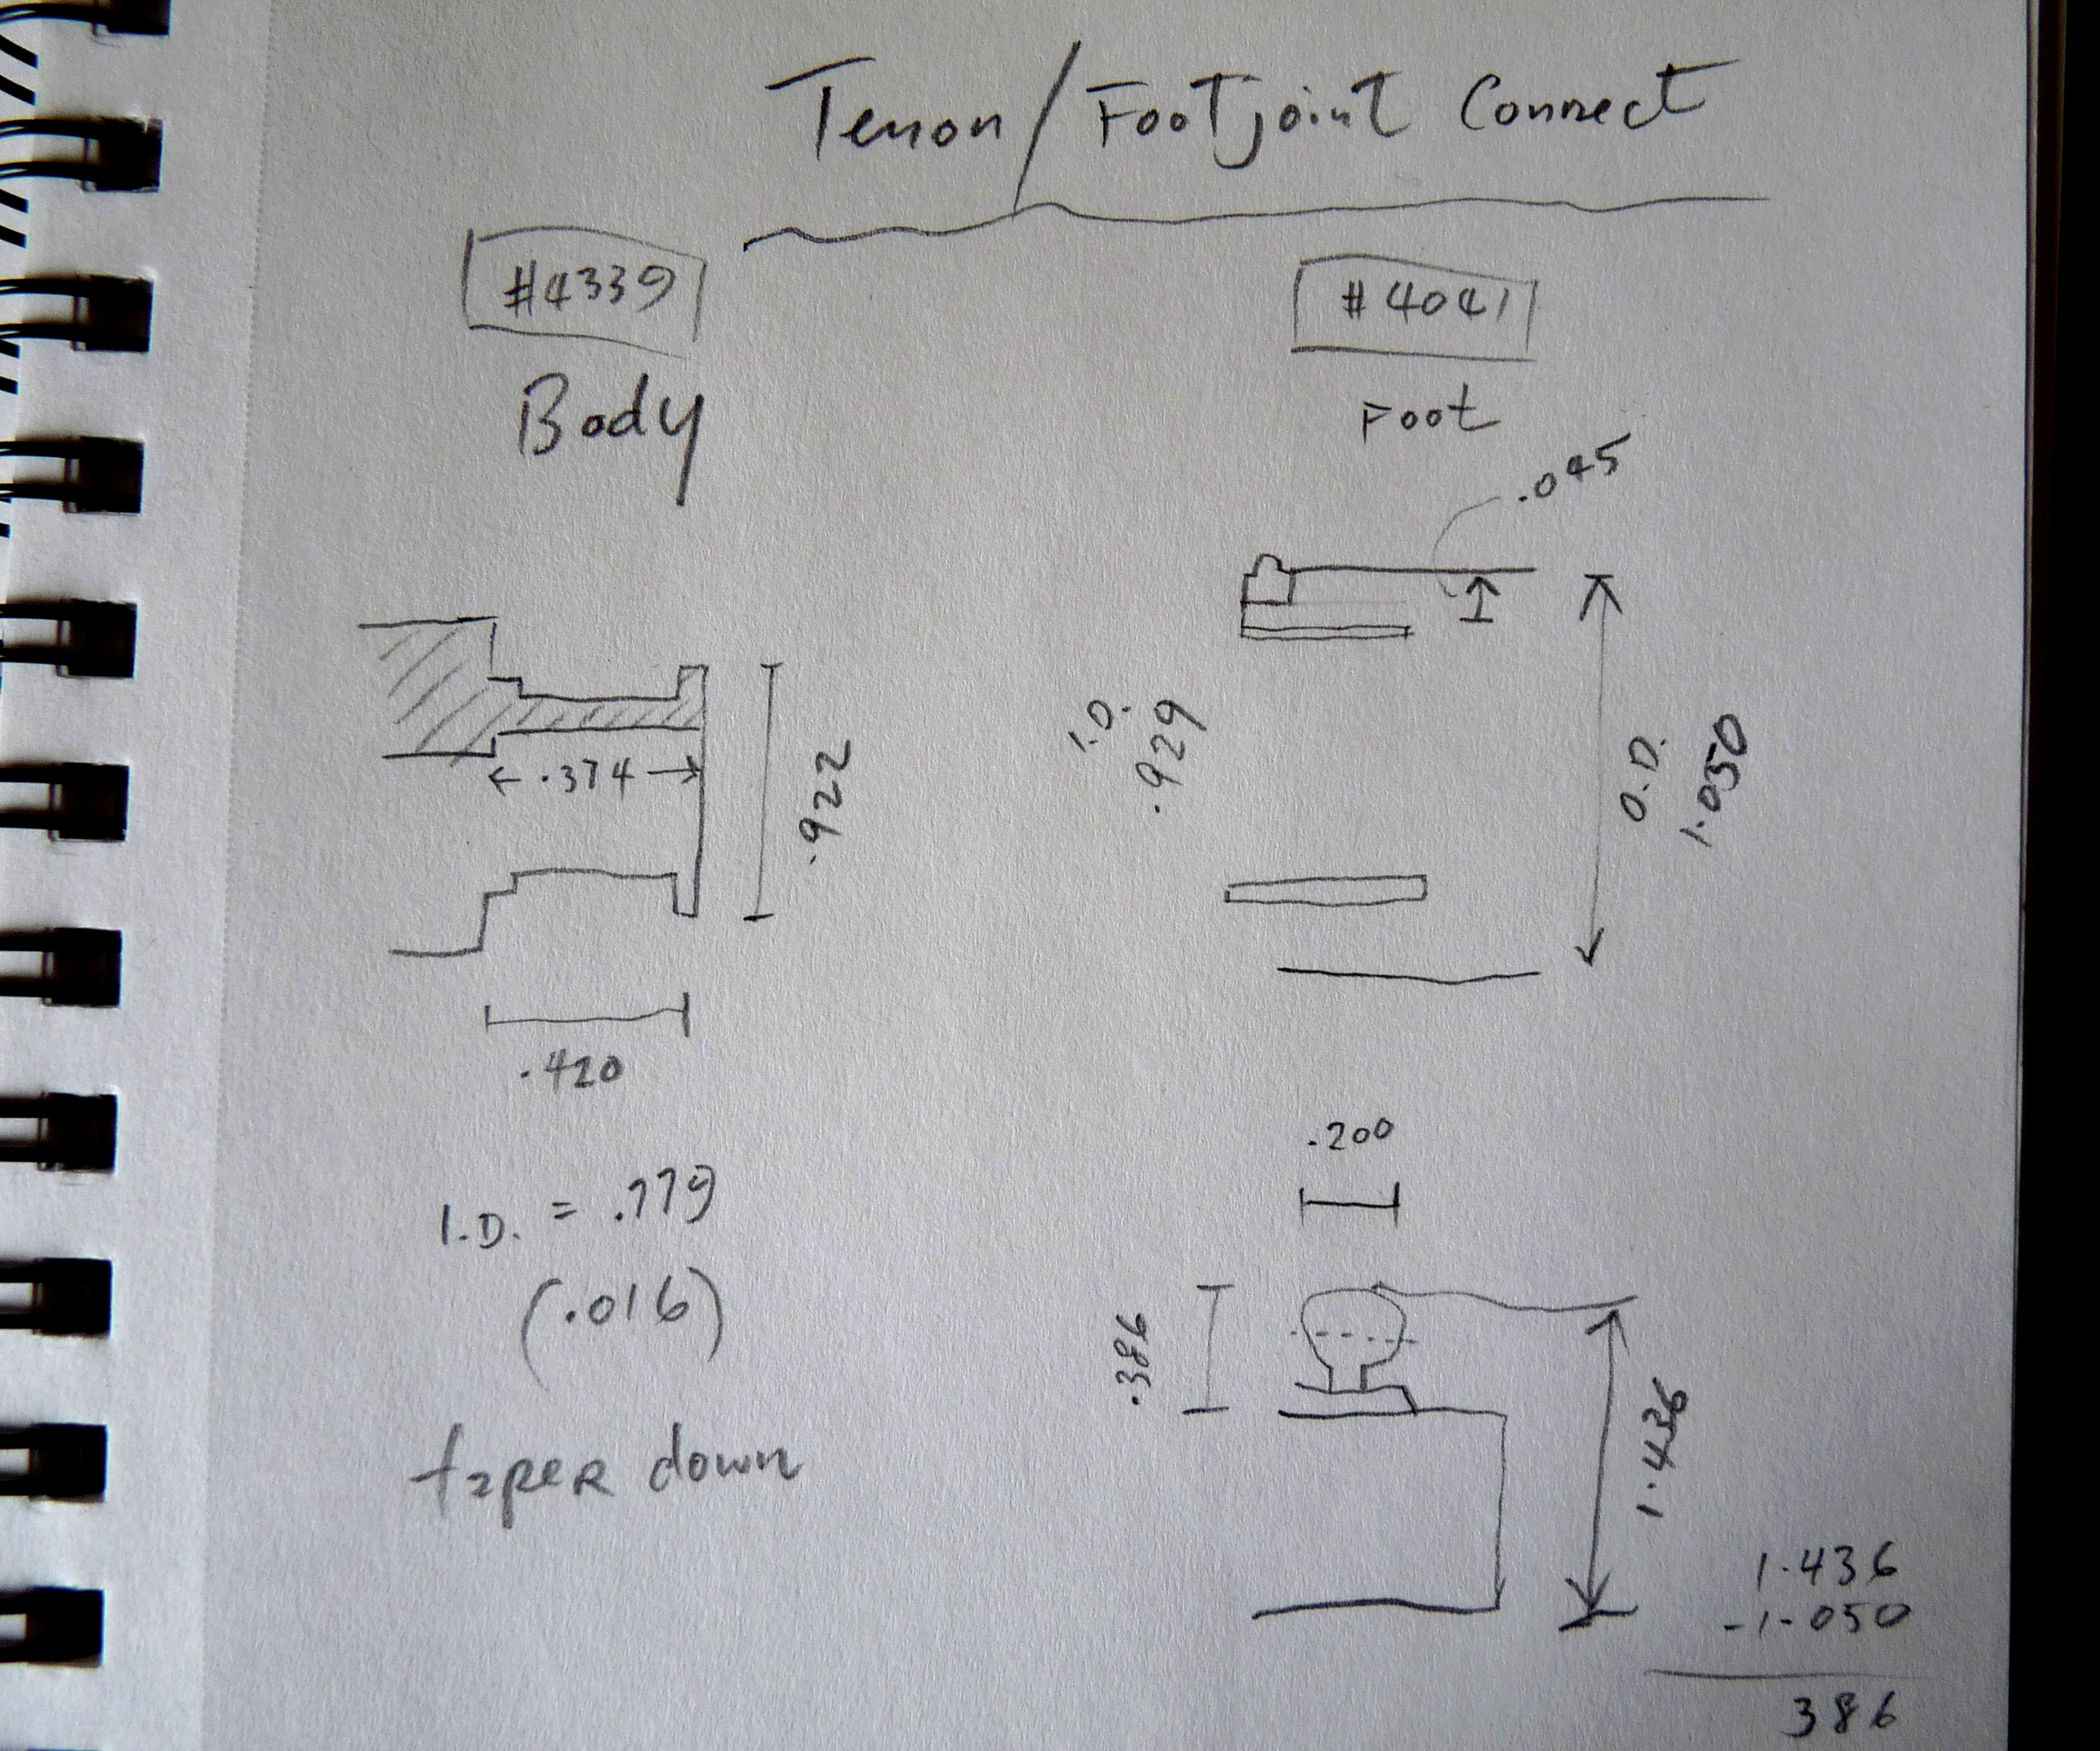
Once the wood footjoint was laid bare, I was able to take measurements and come up with a plan of action. These measurements were compared with those of another wood Louis Lot, #4041, which shared the same specifications. With a sister flute as a reference, I felt confident that the reproduced parts would be authentic in both intention and execution. I used modern tools and adhesives, grenadilla wood that was harvested decades after Louis Lot’s time, and a generic sterling silver alloy instead of “French silver”. The Material Cause was undoubtedly altered in the most precise terms, but the Final Cause was starting to revert back to some of its original notion. The Efficient Cause now had my name added to it - a bit of pride that I privately enjoyed before it would become an anonymous repair years from now.
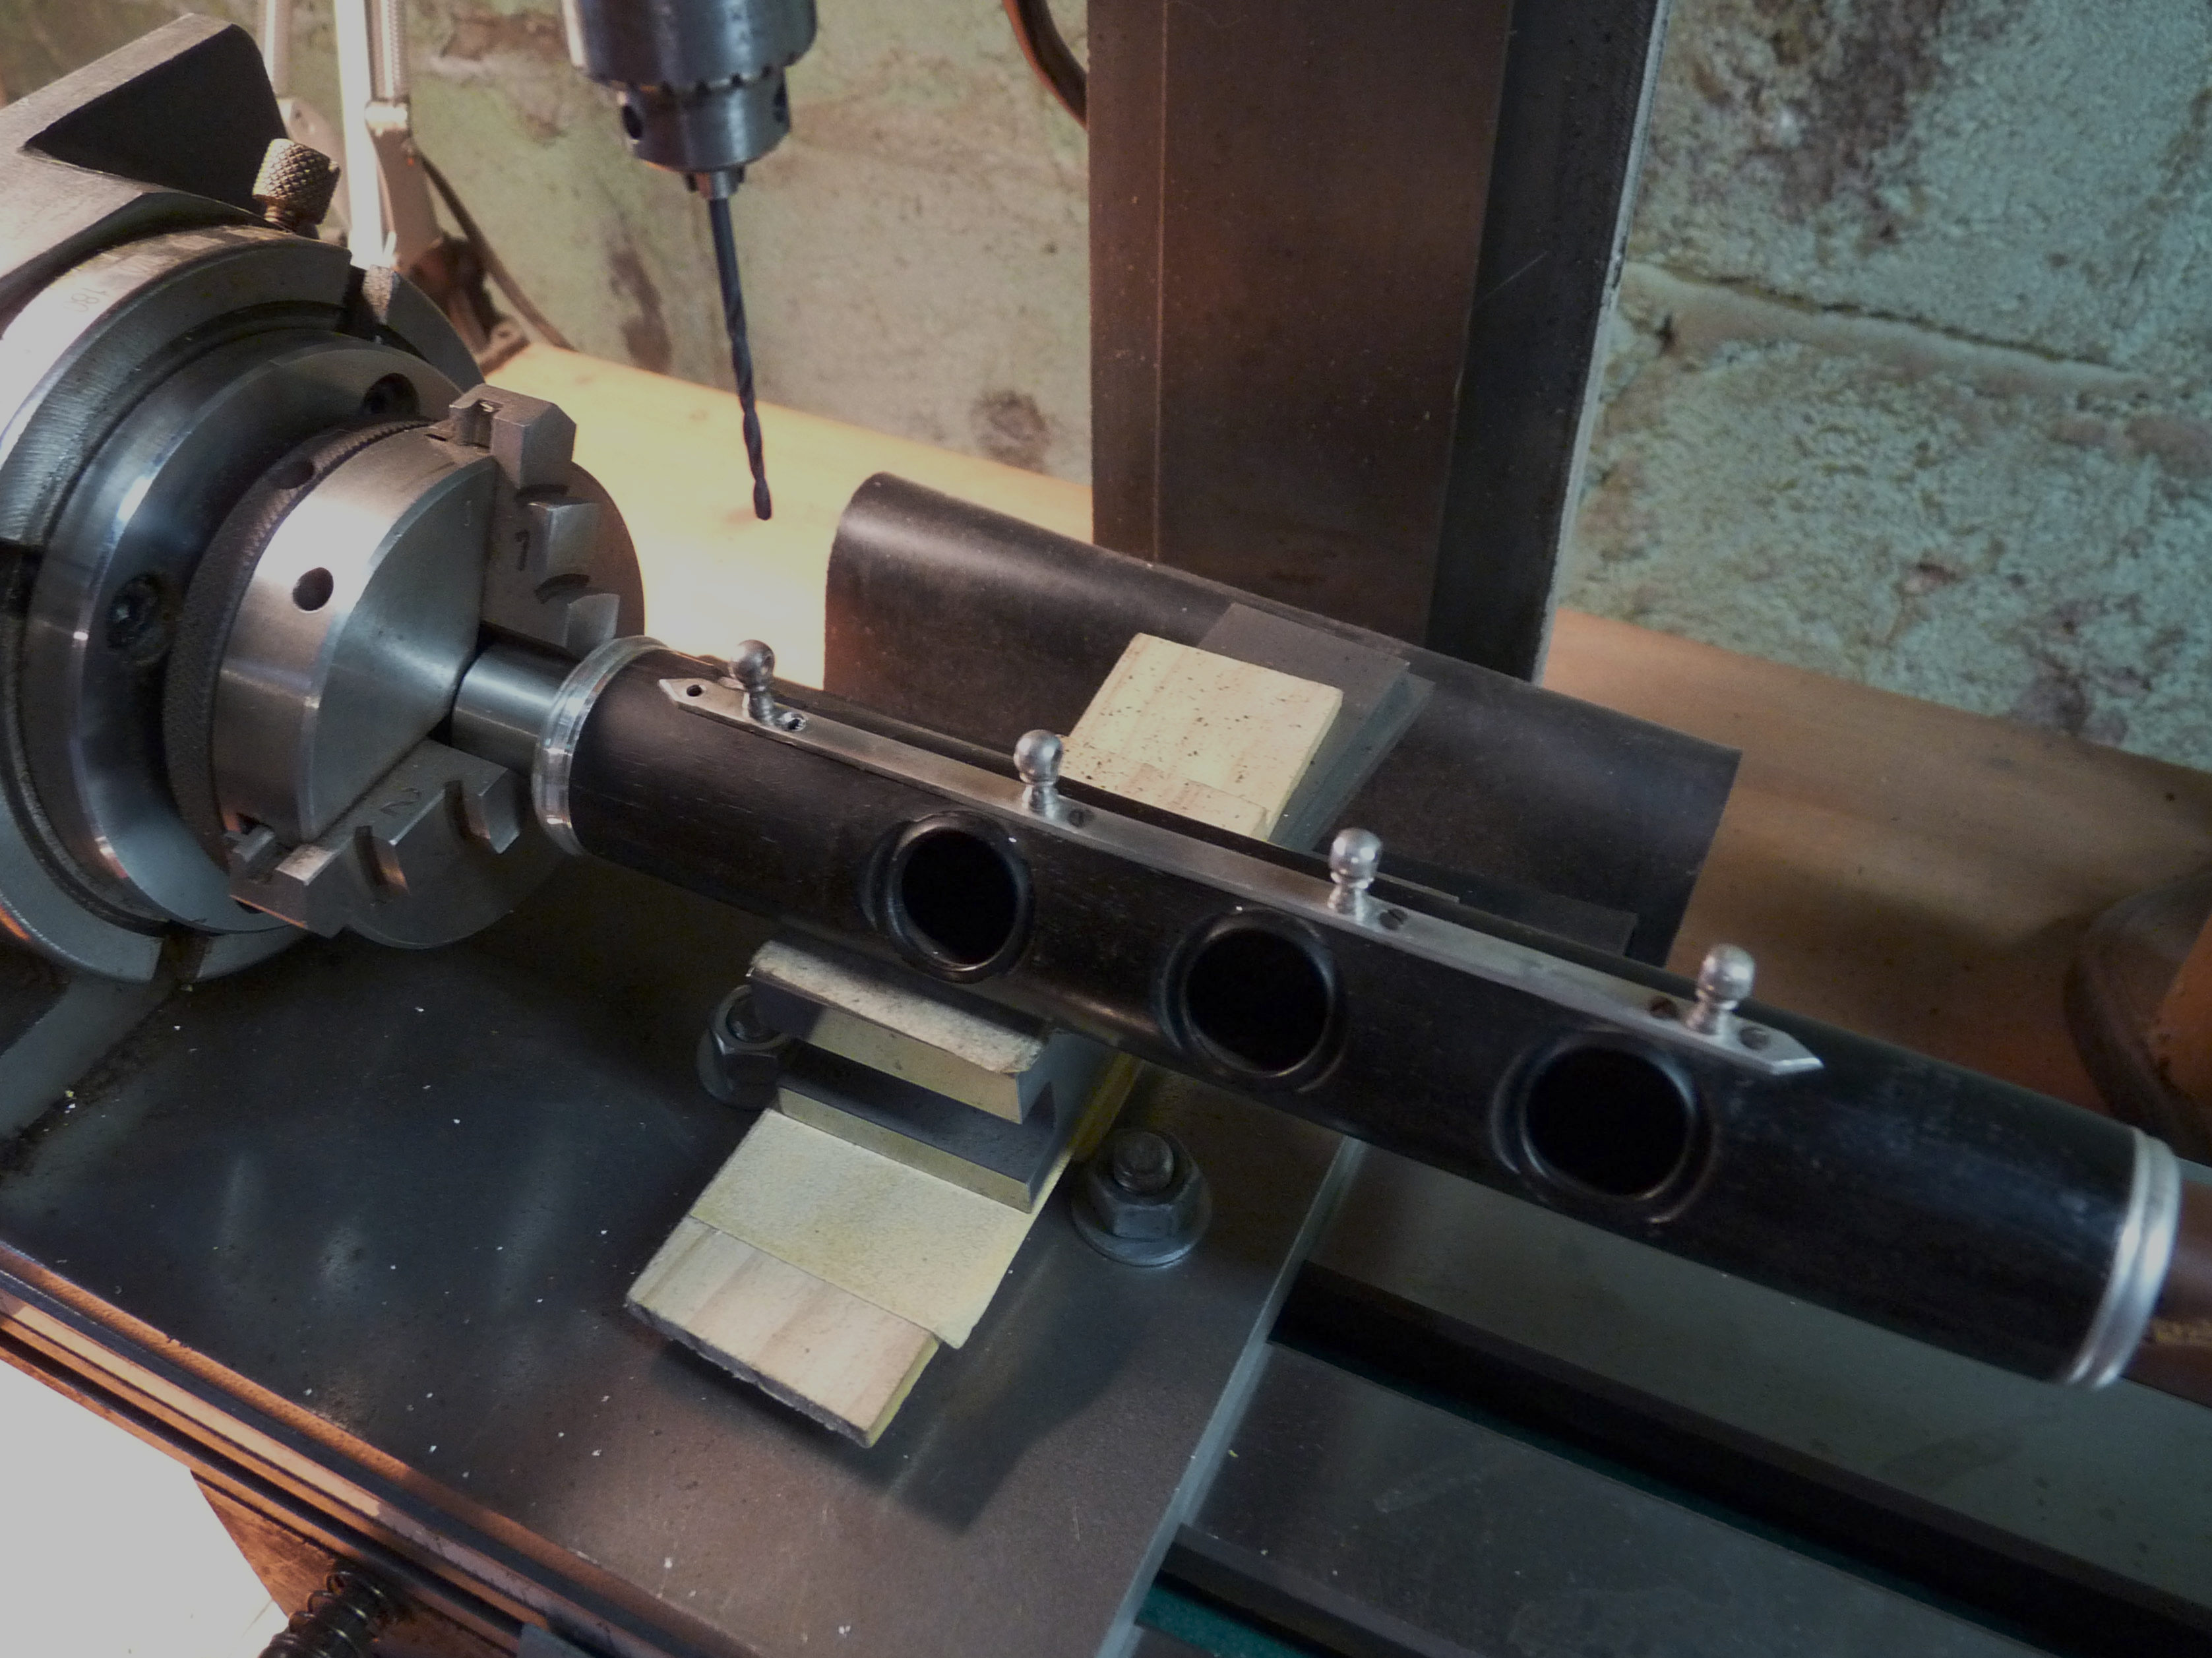
The next step was to replace the missing wood and build a foundation to receive a graft that I would make from scratch.
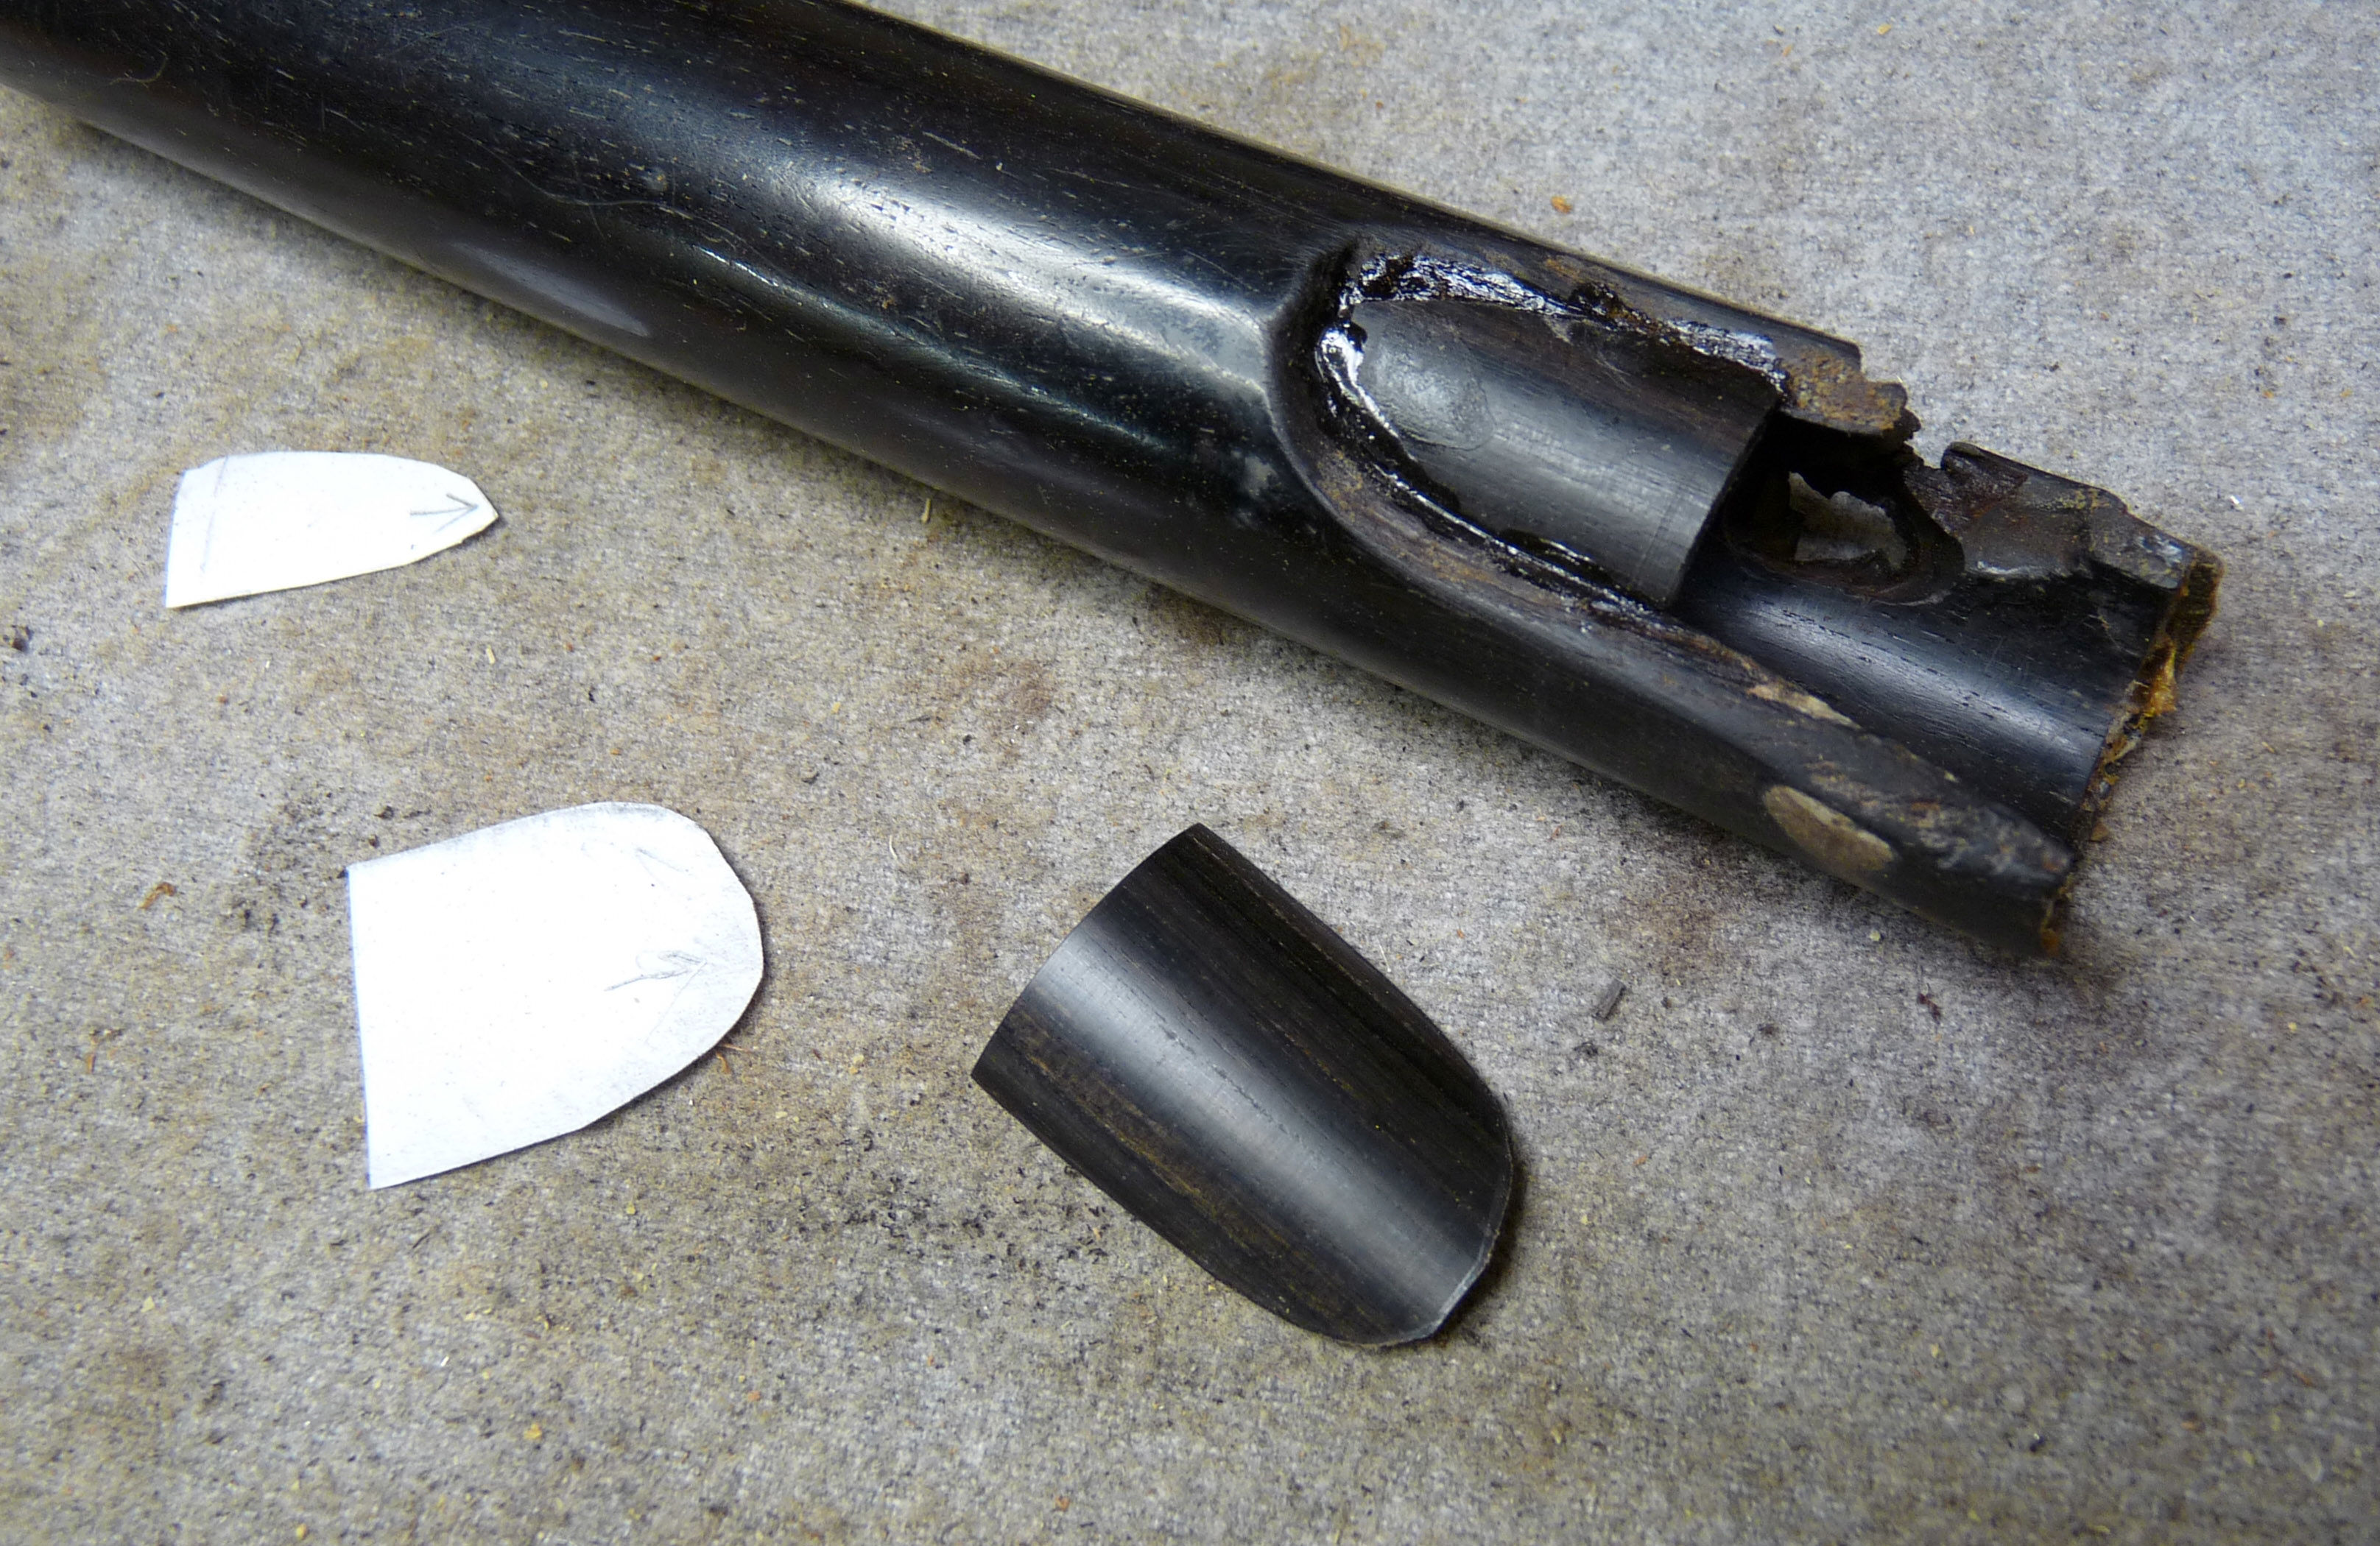
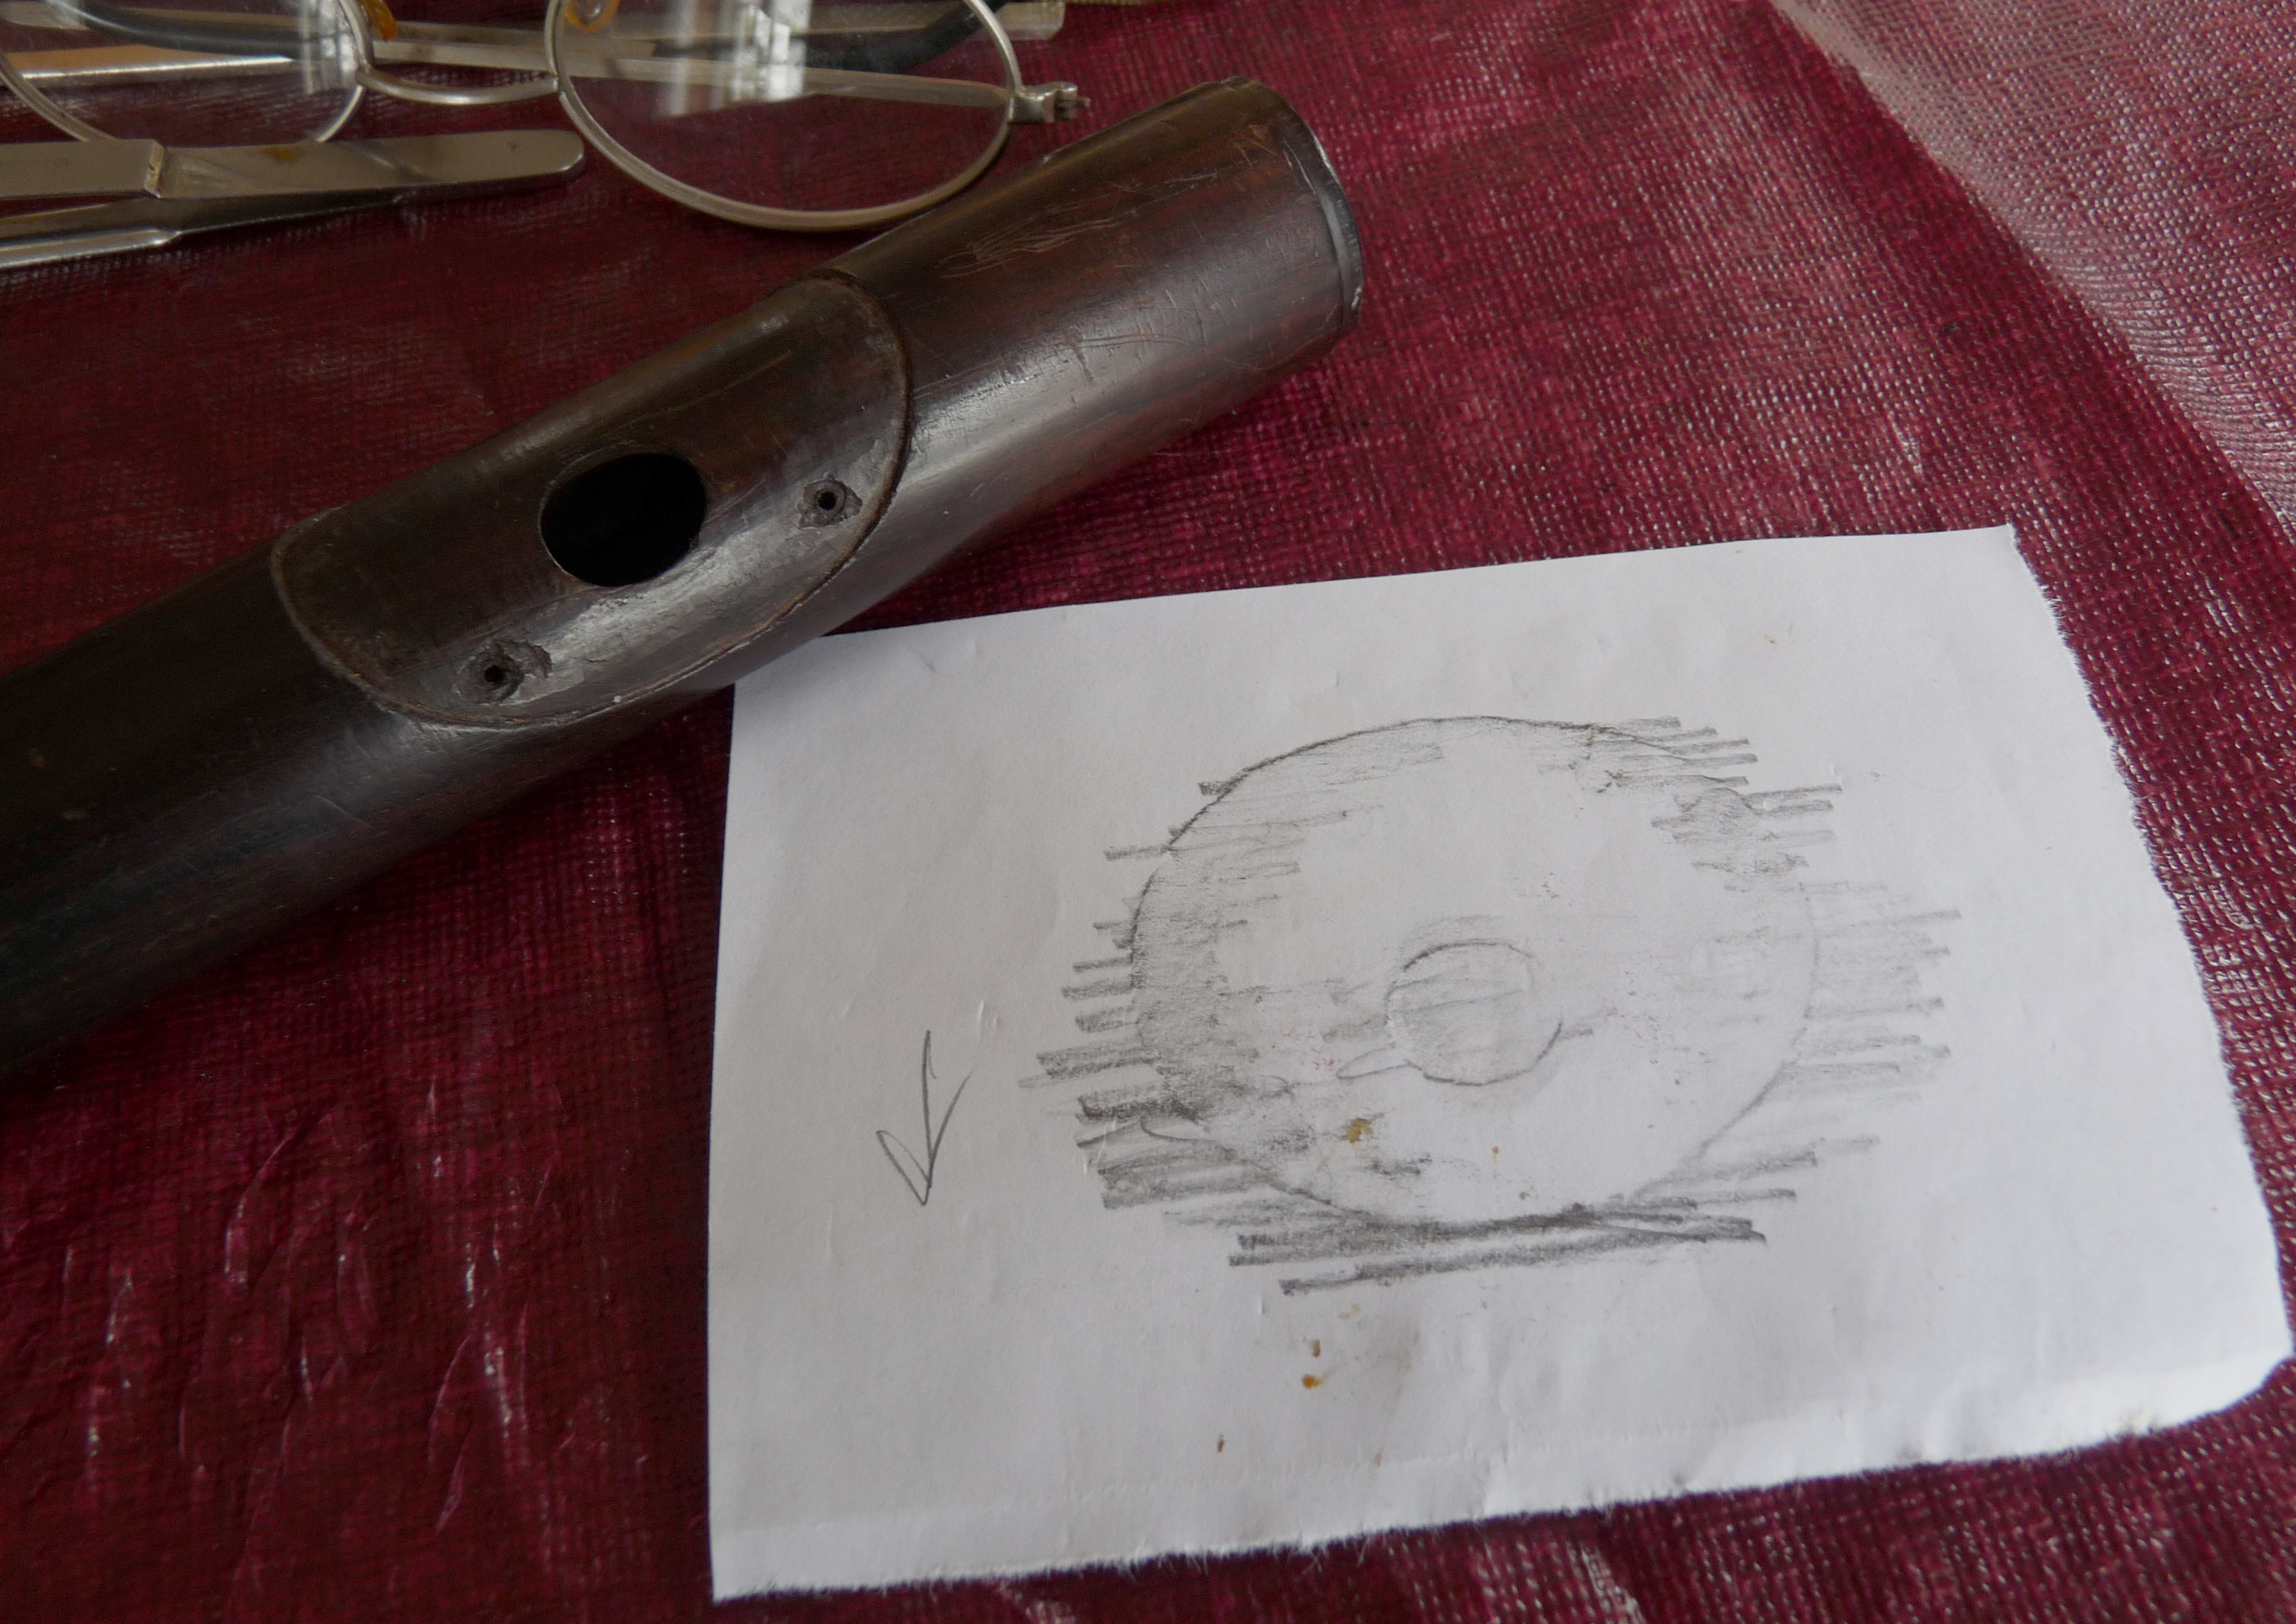
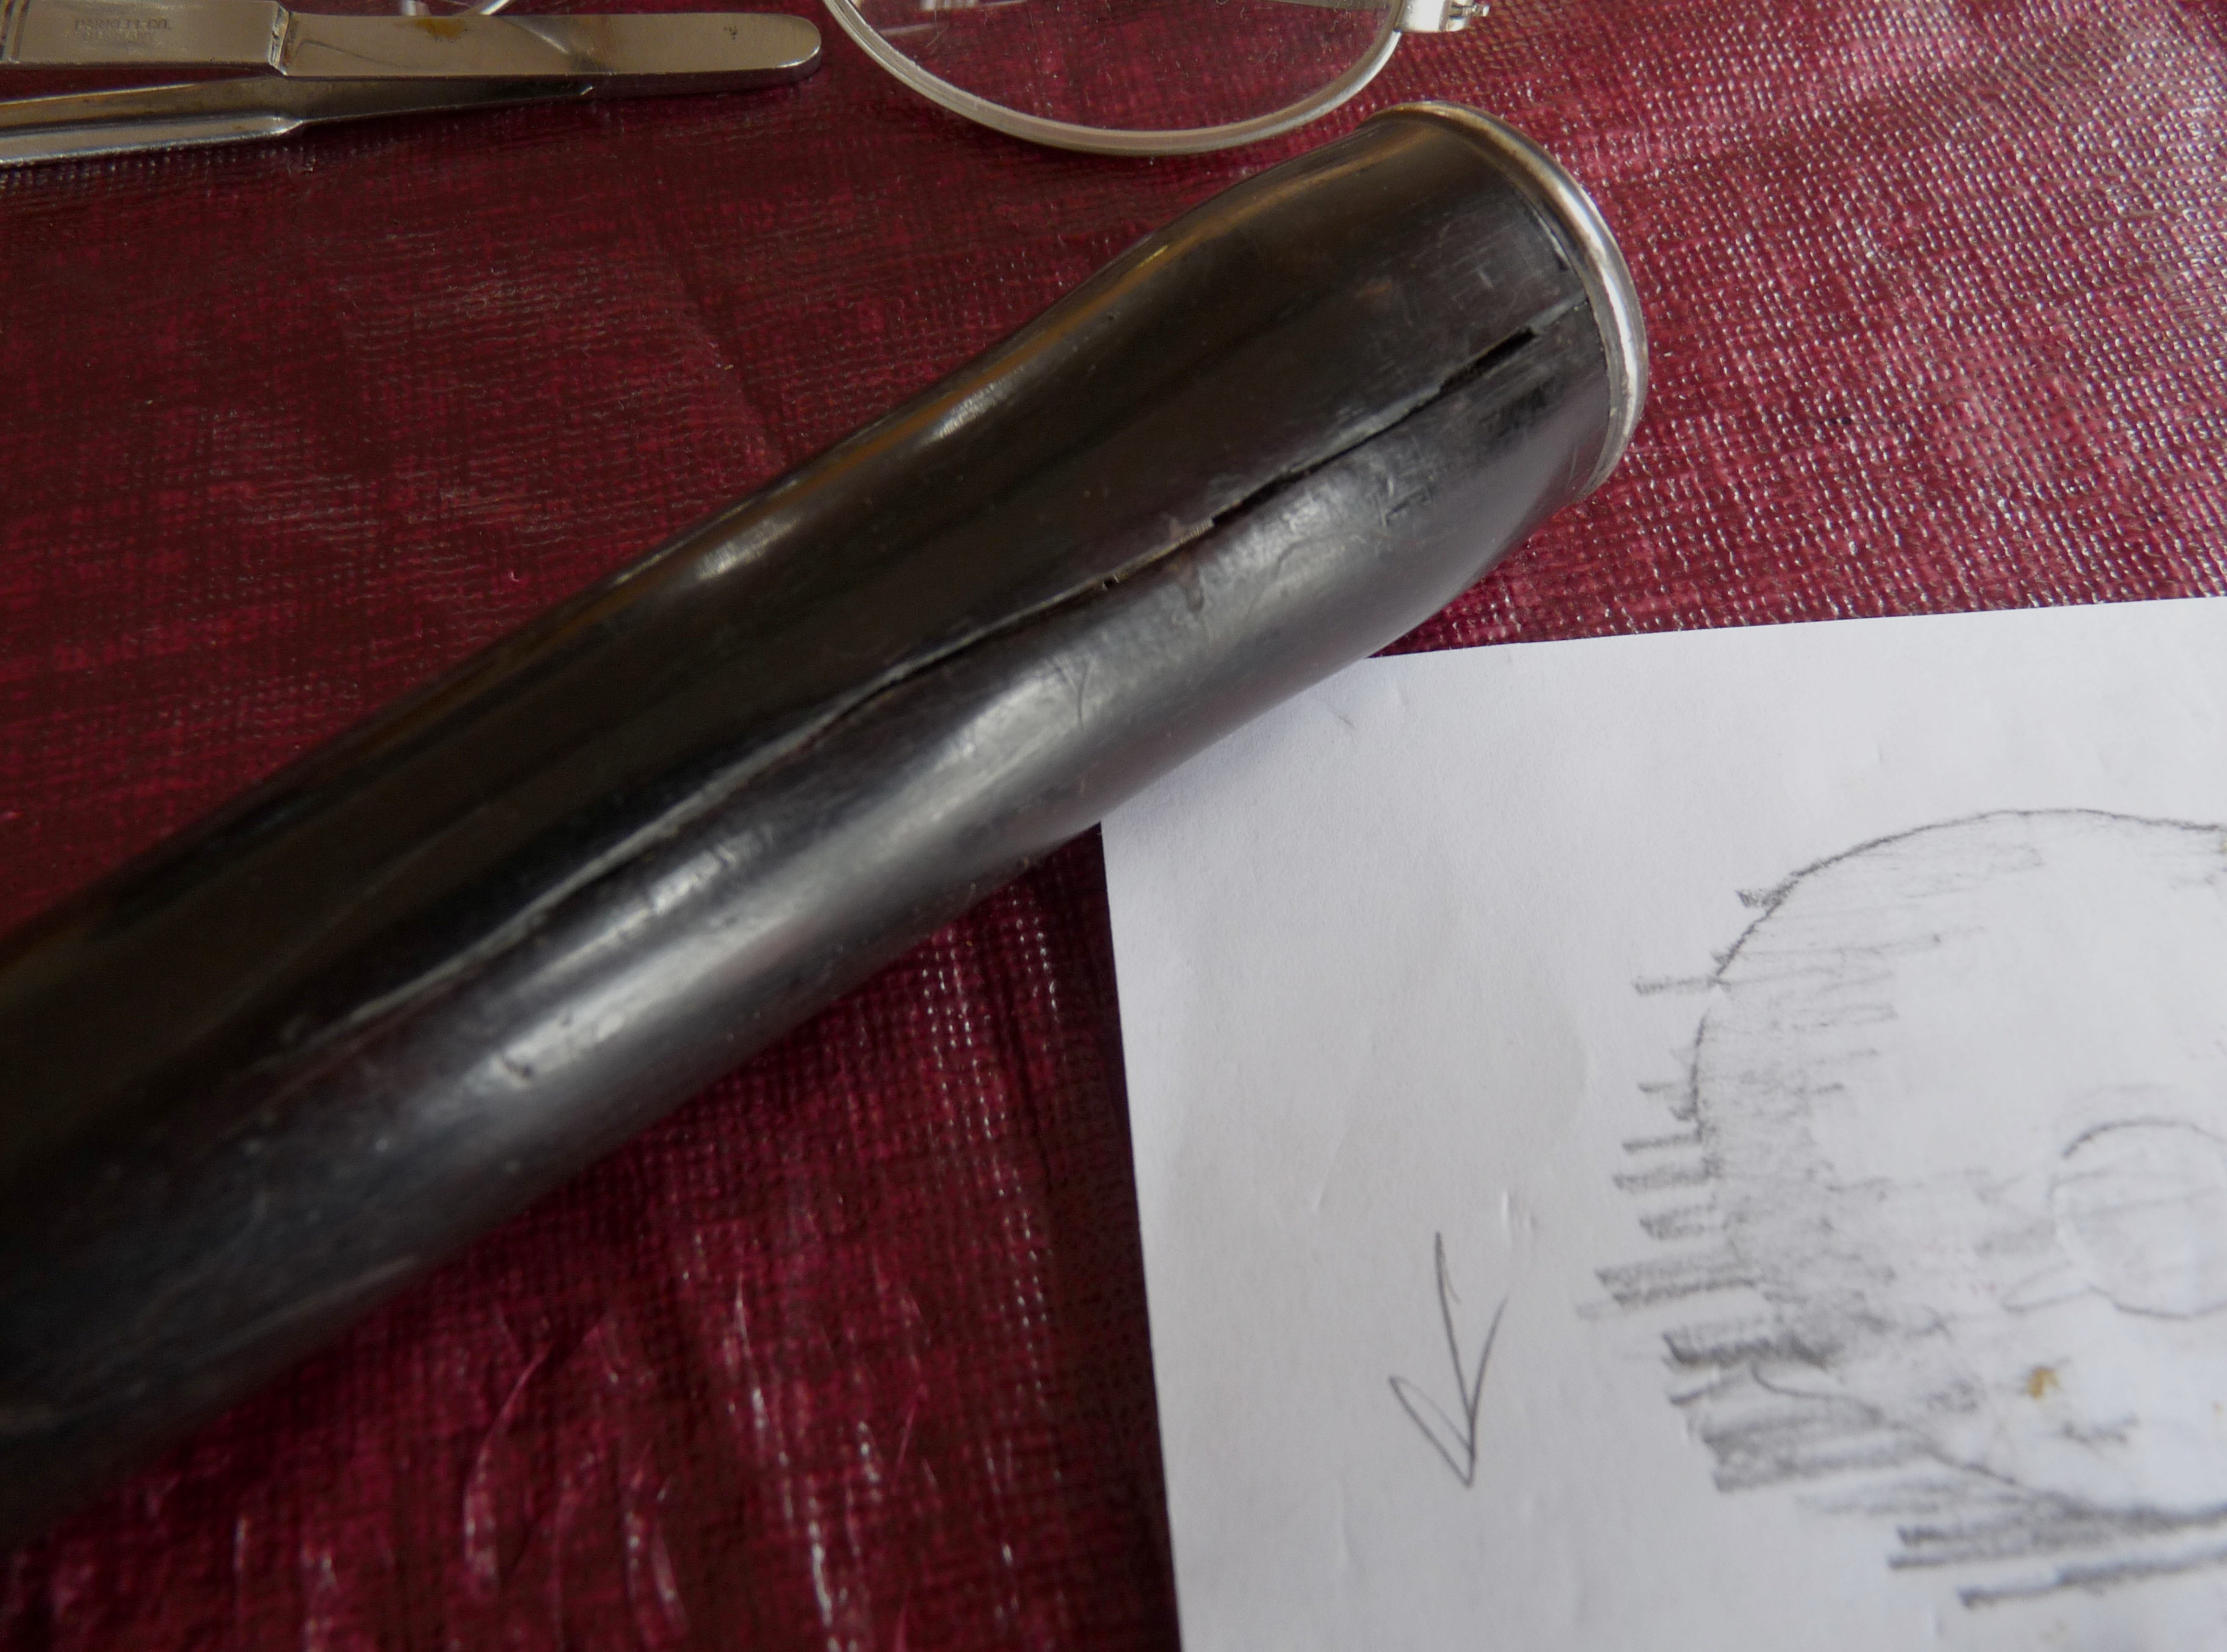
The cavity left behind from the initial damage was an odd shape. I devised a novel idea of using two pieces of wood that would have the right shape. The first piece of wood had the correct bore diameter, the second piece, the outside diameter. When put together, their total wall thickness would be the same as the flute. To create the replacement pieces, I traced the broken shape on pieces of paper as a guide. This method allowed me to effectively close the cavity for the next step.
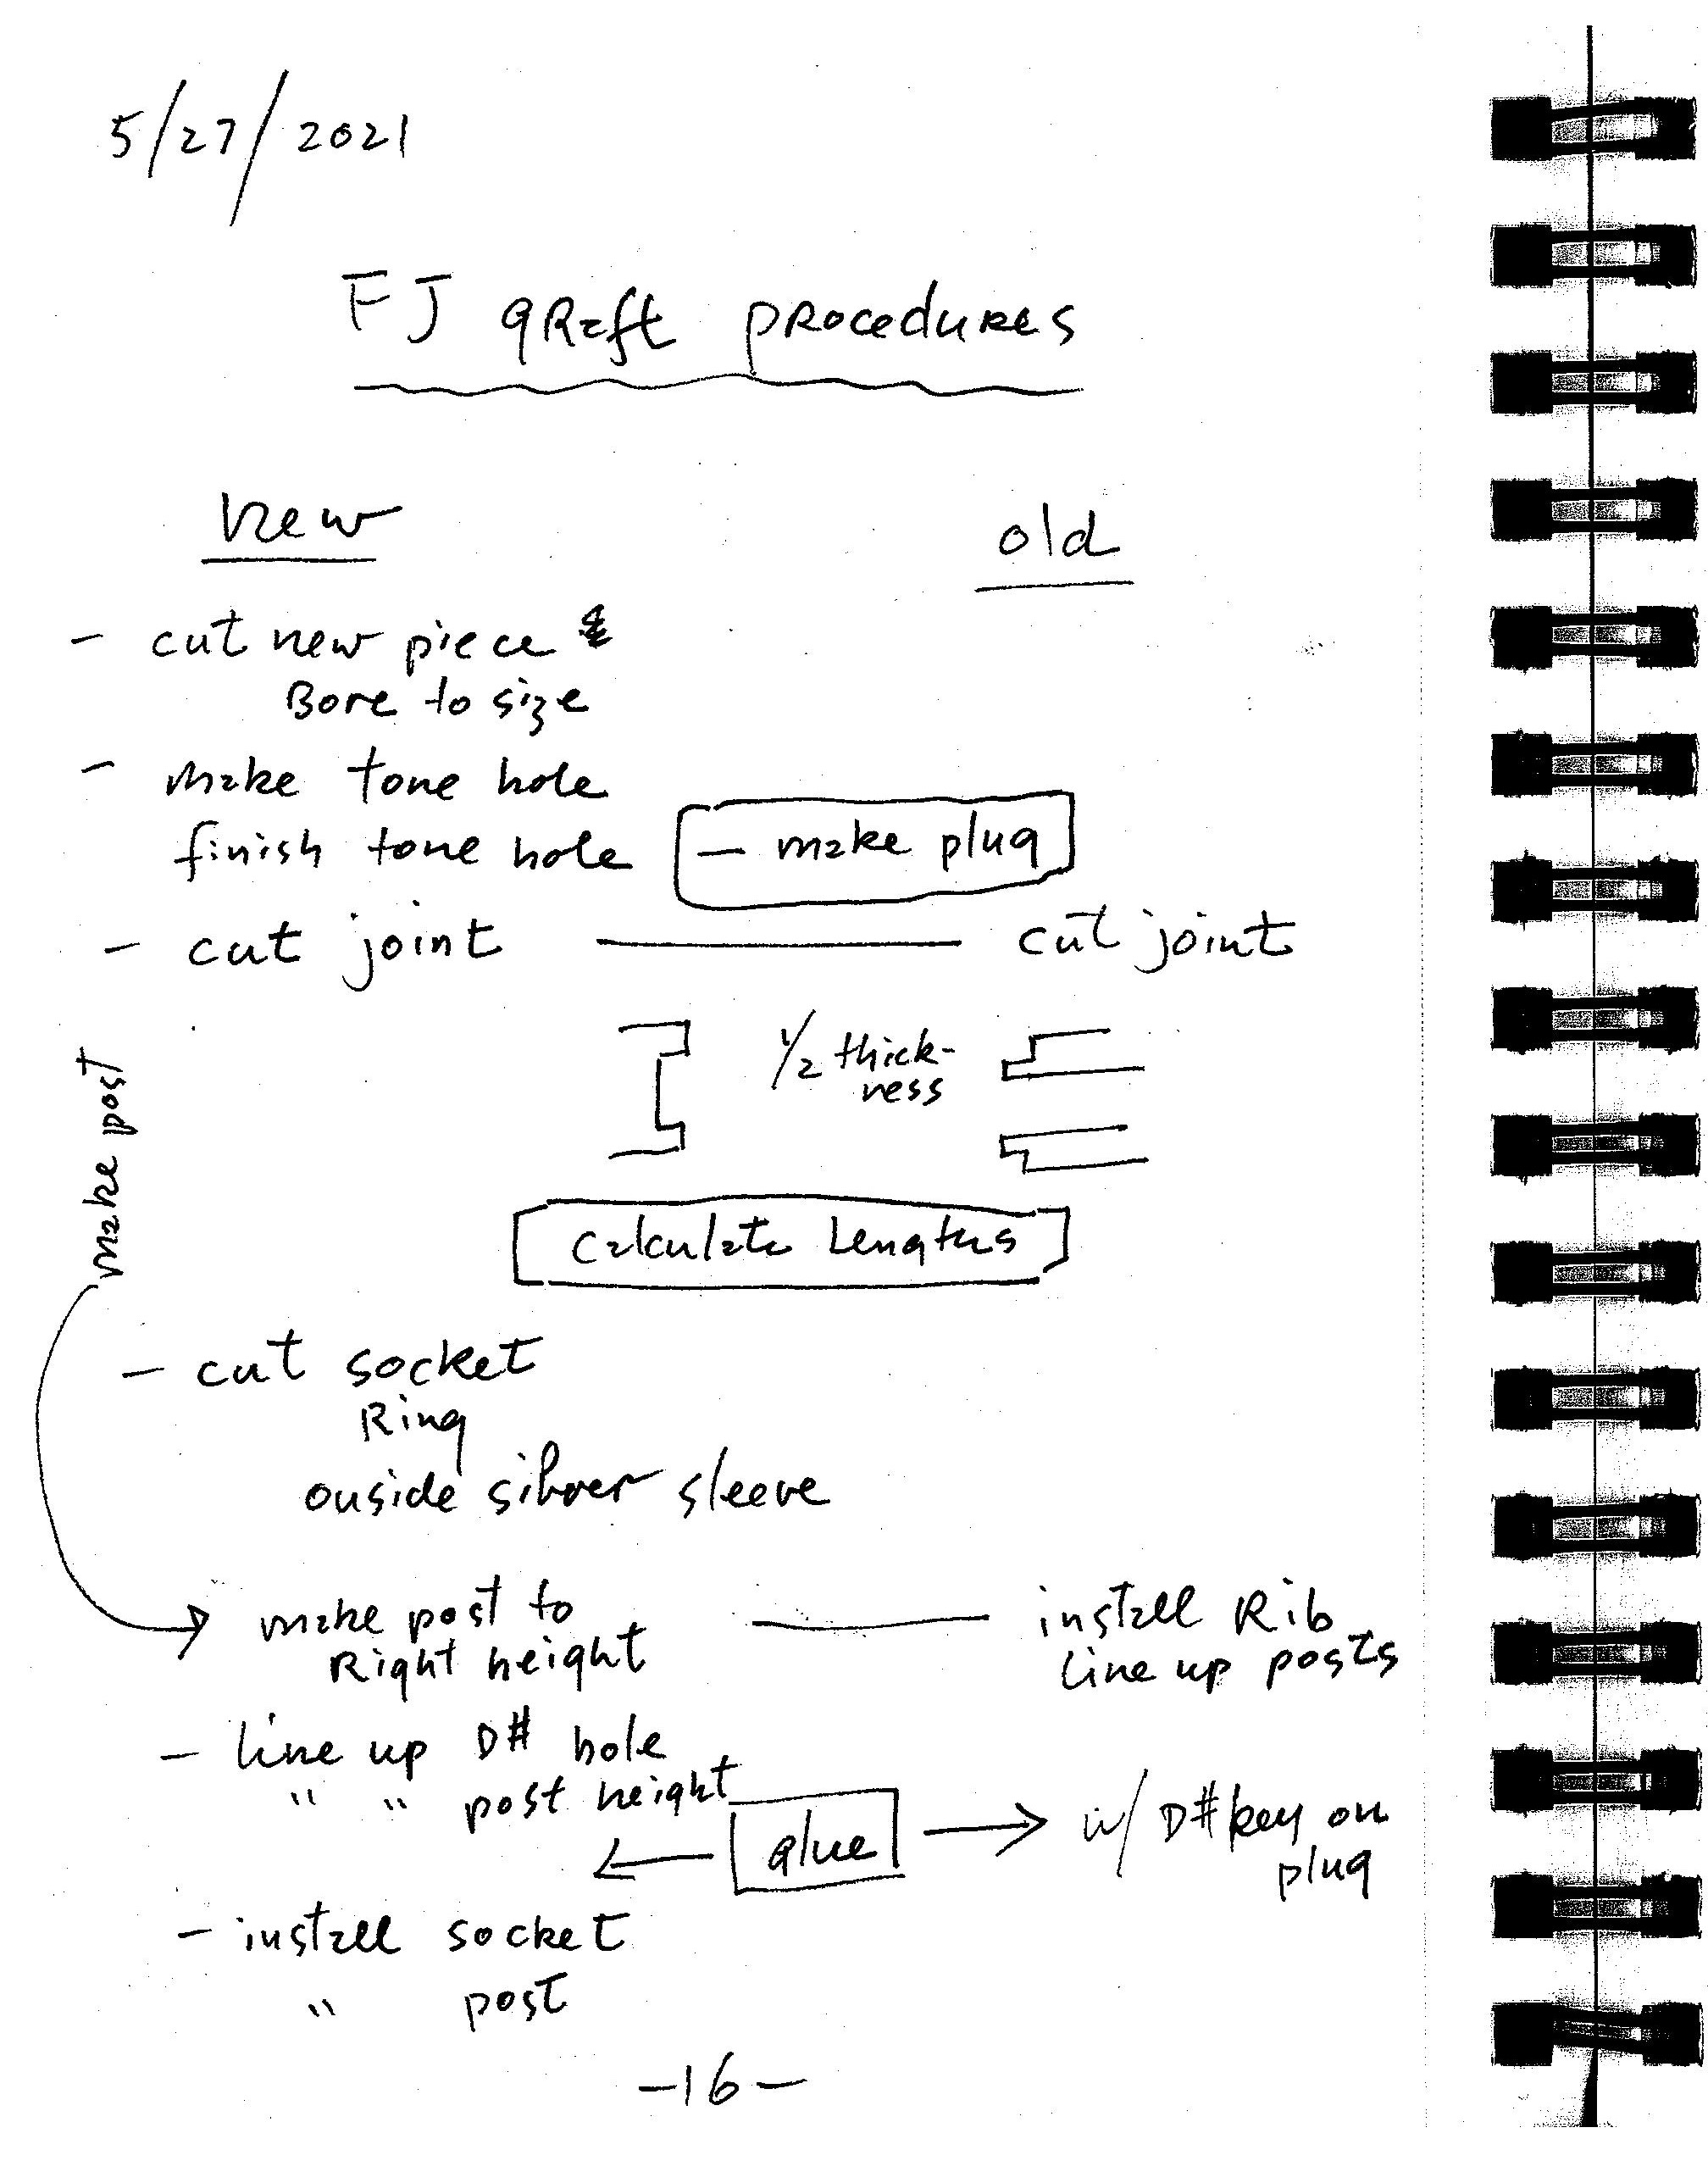
Once the damaged wood had been replaced, I needed to find the exact cut-off point below the C# tone hole. There had to be enough room for a lap joint between the C# and D# tone holes. Numerous measurements were made and double-checked before the joints were cut. The most critical aspect was to yield the correct distance between the two tone holes. I wanted to follow the Formal Cause Louis Lot laid out. In this case, it was feasible to replicate the old master’s architecture exactly.
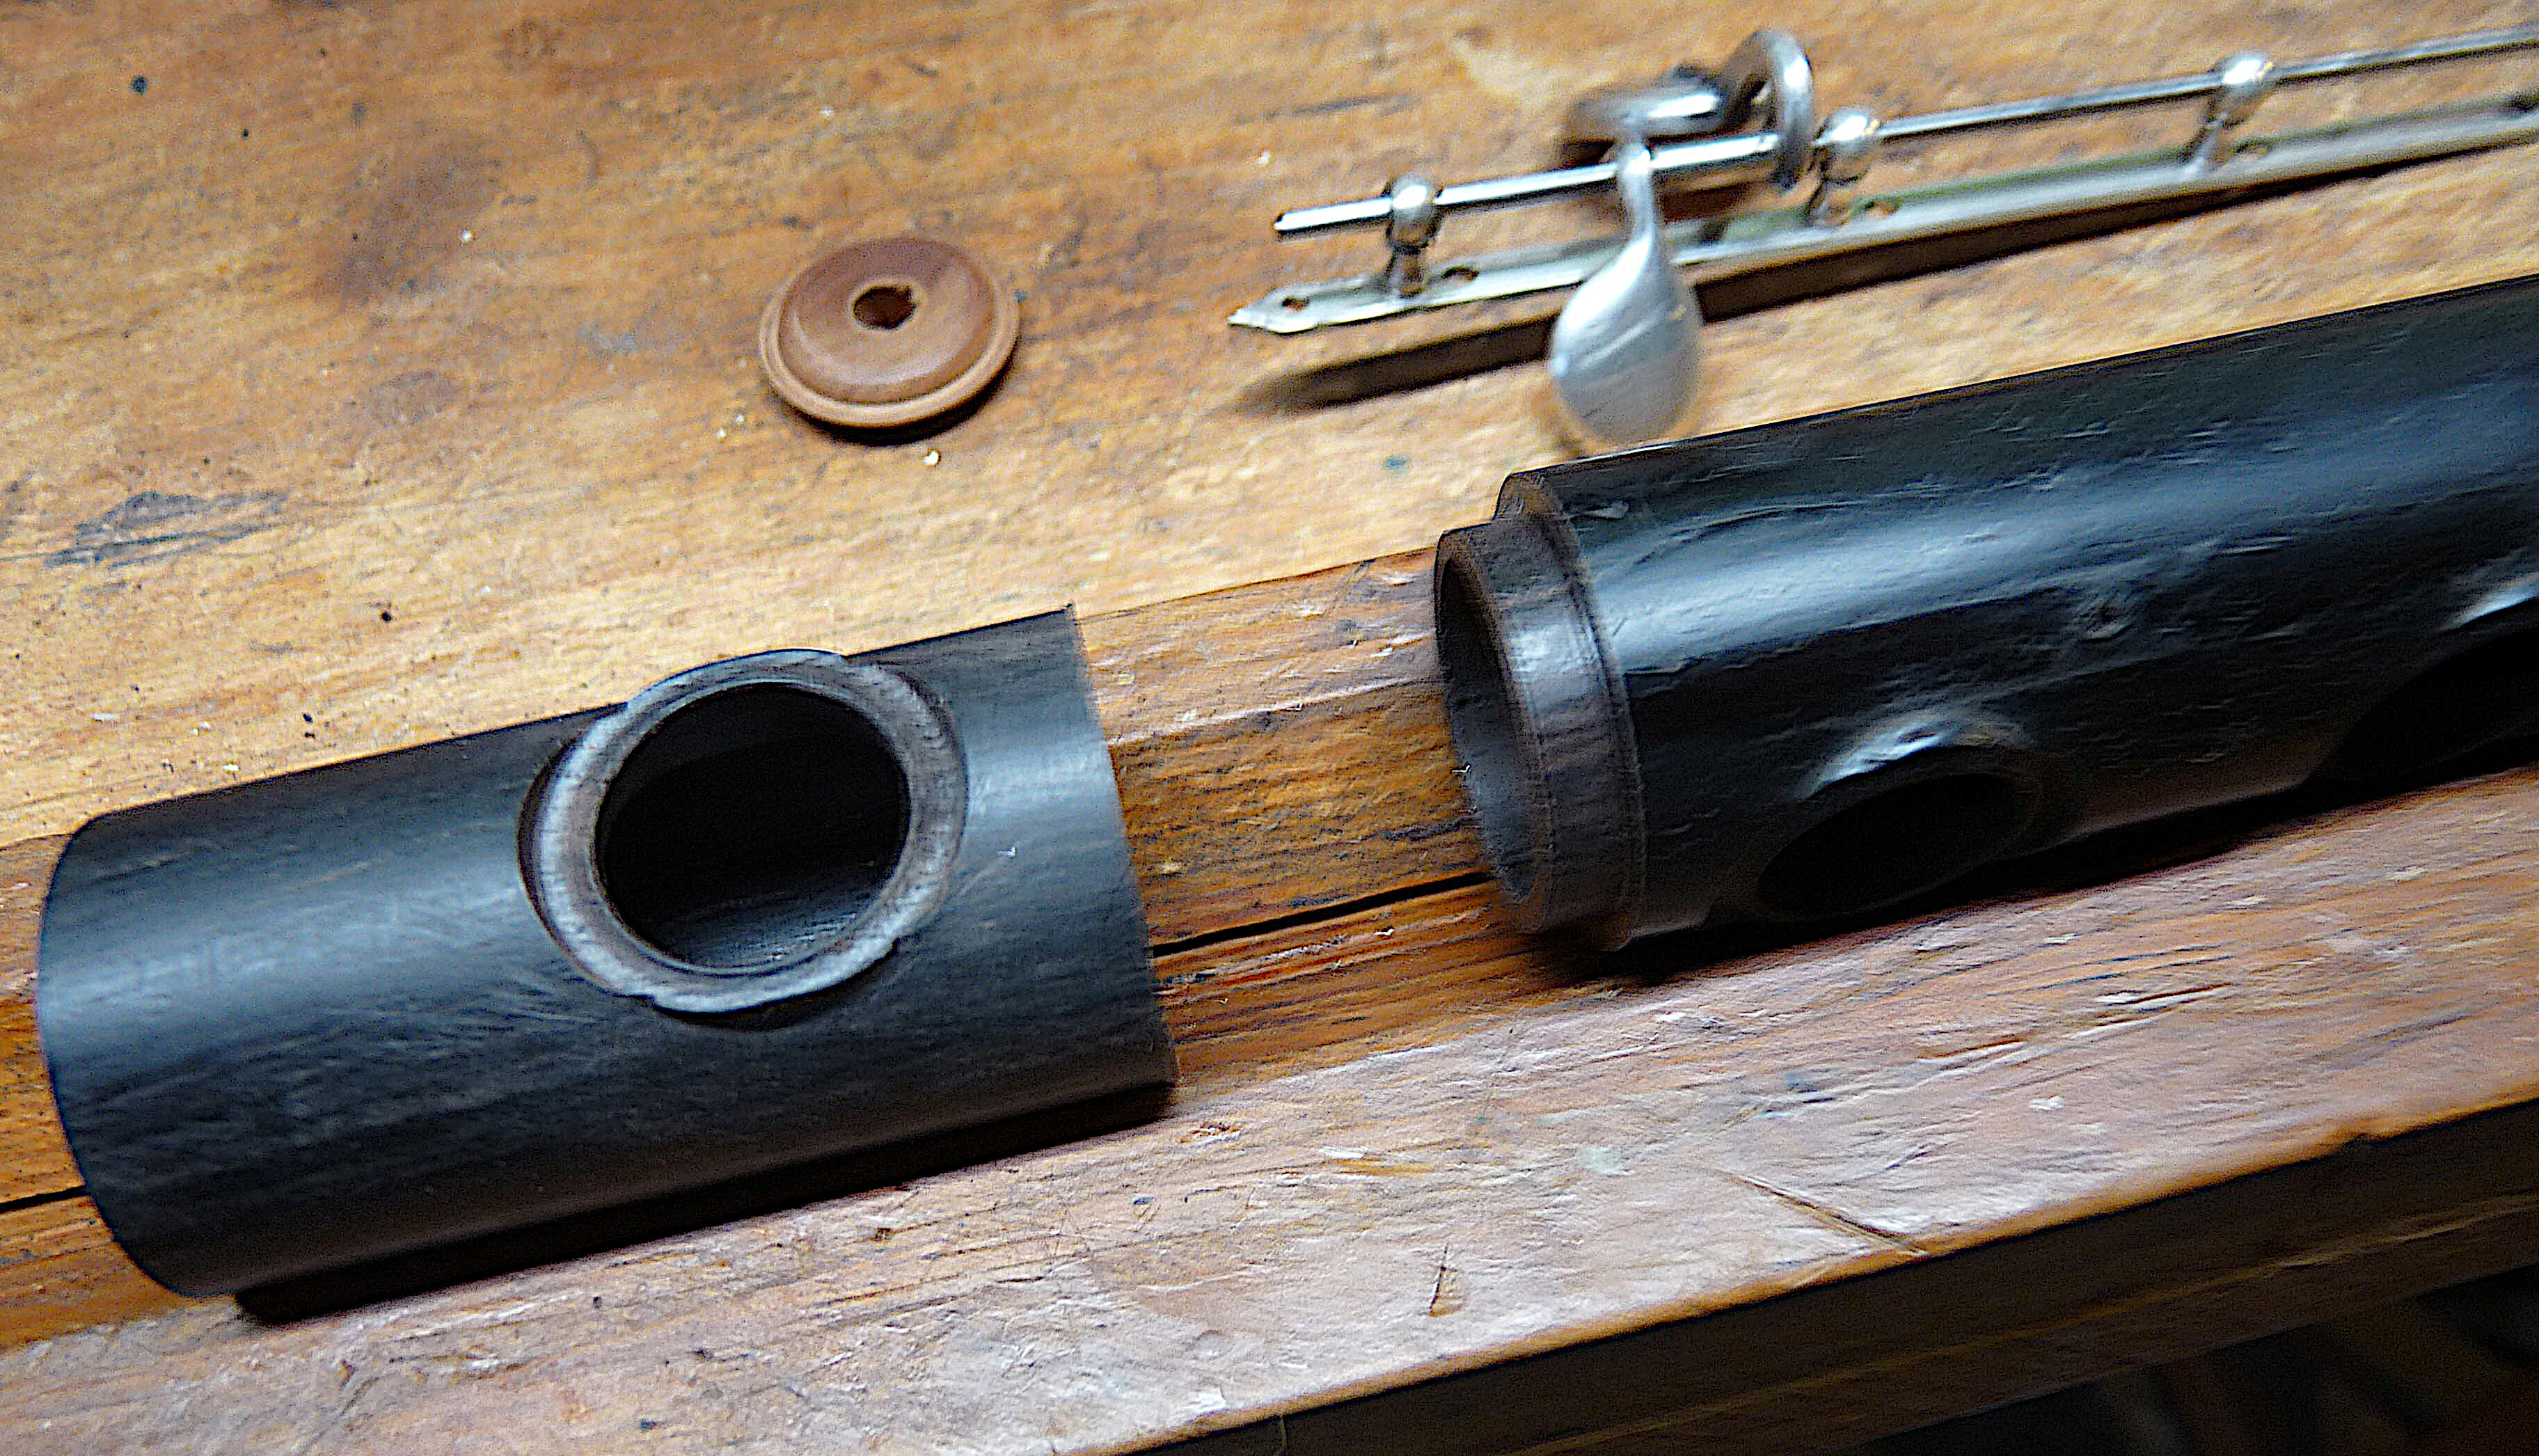
To safeguard any measuring mistakes, the graft was made with extra length on the side of the socket joint. The lap joint test fit was exact. It should be a very sturdy joint. For adhesive, the strongest epoxy was selected. It was tested previously on the same joint geometry on grenadilla wood with success. Several additional steps were required before final assembly.
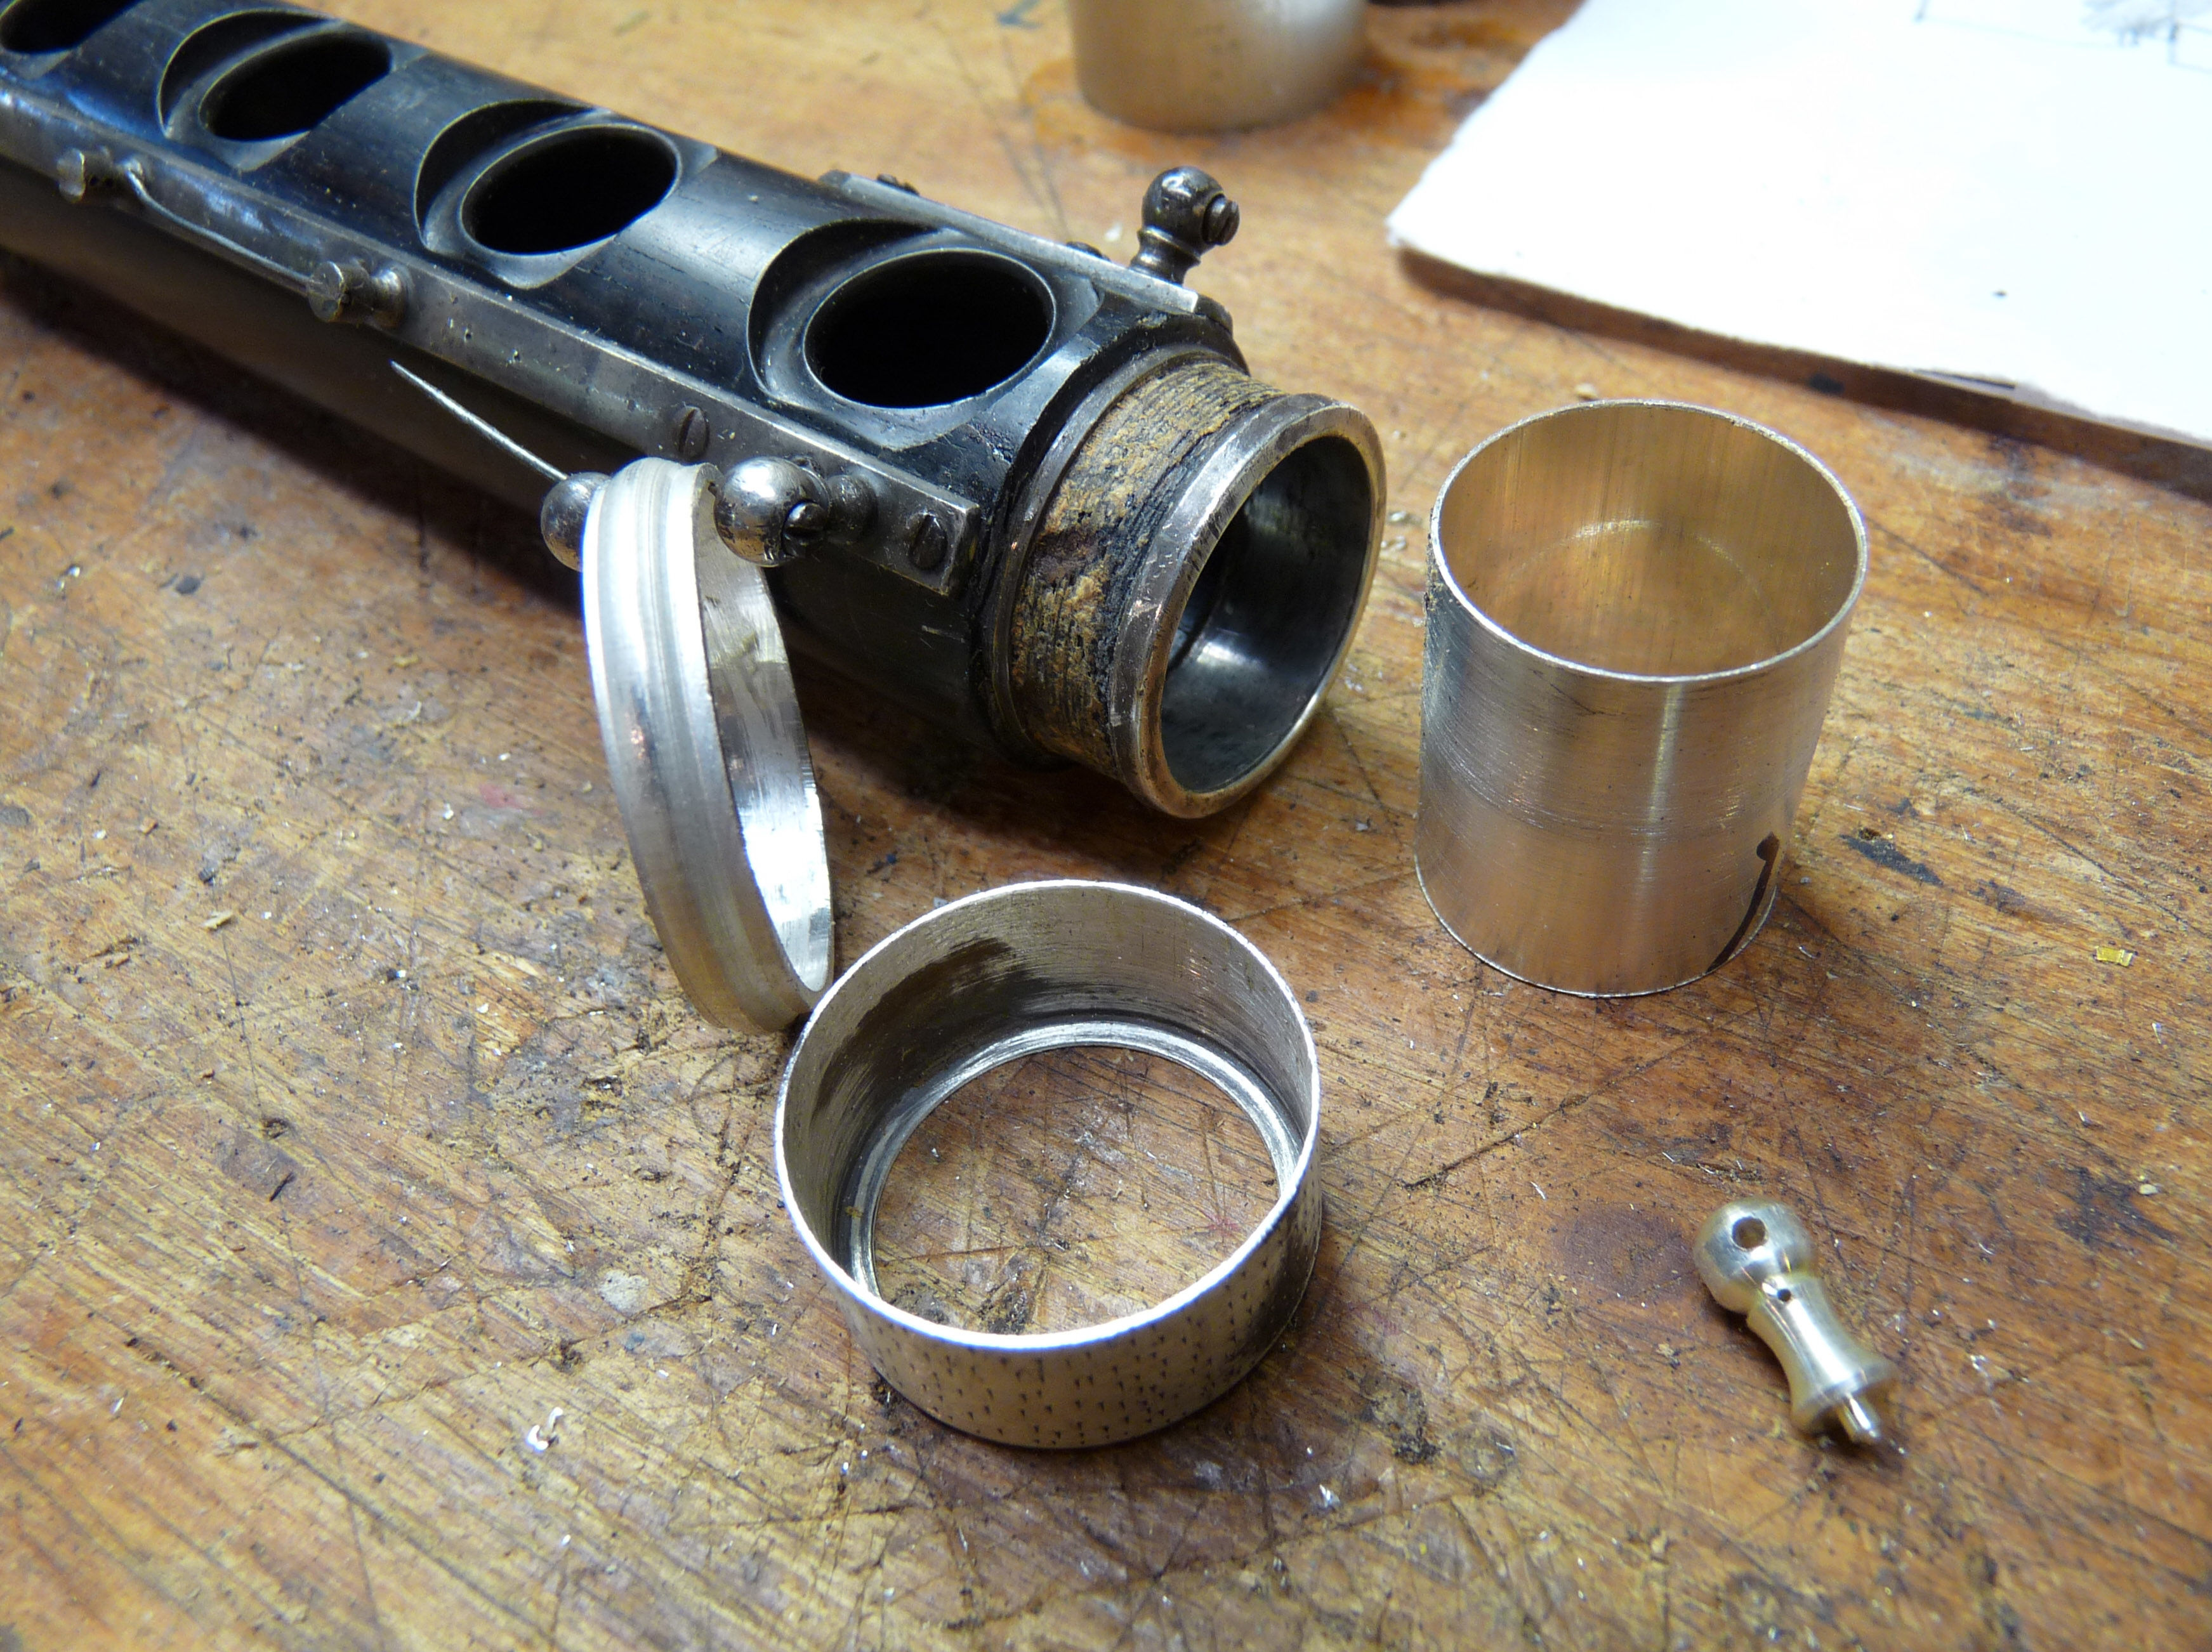
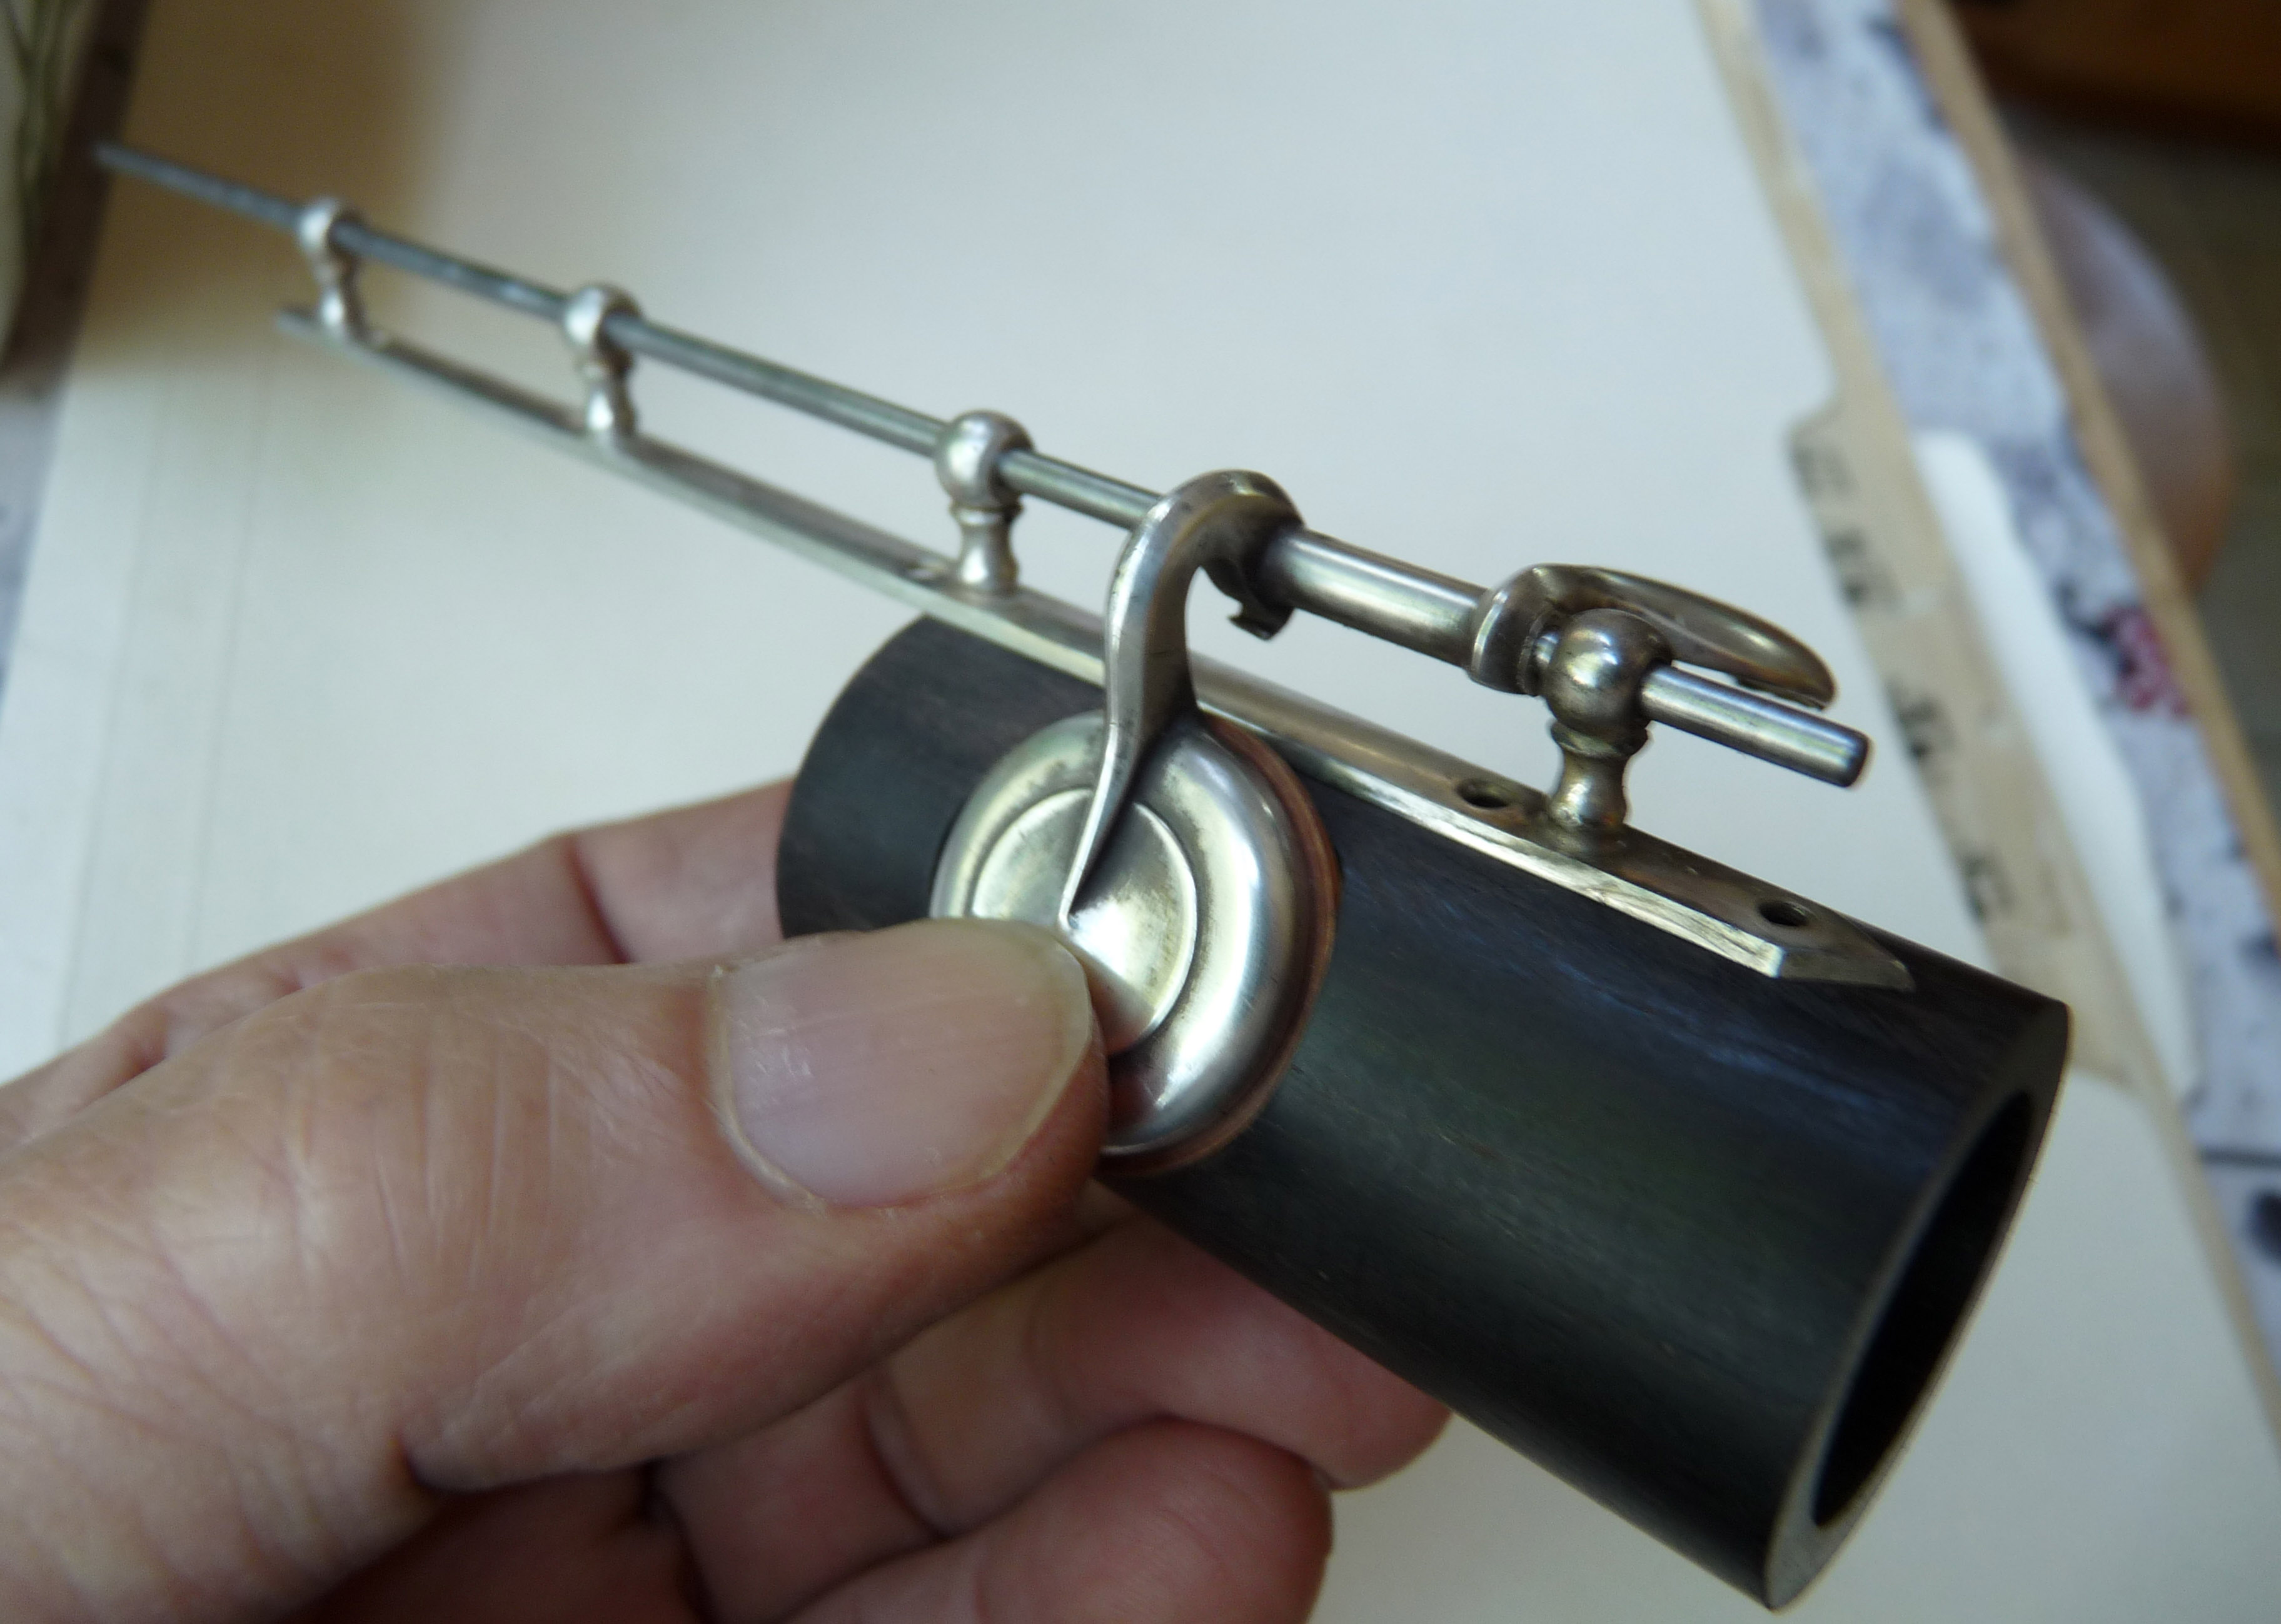
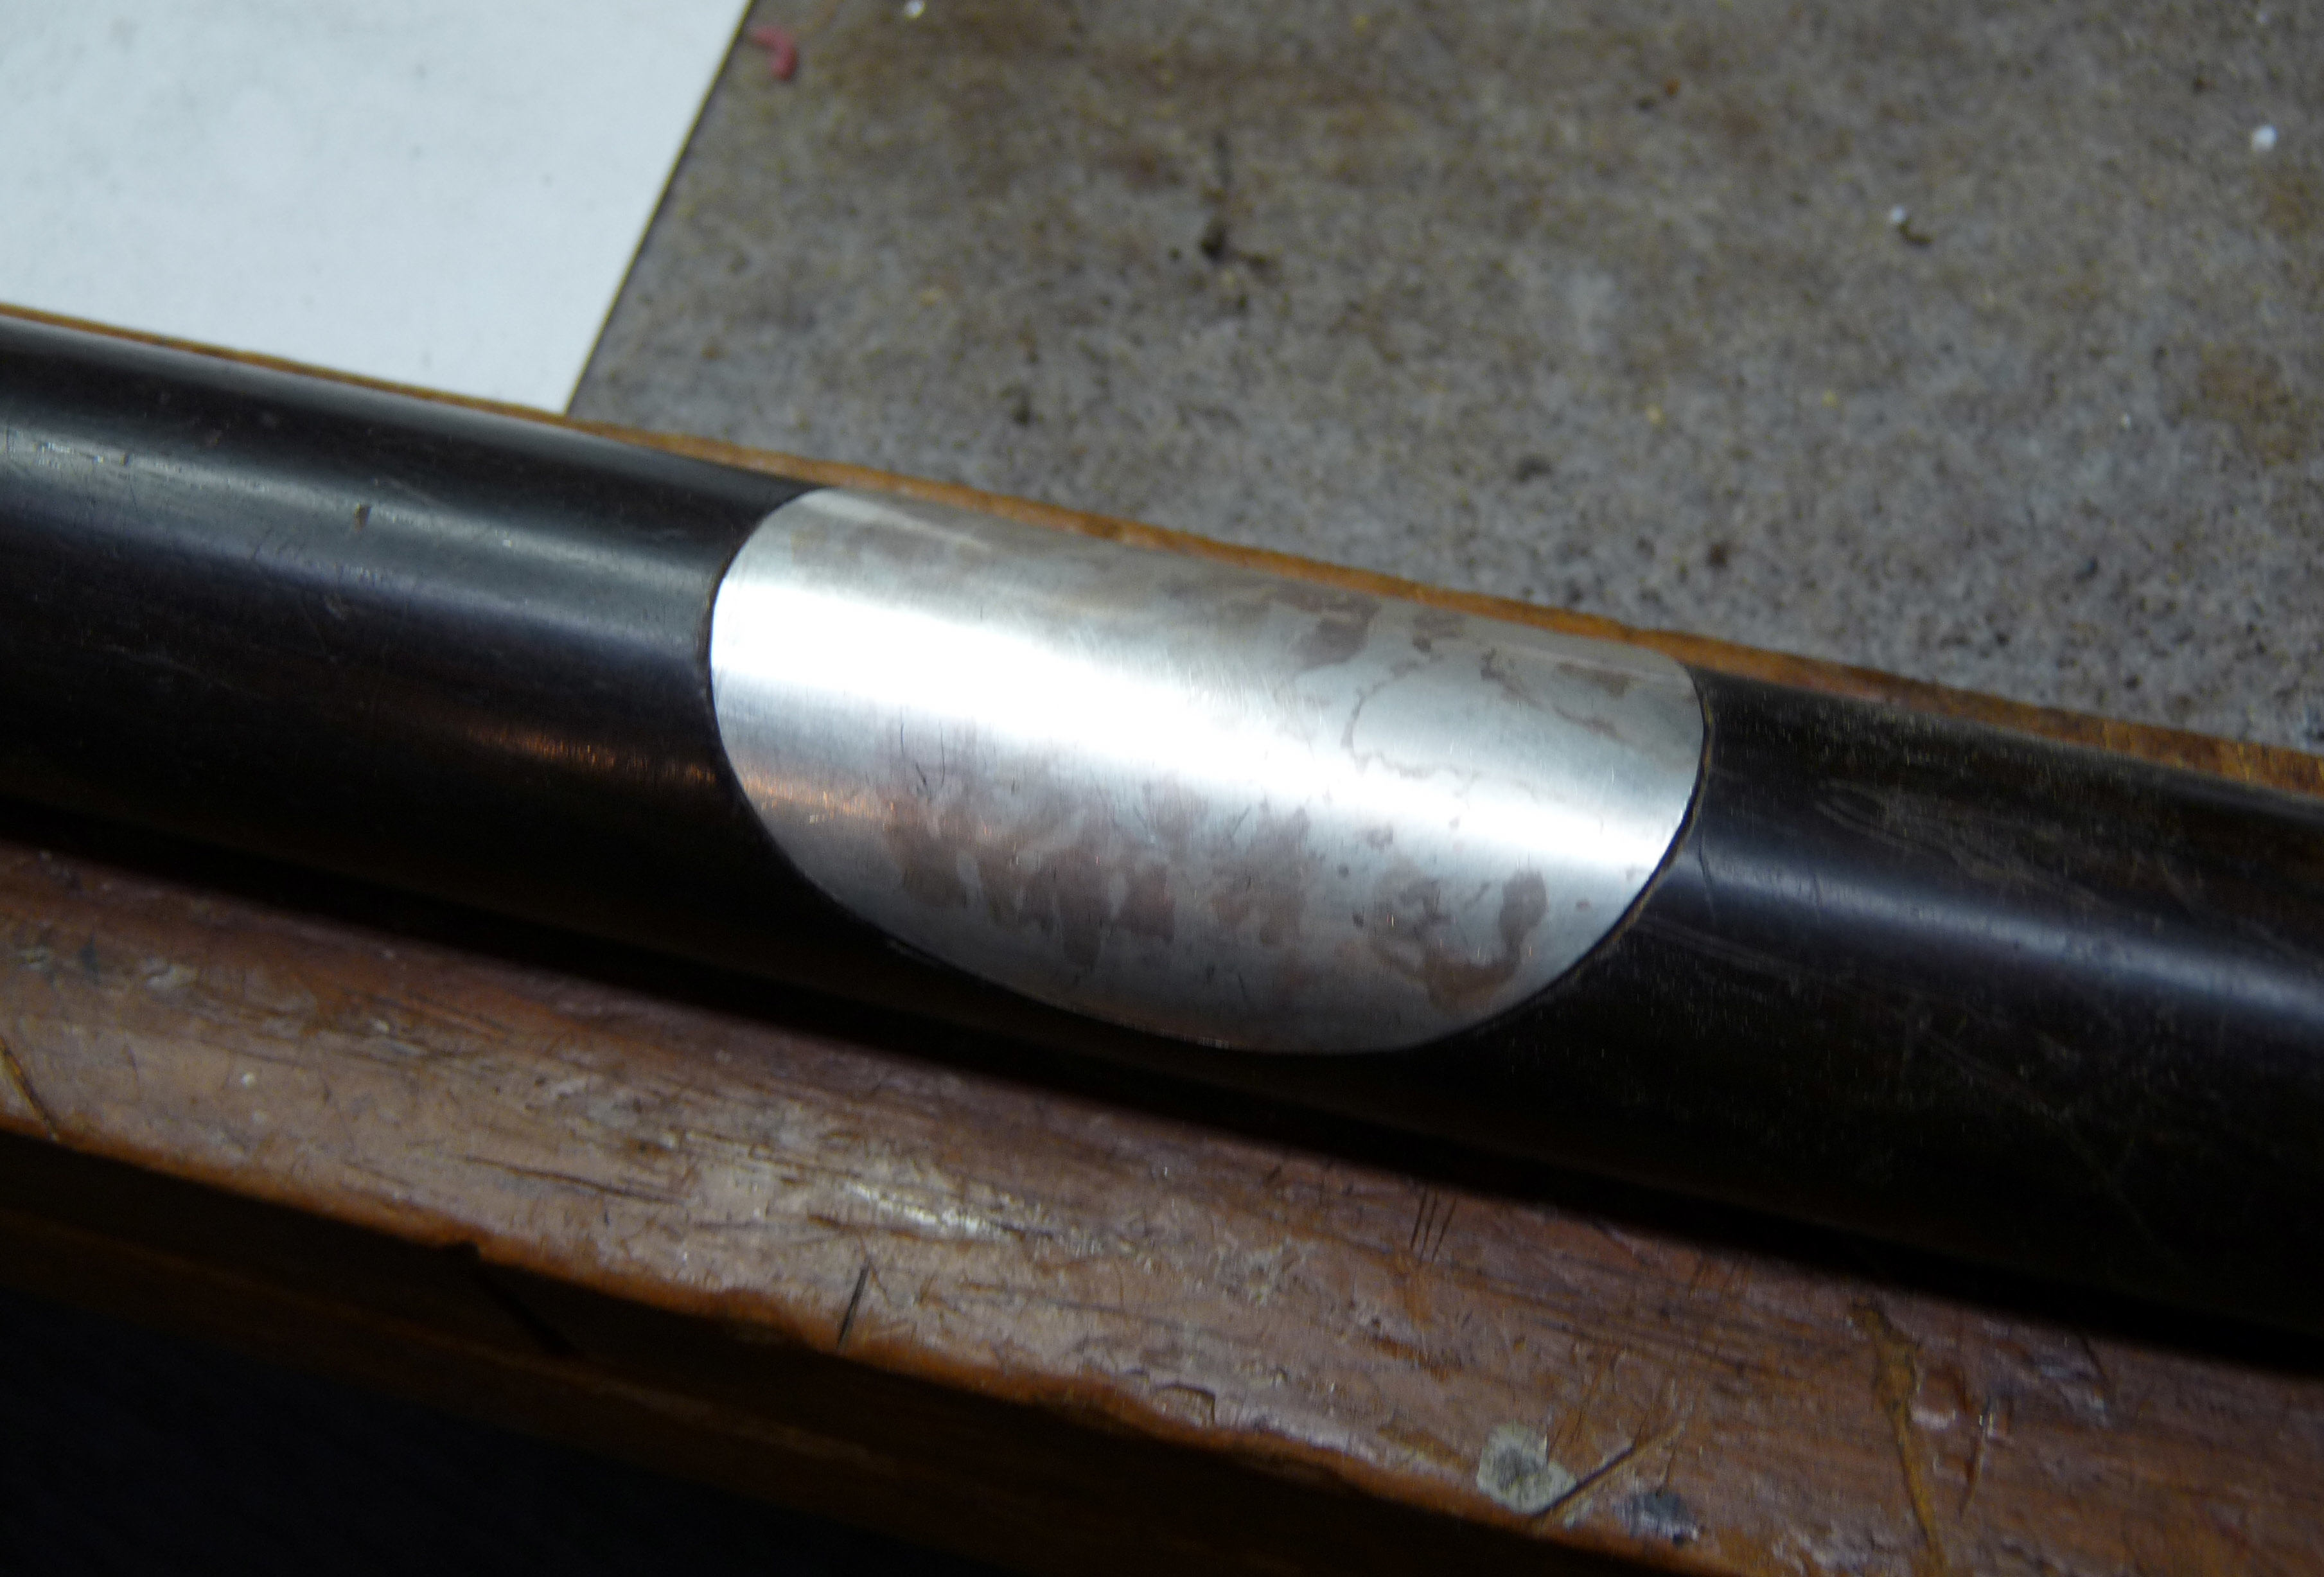
The socket hardware comprised a socket sleeve, an inner silver tube, a ring and a threaded post. The assembly needed a perfect fit within the footjoint, too tight risked cracking the wood, while too loose risked it being pulled out. The alignment and height of the post had to be worked out after the rib was installed. Multi-sessions of test-fitting were common practice.
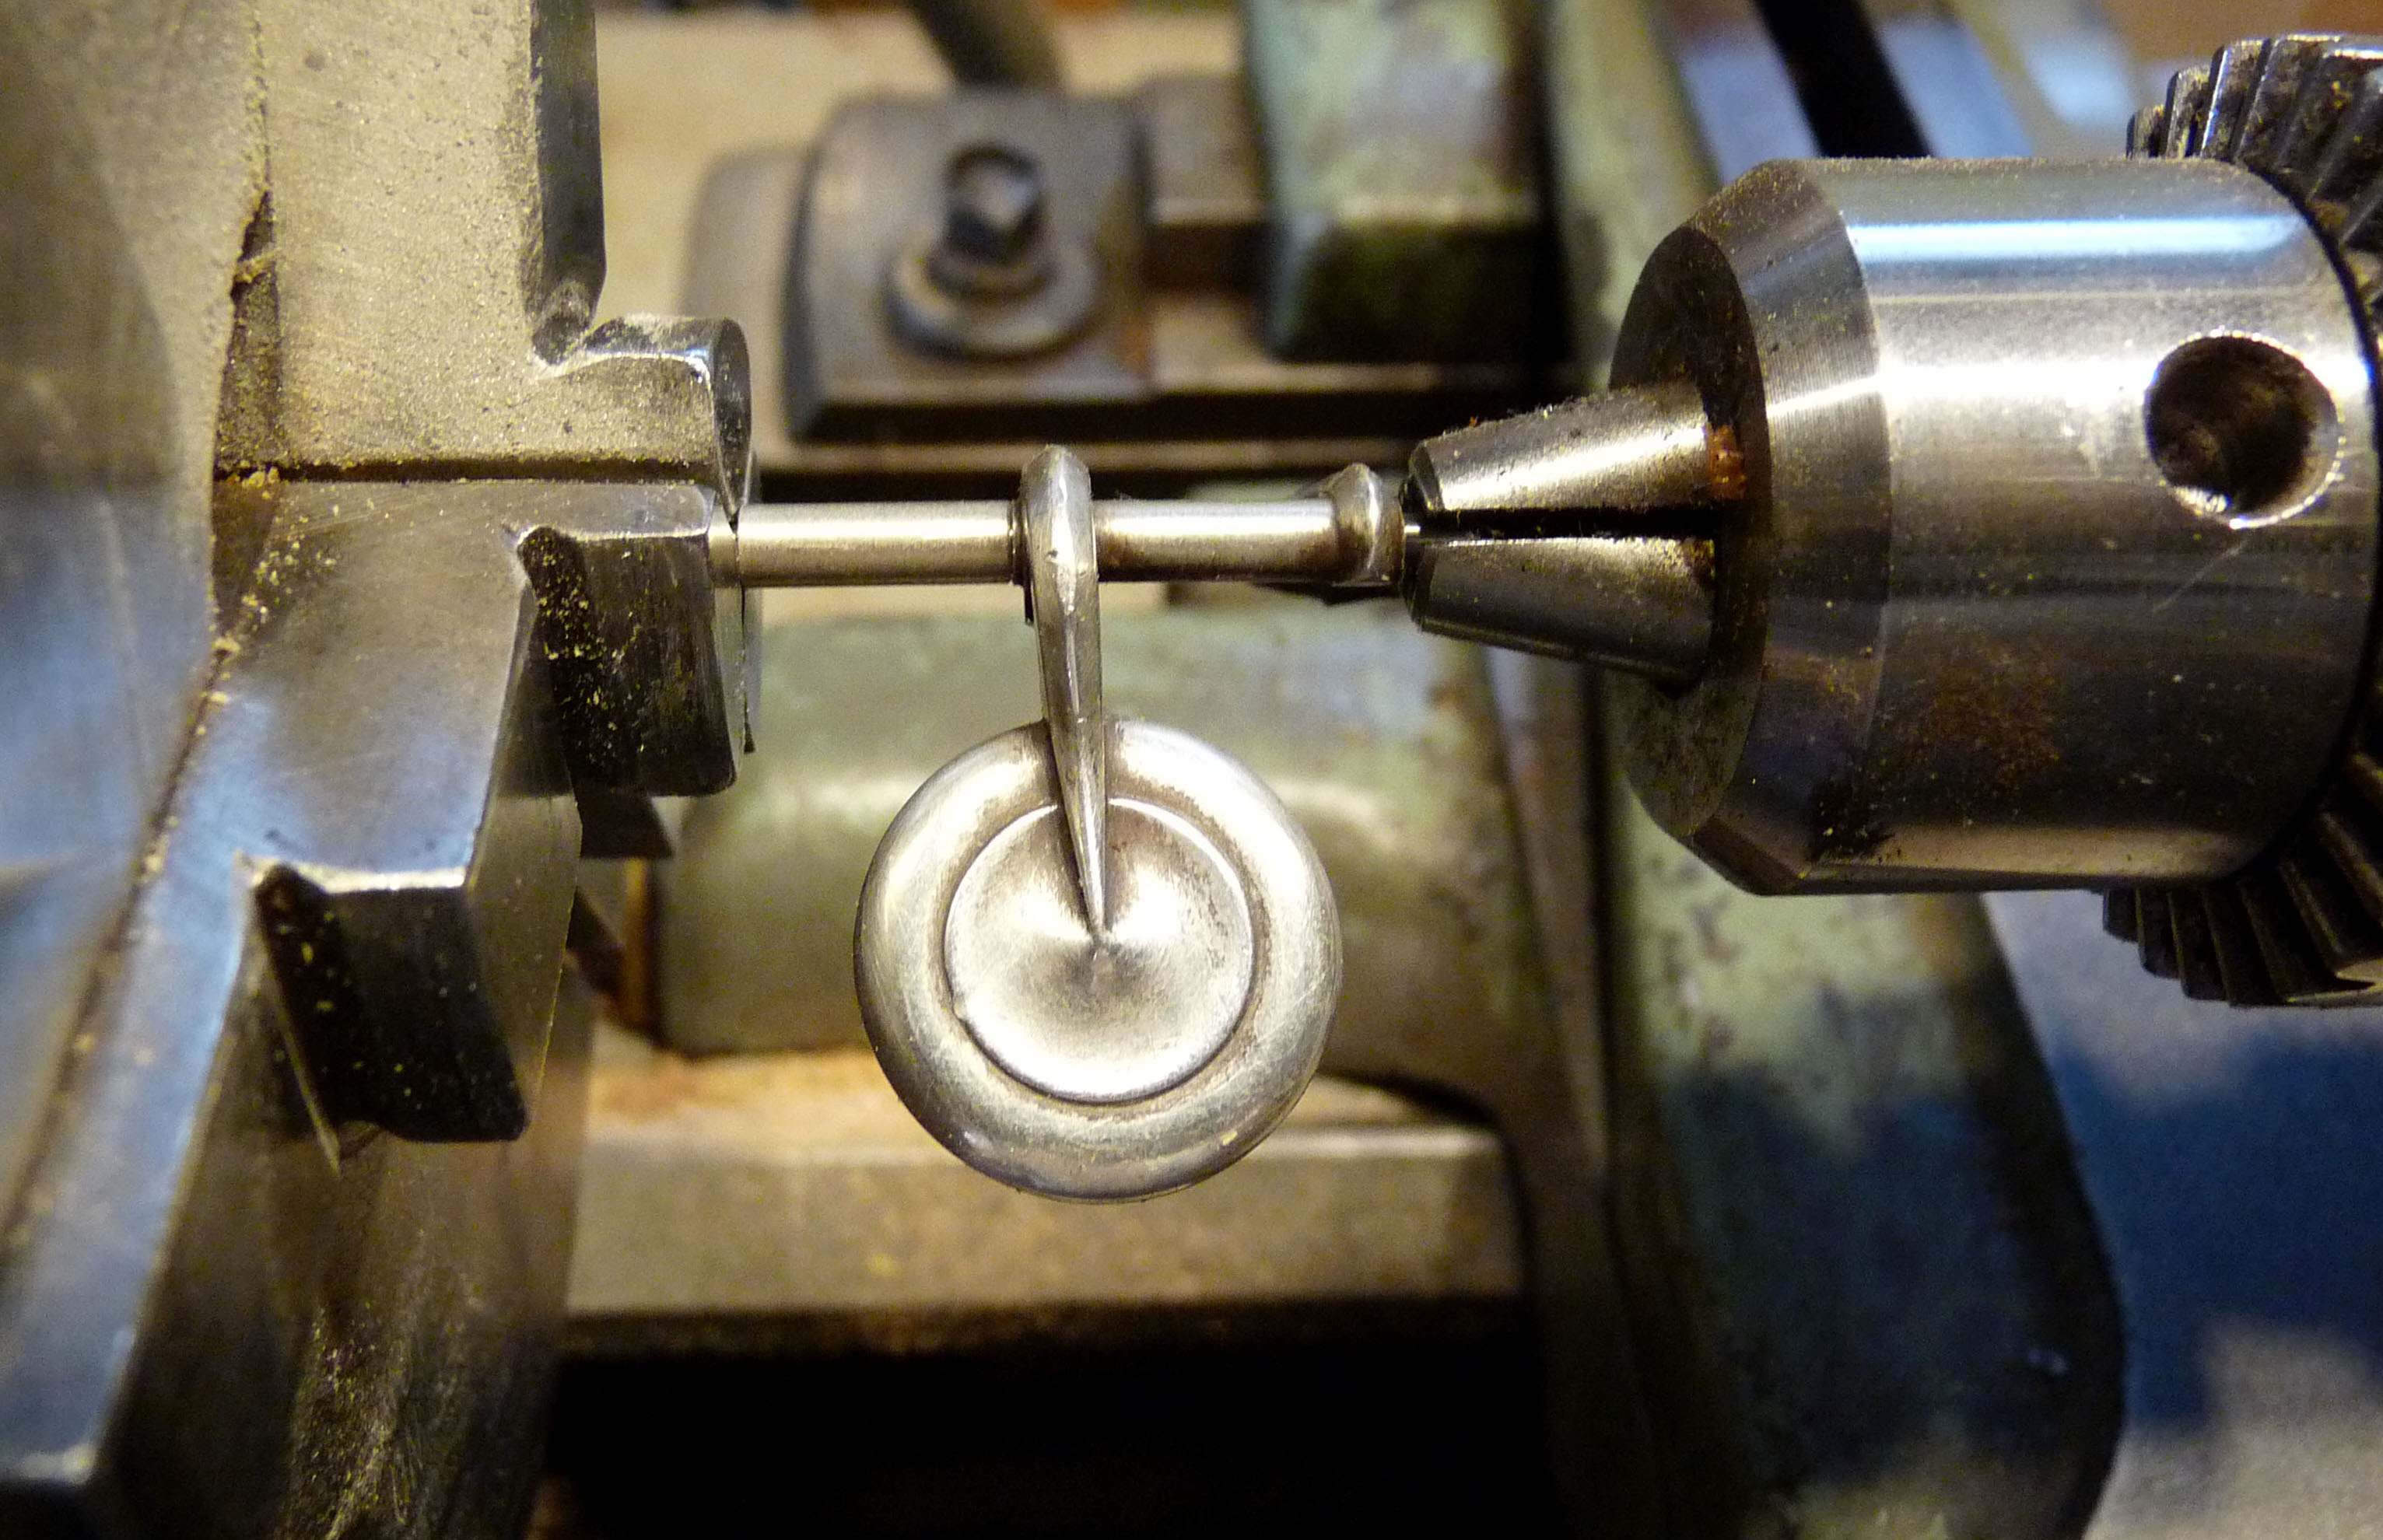
After repeated heating and soaking in various solvents, including vinegar and Knock’er Loose, the footjoint keys finally came loose from the steel. The old steel was rusted beyond repair. A new one had to be made. A common, quicker solution would be to use off-the-shelf steels and ream up the mechanism tubing to fit. However, this flute used an .092” steel, which was smaller than most modern steels. I decided to make a properly sized steel, avoiding the need to ream the original posts and mechanism tubing, thus preserving another original aspect of this flute. With a perfectly straight new steel in place, I was able to align the long bridges and straighten the rib.
The D# key cup was knocked out of place, leaving the cup out of alignment with the tone hole. Louis Lot keys are extremely hard. It took quite a bit of force to return the key cup to its original position. The force needed to be applied precisely with a mallet hitting a wooden stick aimed at the thick arm instead of the thin cup, otherwise, the cup would be deformed. The corrected cup would help in aligning the graft both radially and longitudinally. These positions were double-checked with measurements from sister flute #4041.
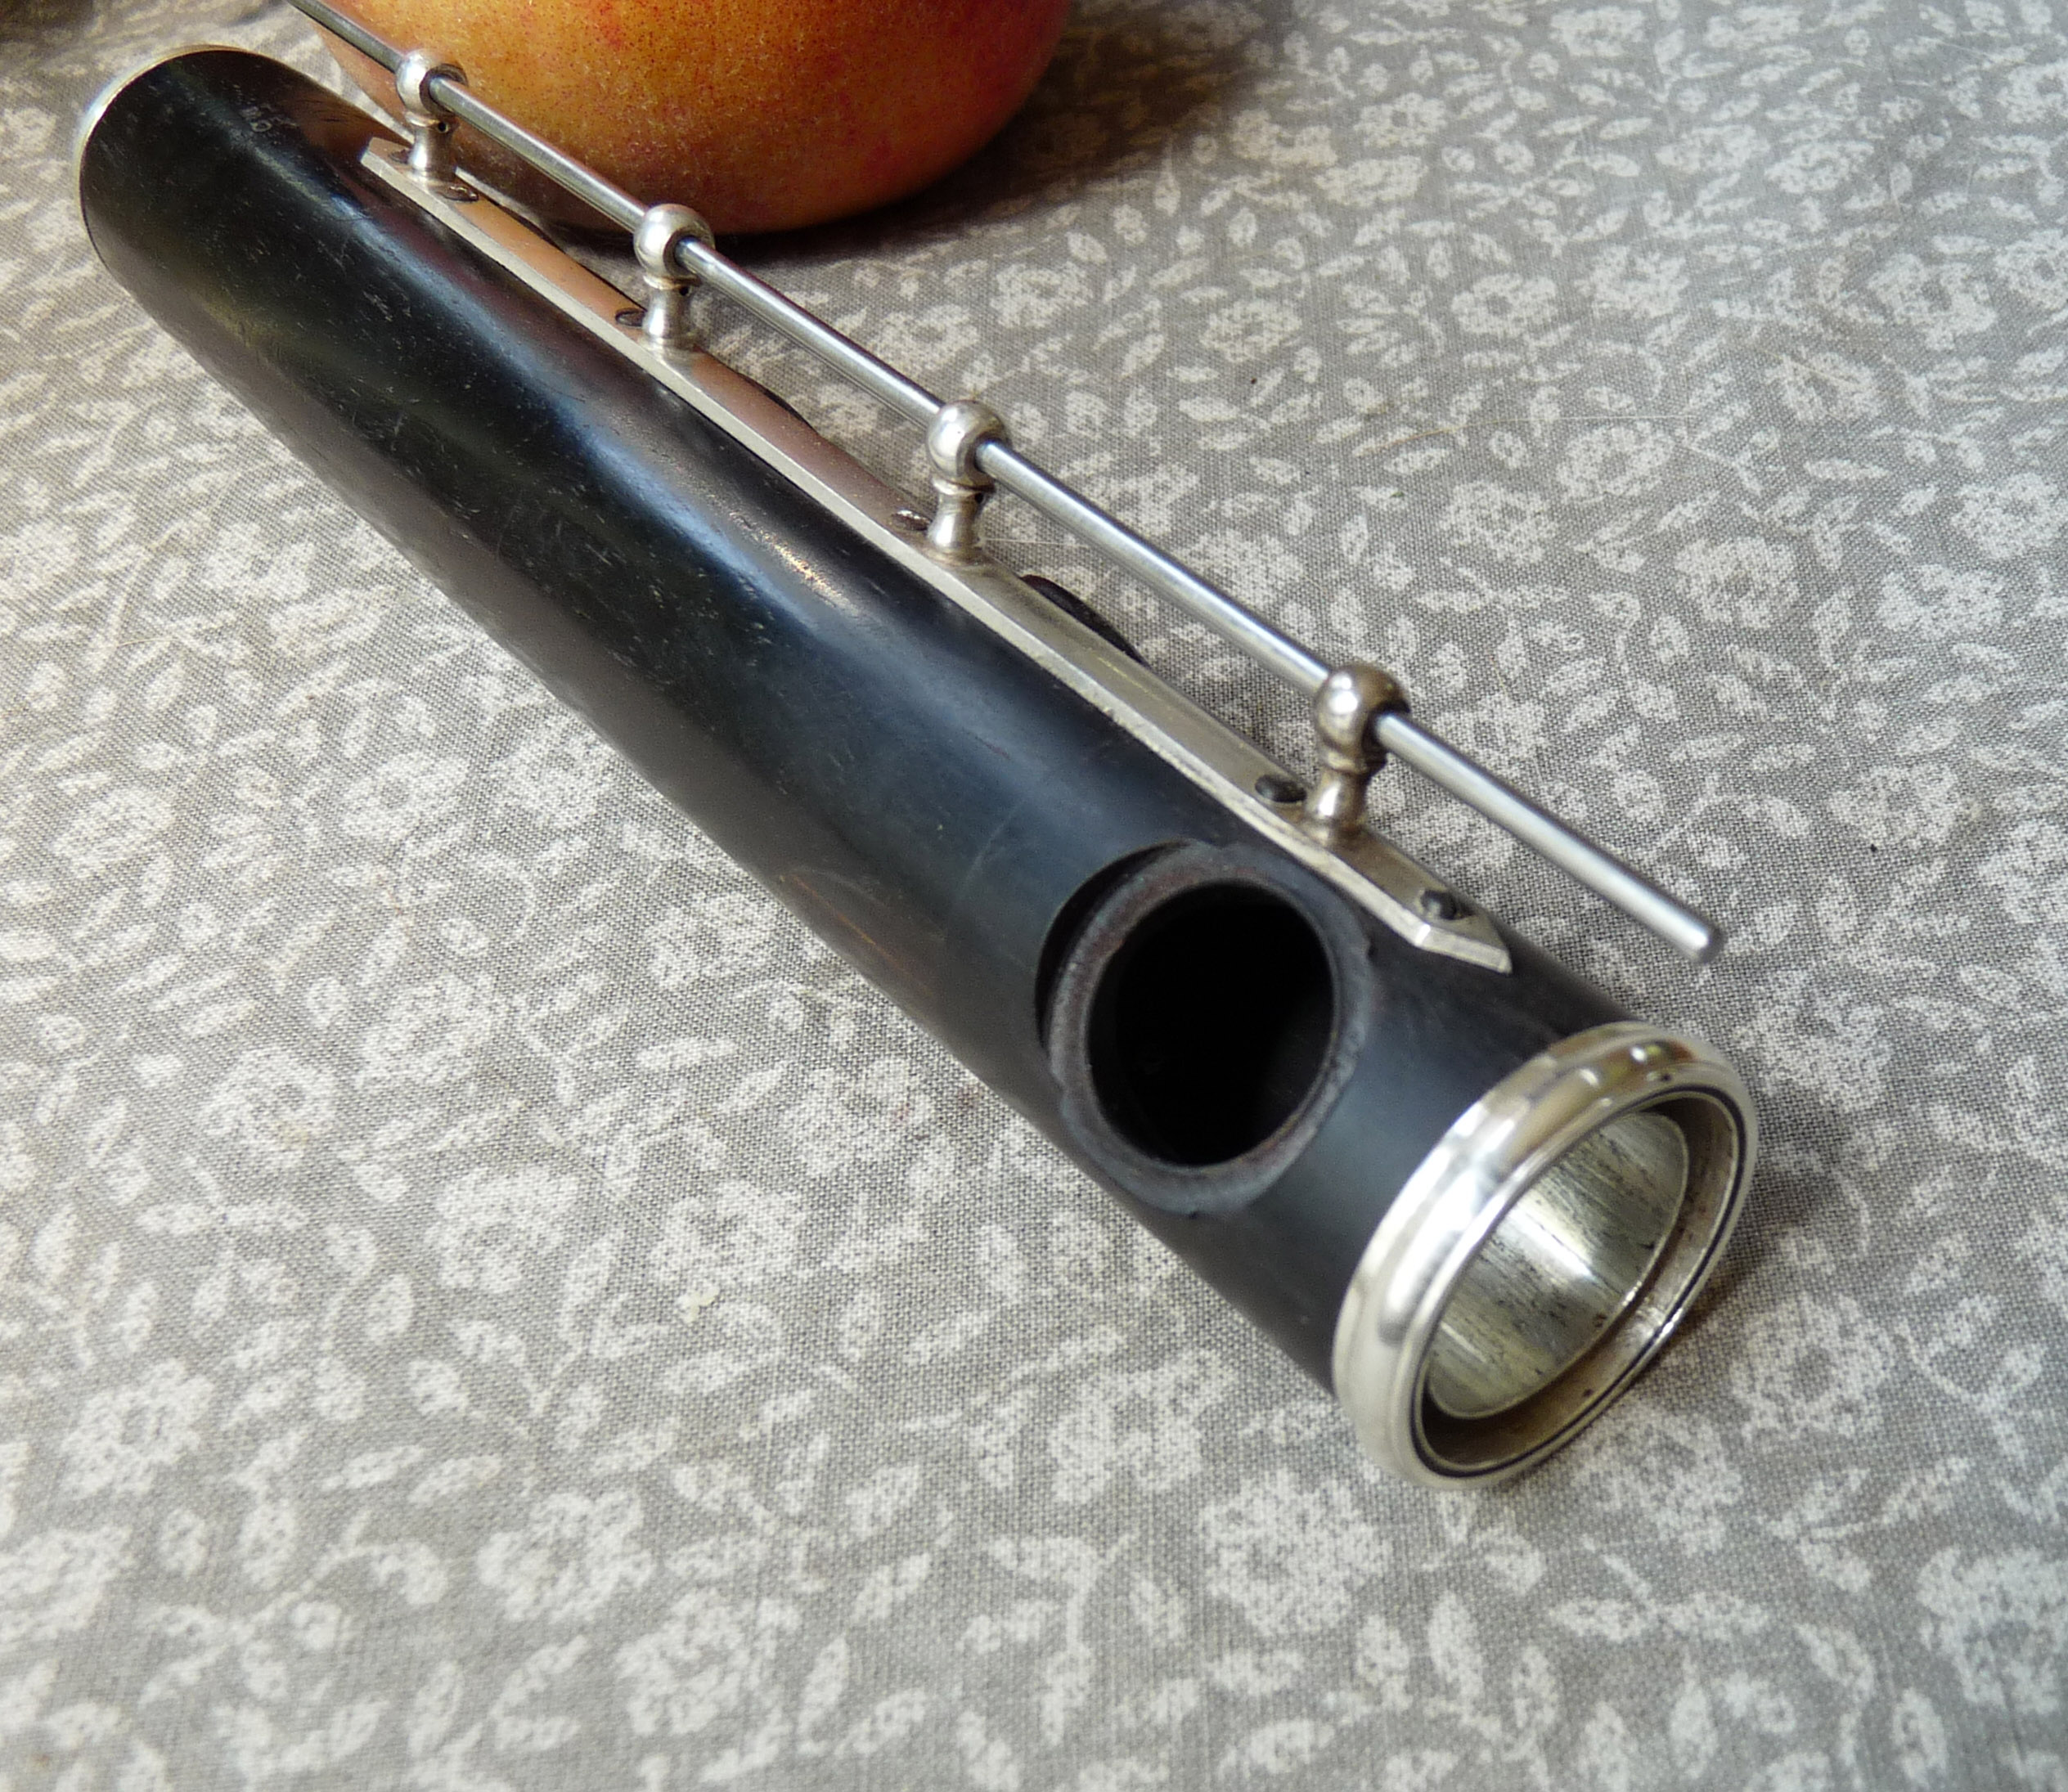
It was time for the glue-up. After multiple checks and confirmations, epoxy was applied to the joints. The final result was successful. The wood cleaned up and polished nicely.
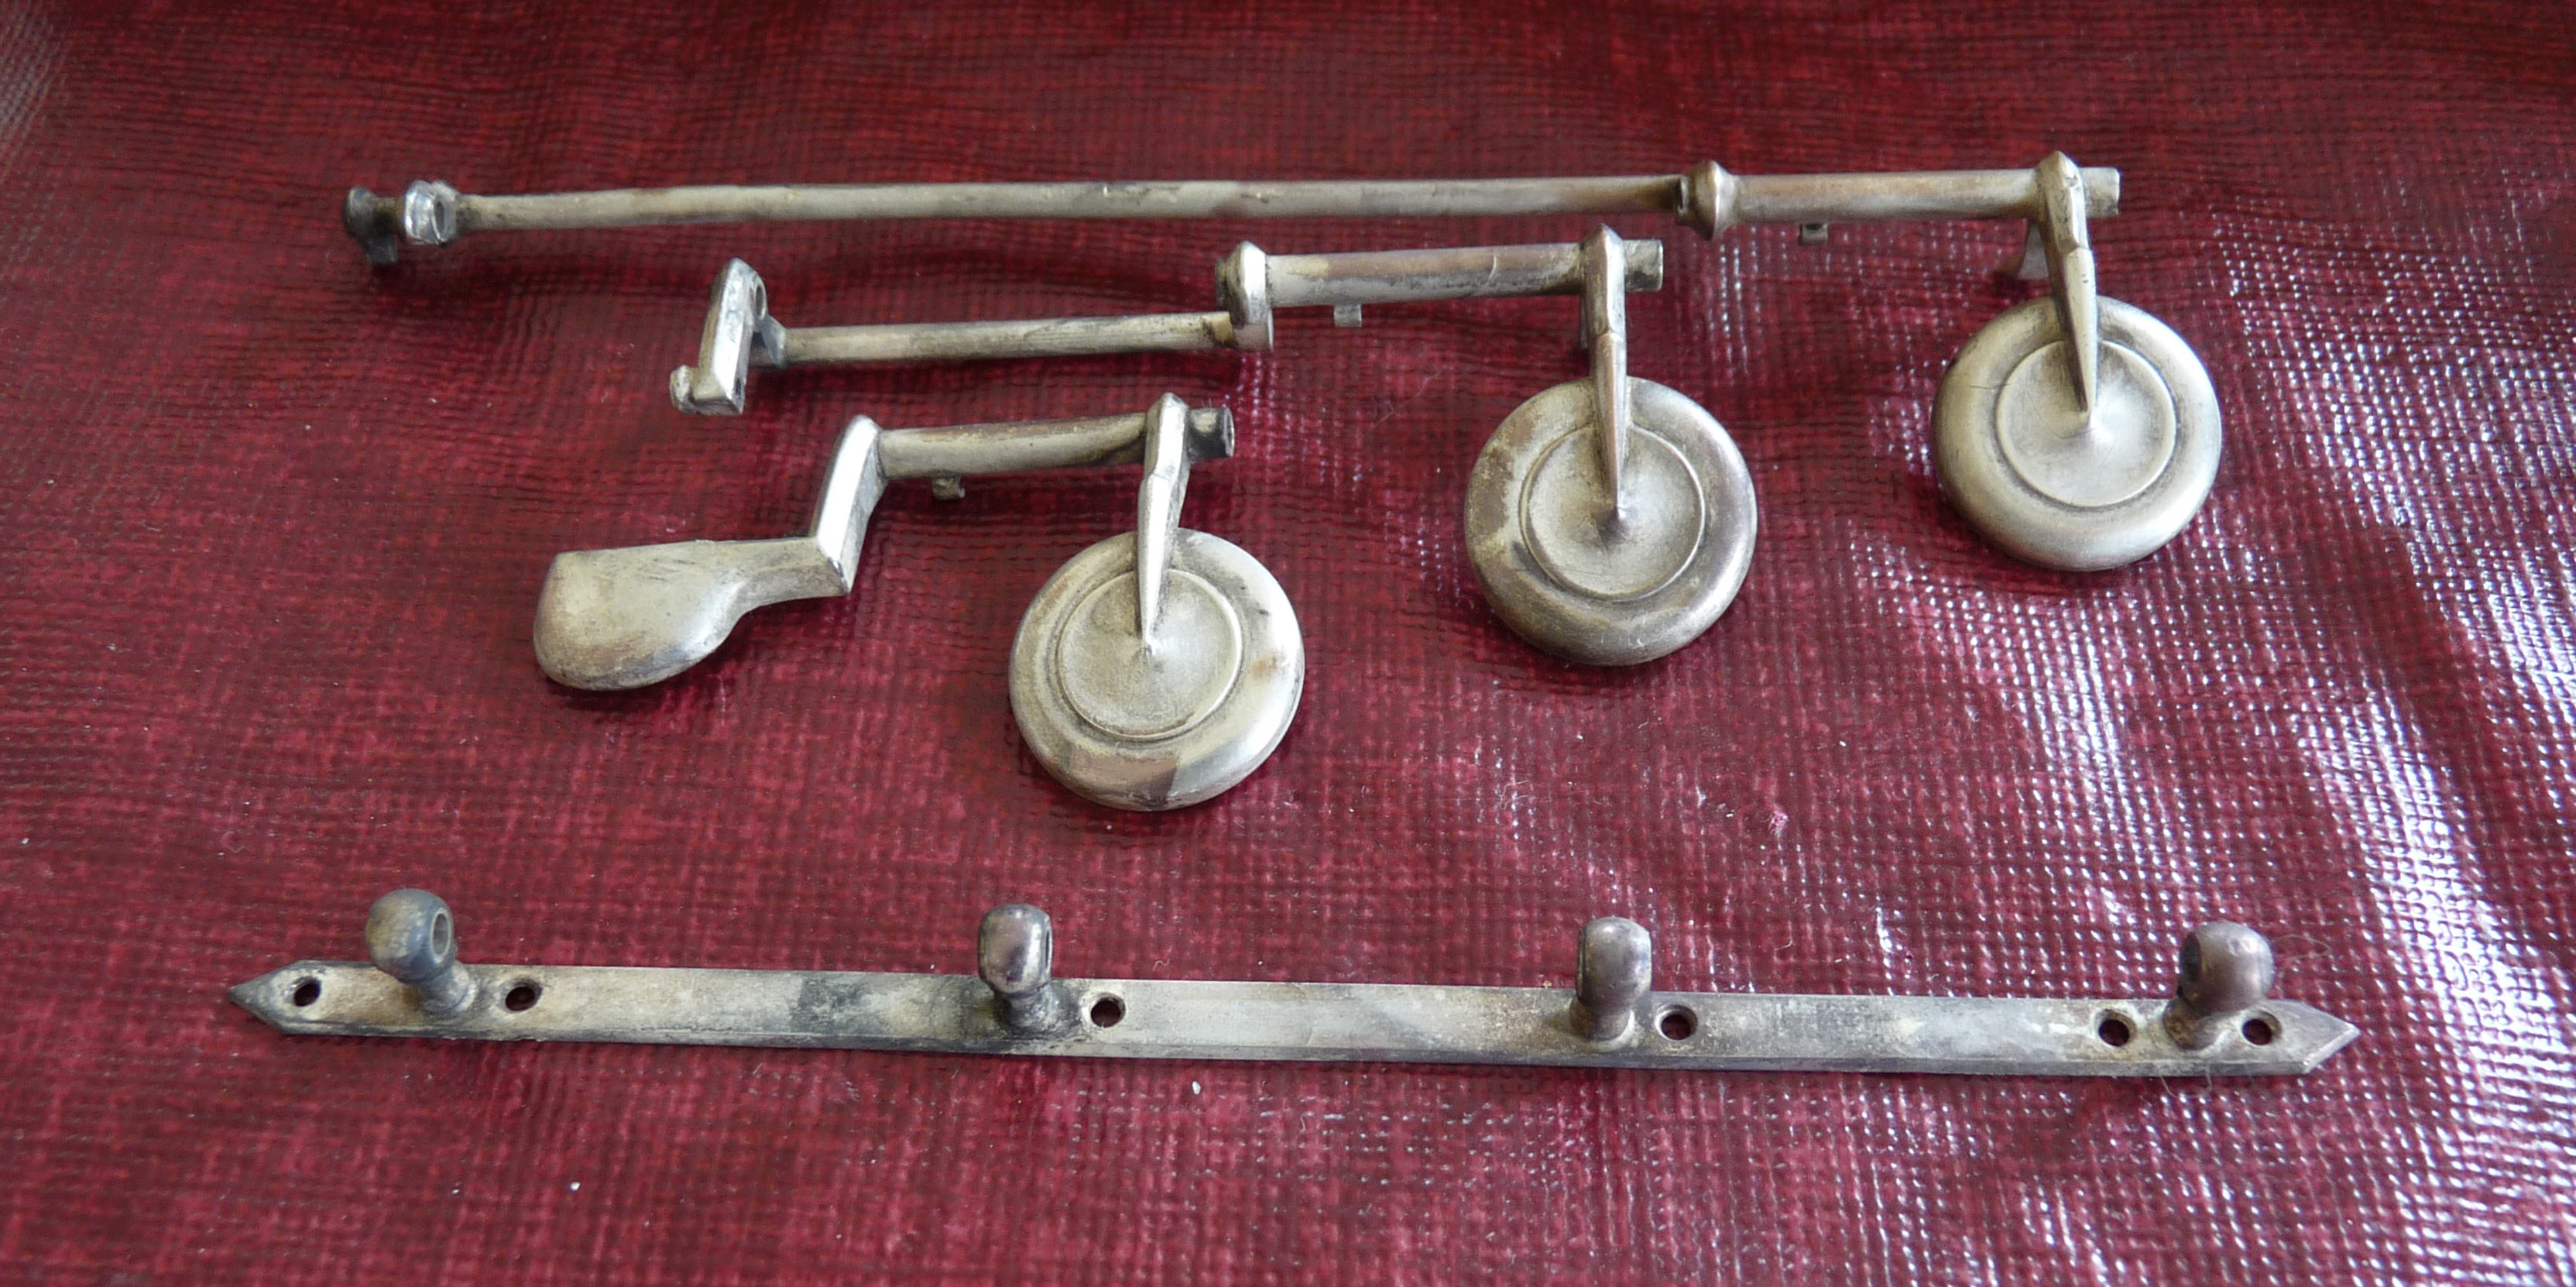
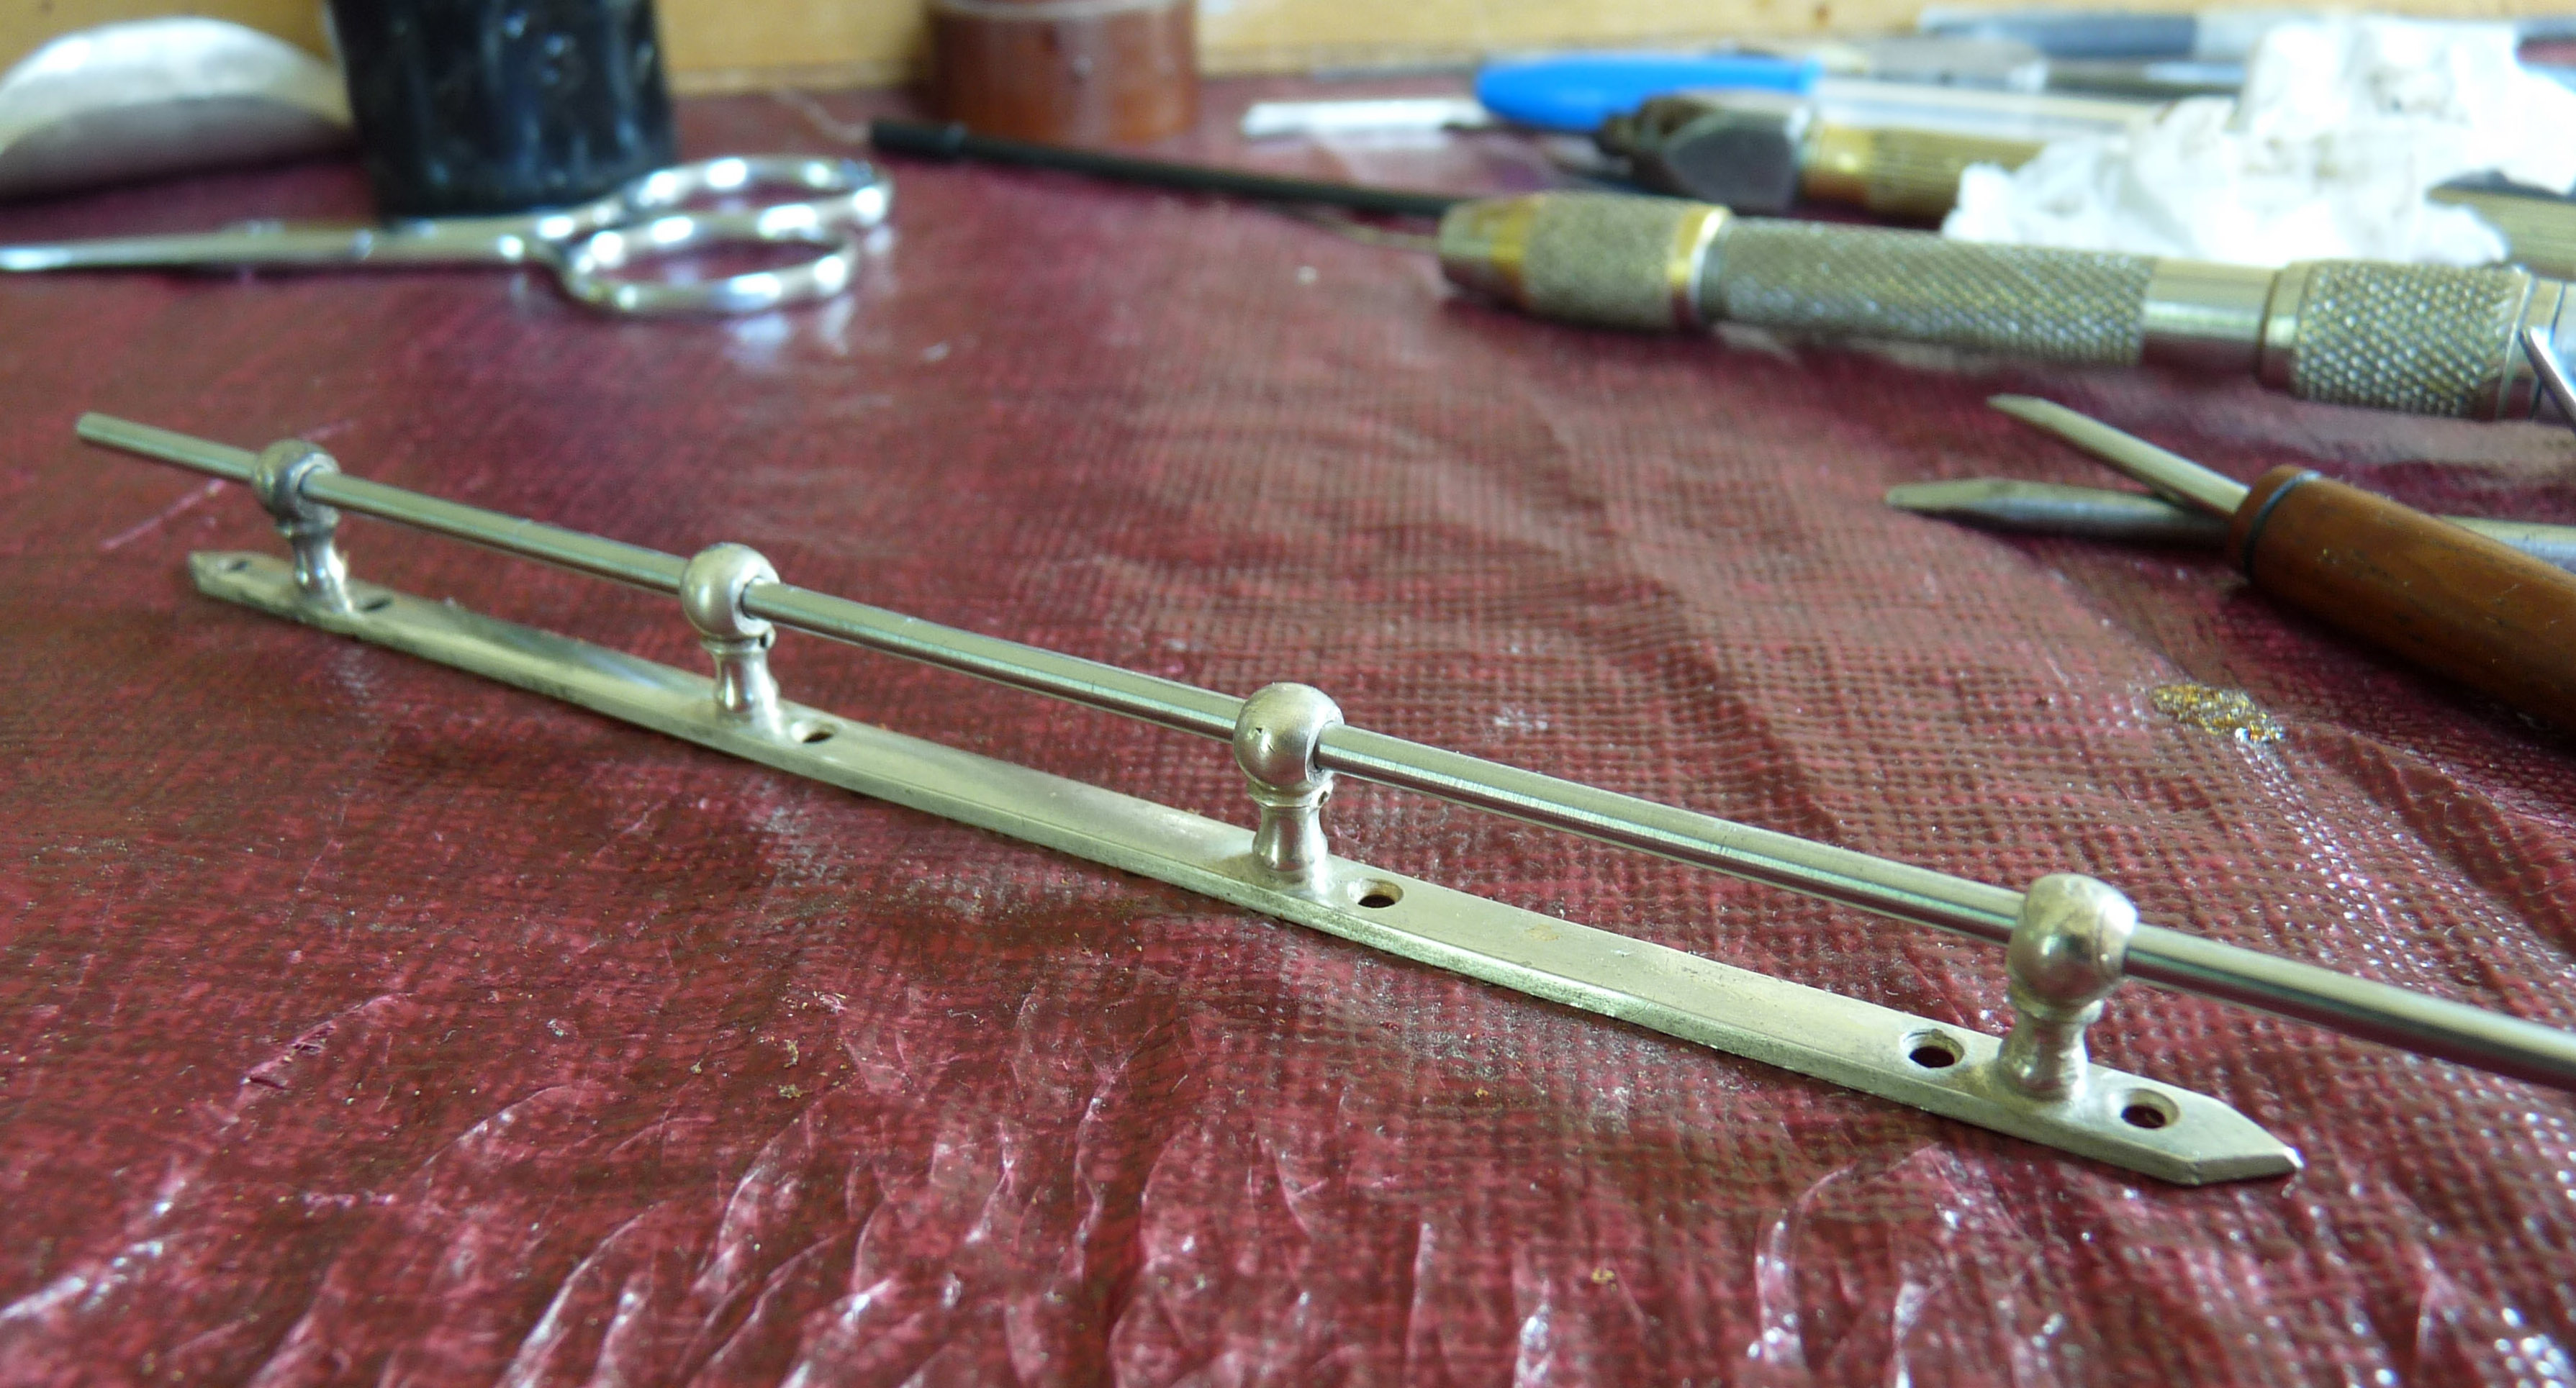
The socket and rib were then installed. The last step was to align the post and solder it to the ring before pressing it in place.
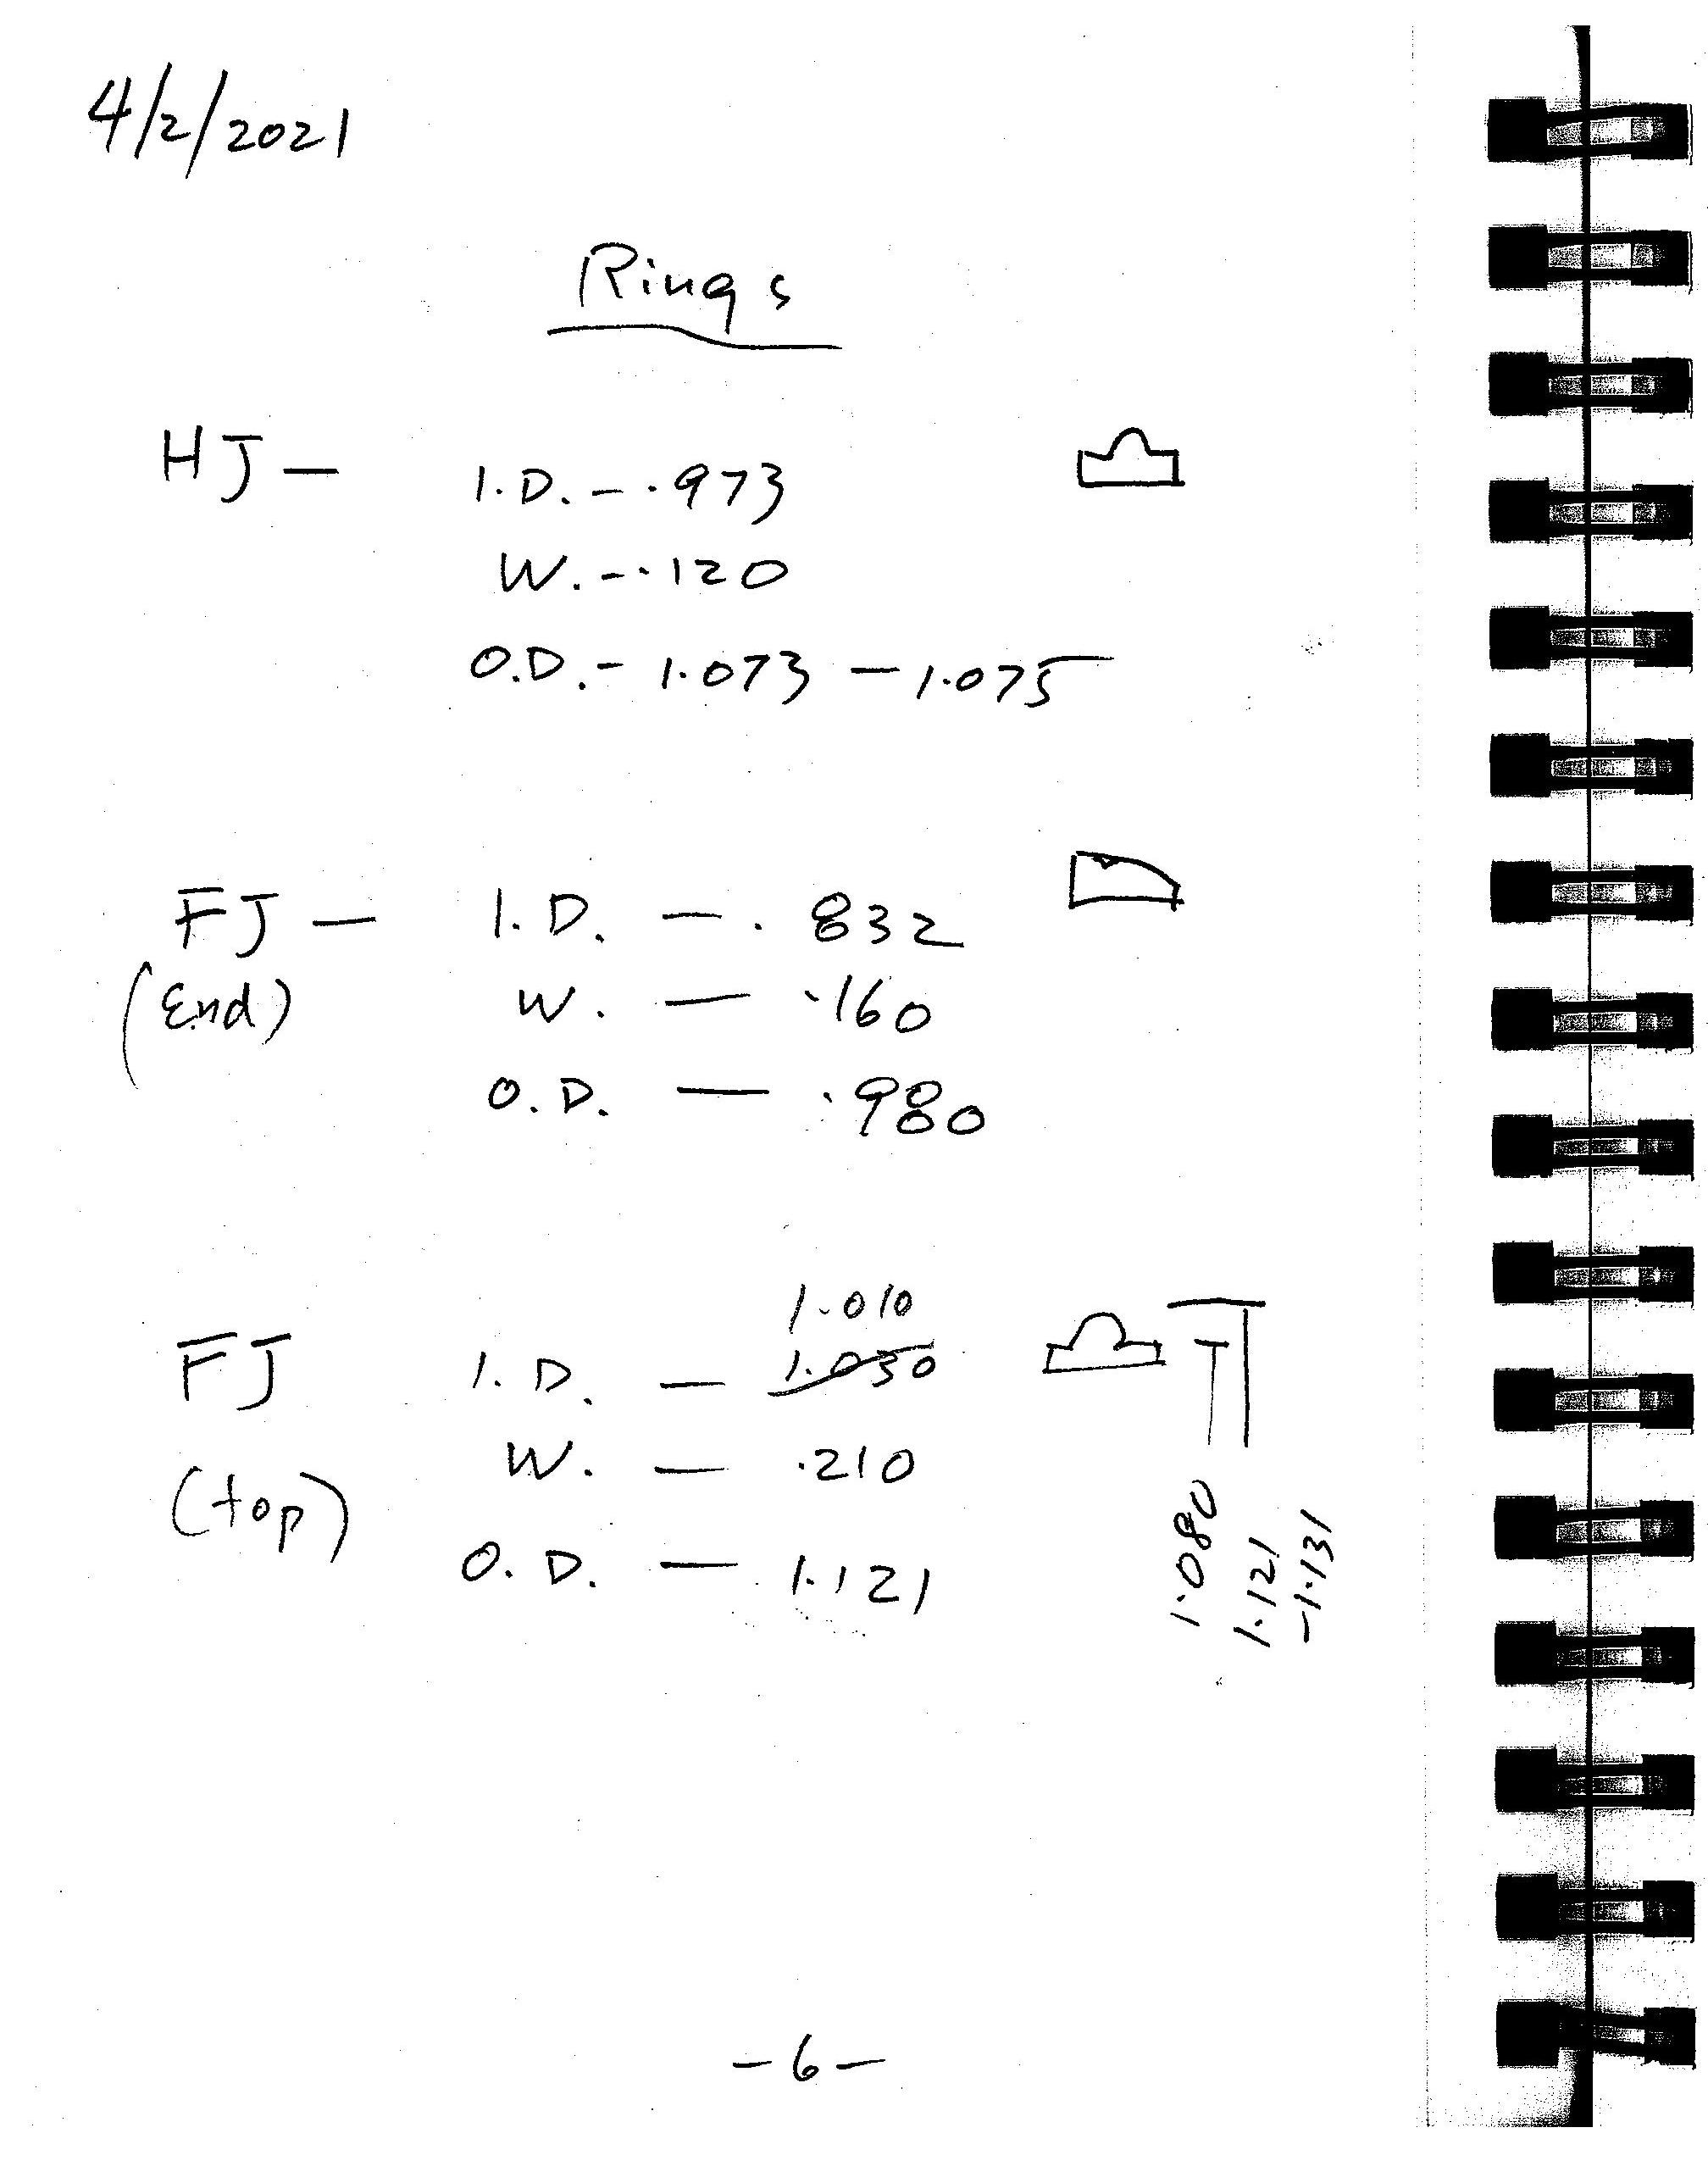
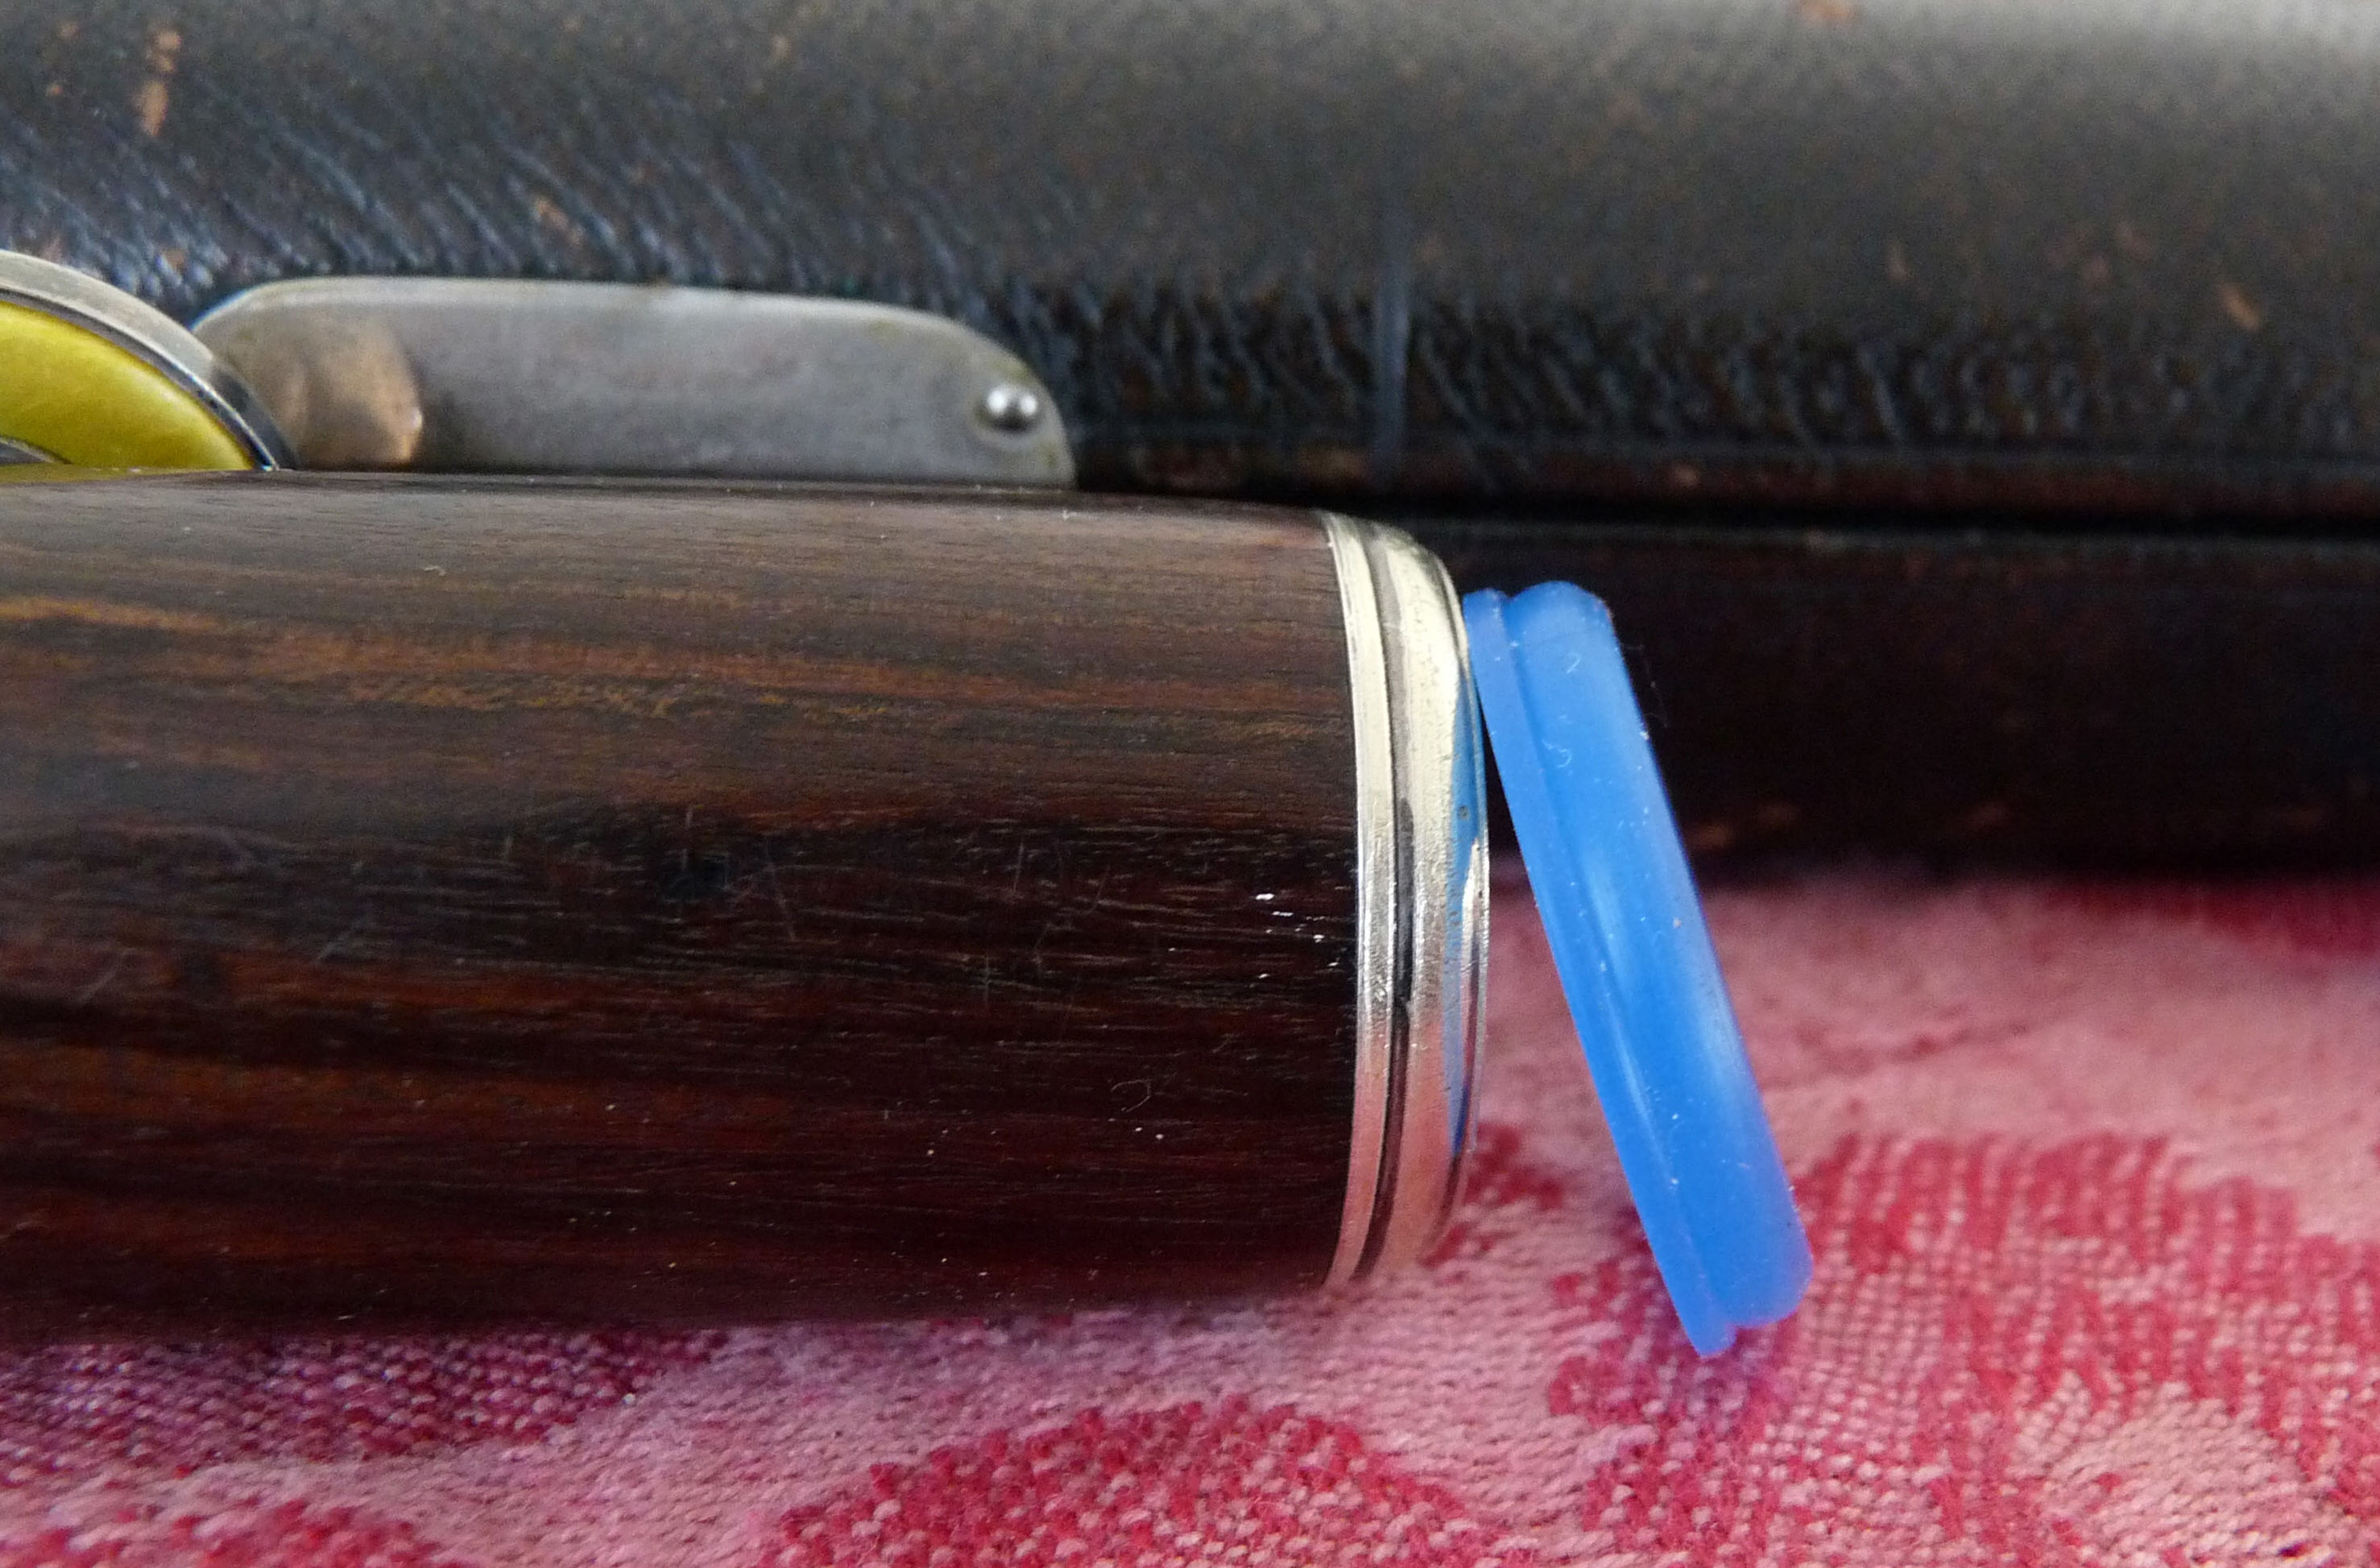
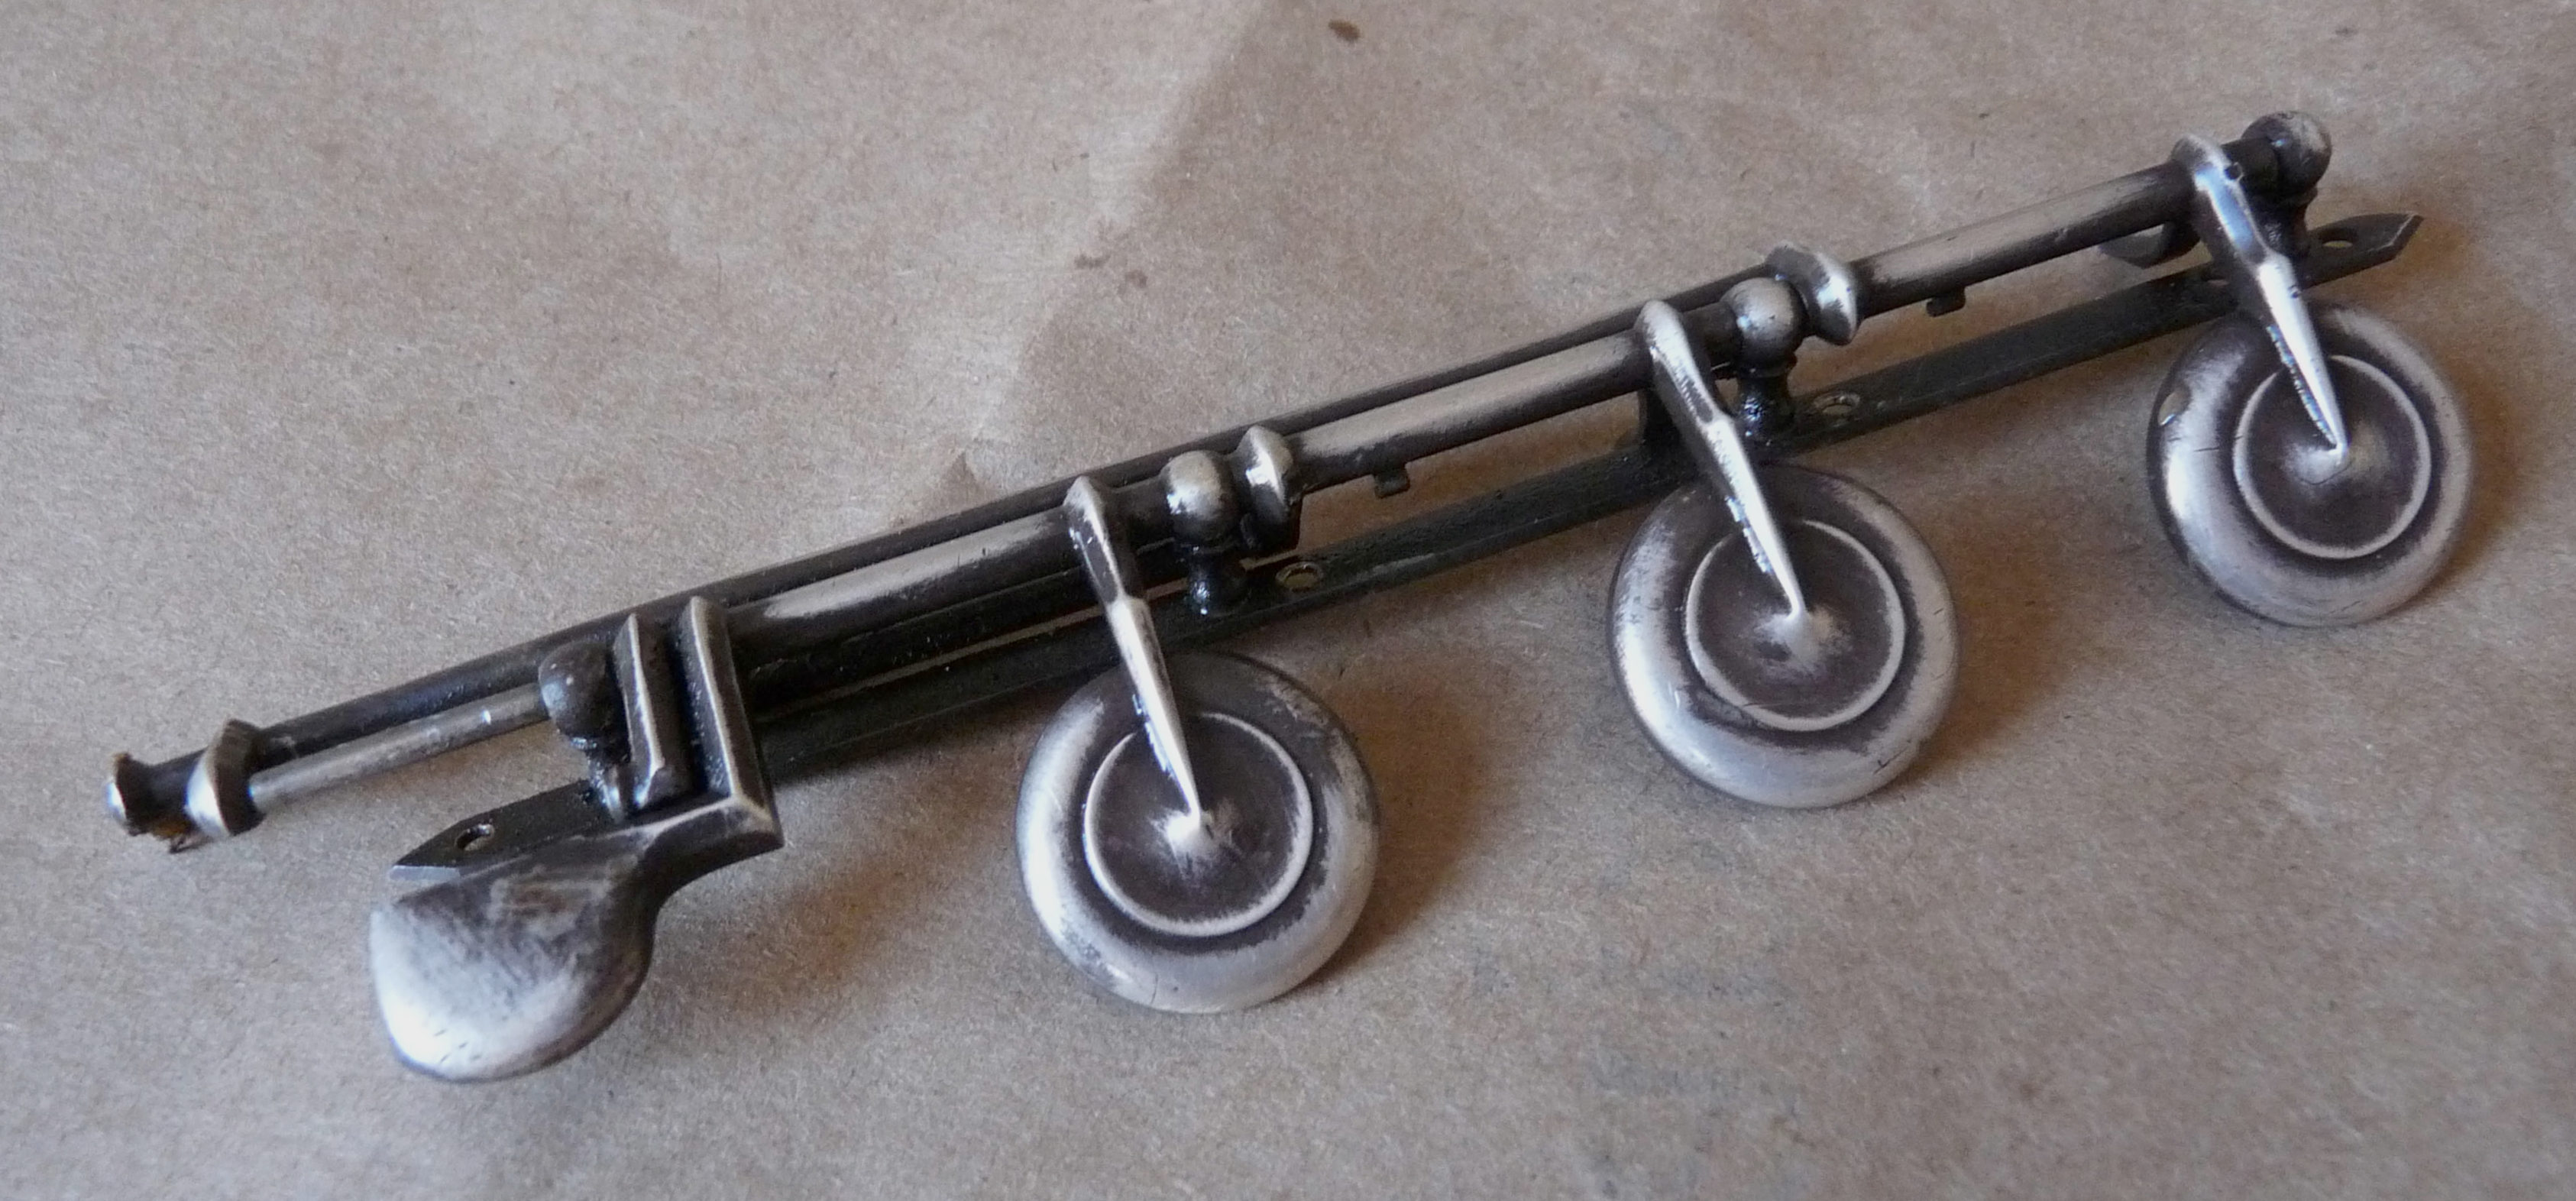
The flute was missing three rings, each with a unique shape and size. Casting them in silver was the easiest solution to replicate them. I began by copying the profiles from the sister flute in wax. The original rings might have been cut with special form cutters from heavy seamed tubing or perhaps made from drawn pattern wire. Both processes involved forming thick pieces of silver with tremendous force. No casting components would have been used on a Louis Lot flute. My approach would satisfy the rings’ functional requirements, but not their historical authenticity. That is why preserving the originality of a historical instrument is so important. A vintage flute can only be original once.

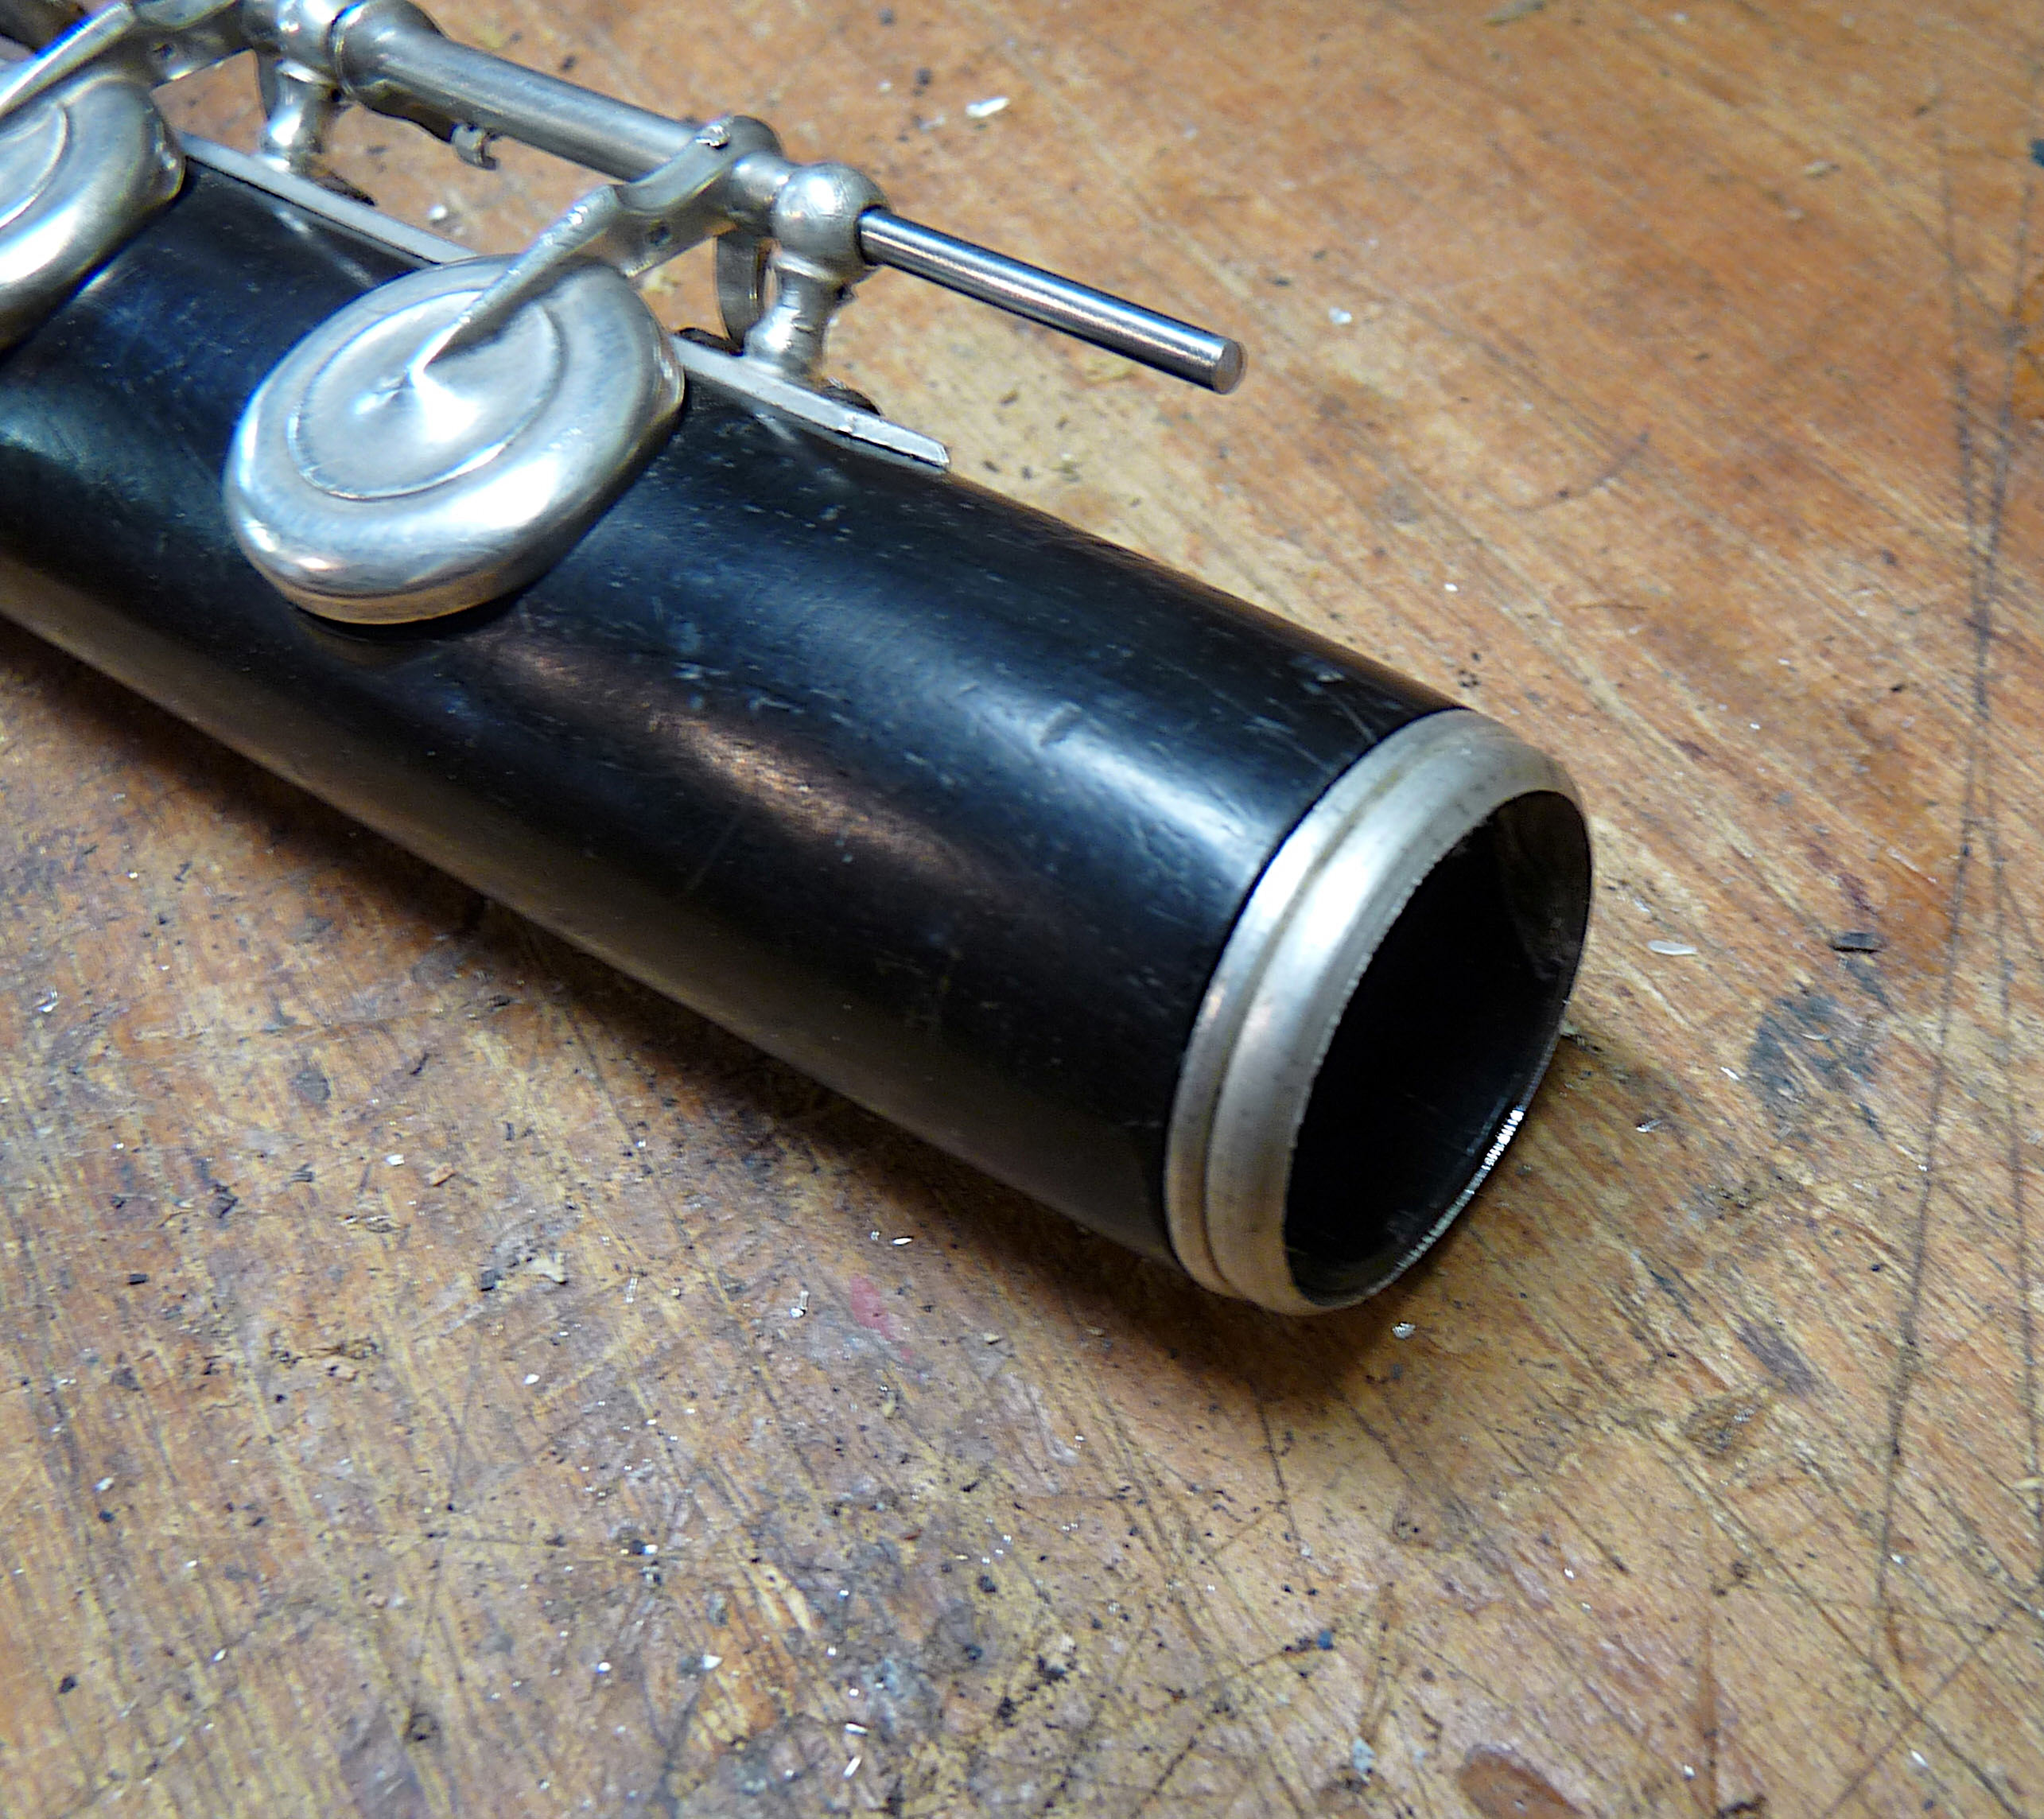
The footjoint was finally finished. The extra length of the steel could easily be trimmed, slotted and the ends rounded with just hand tools. By and by, a footjoint that seemed beyond repair reached the padding stage. Fortunately, the tone hole seats were undamaged, so padding should go well.

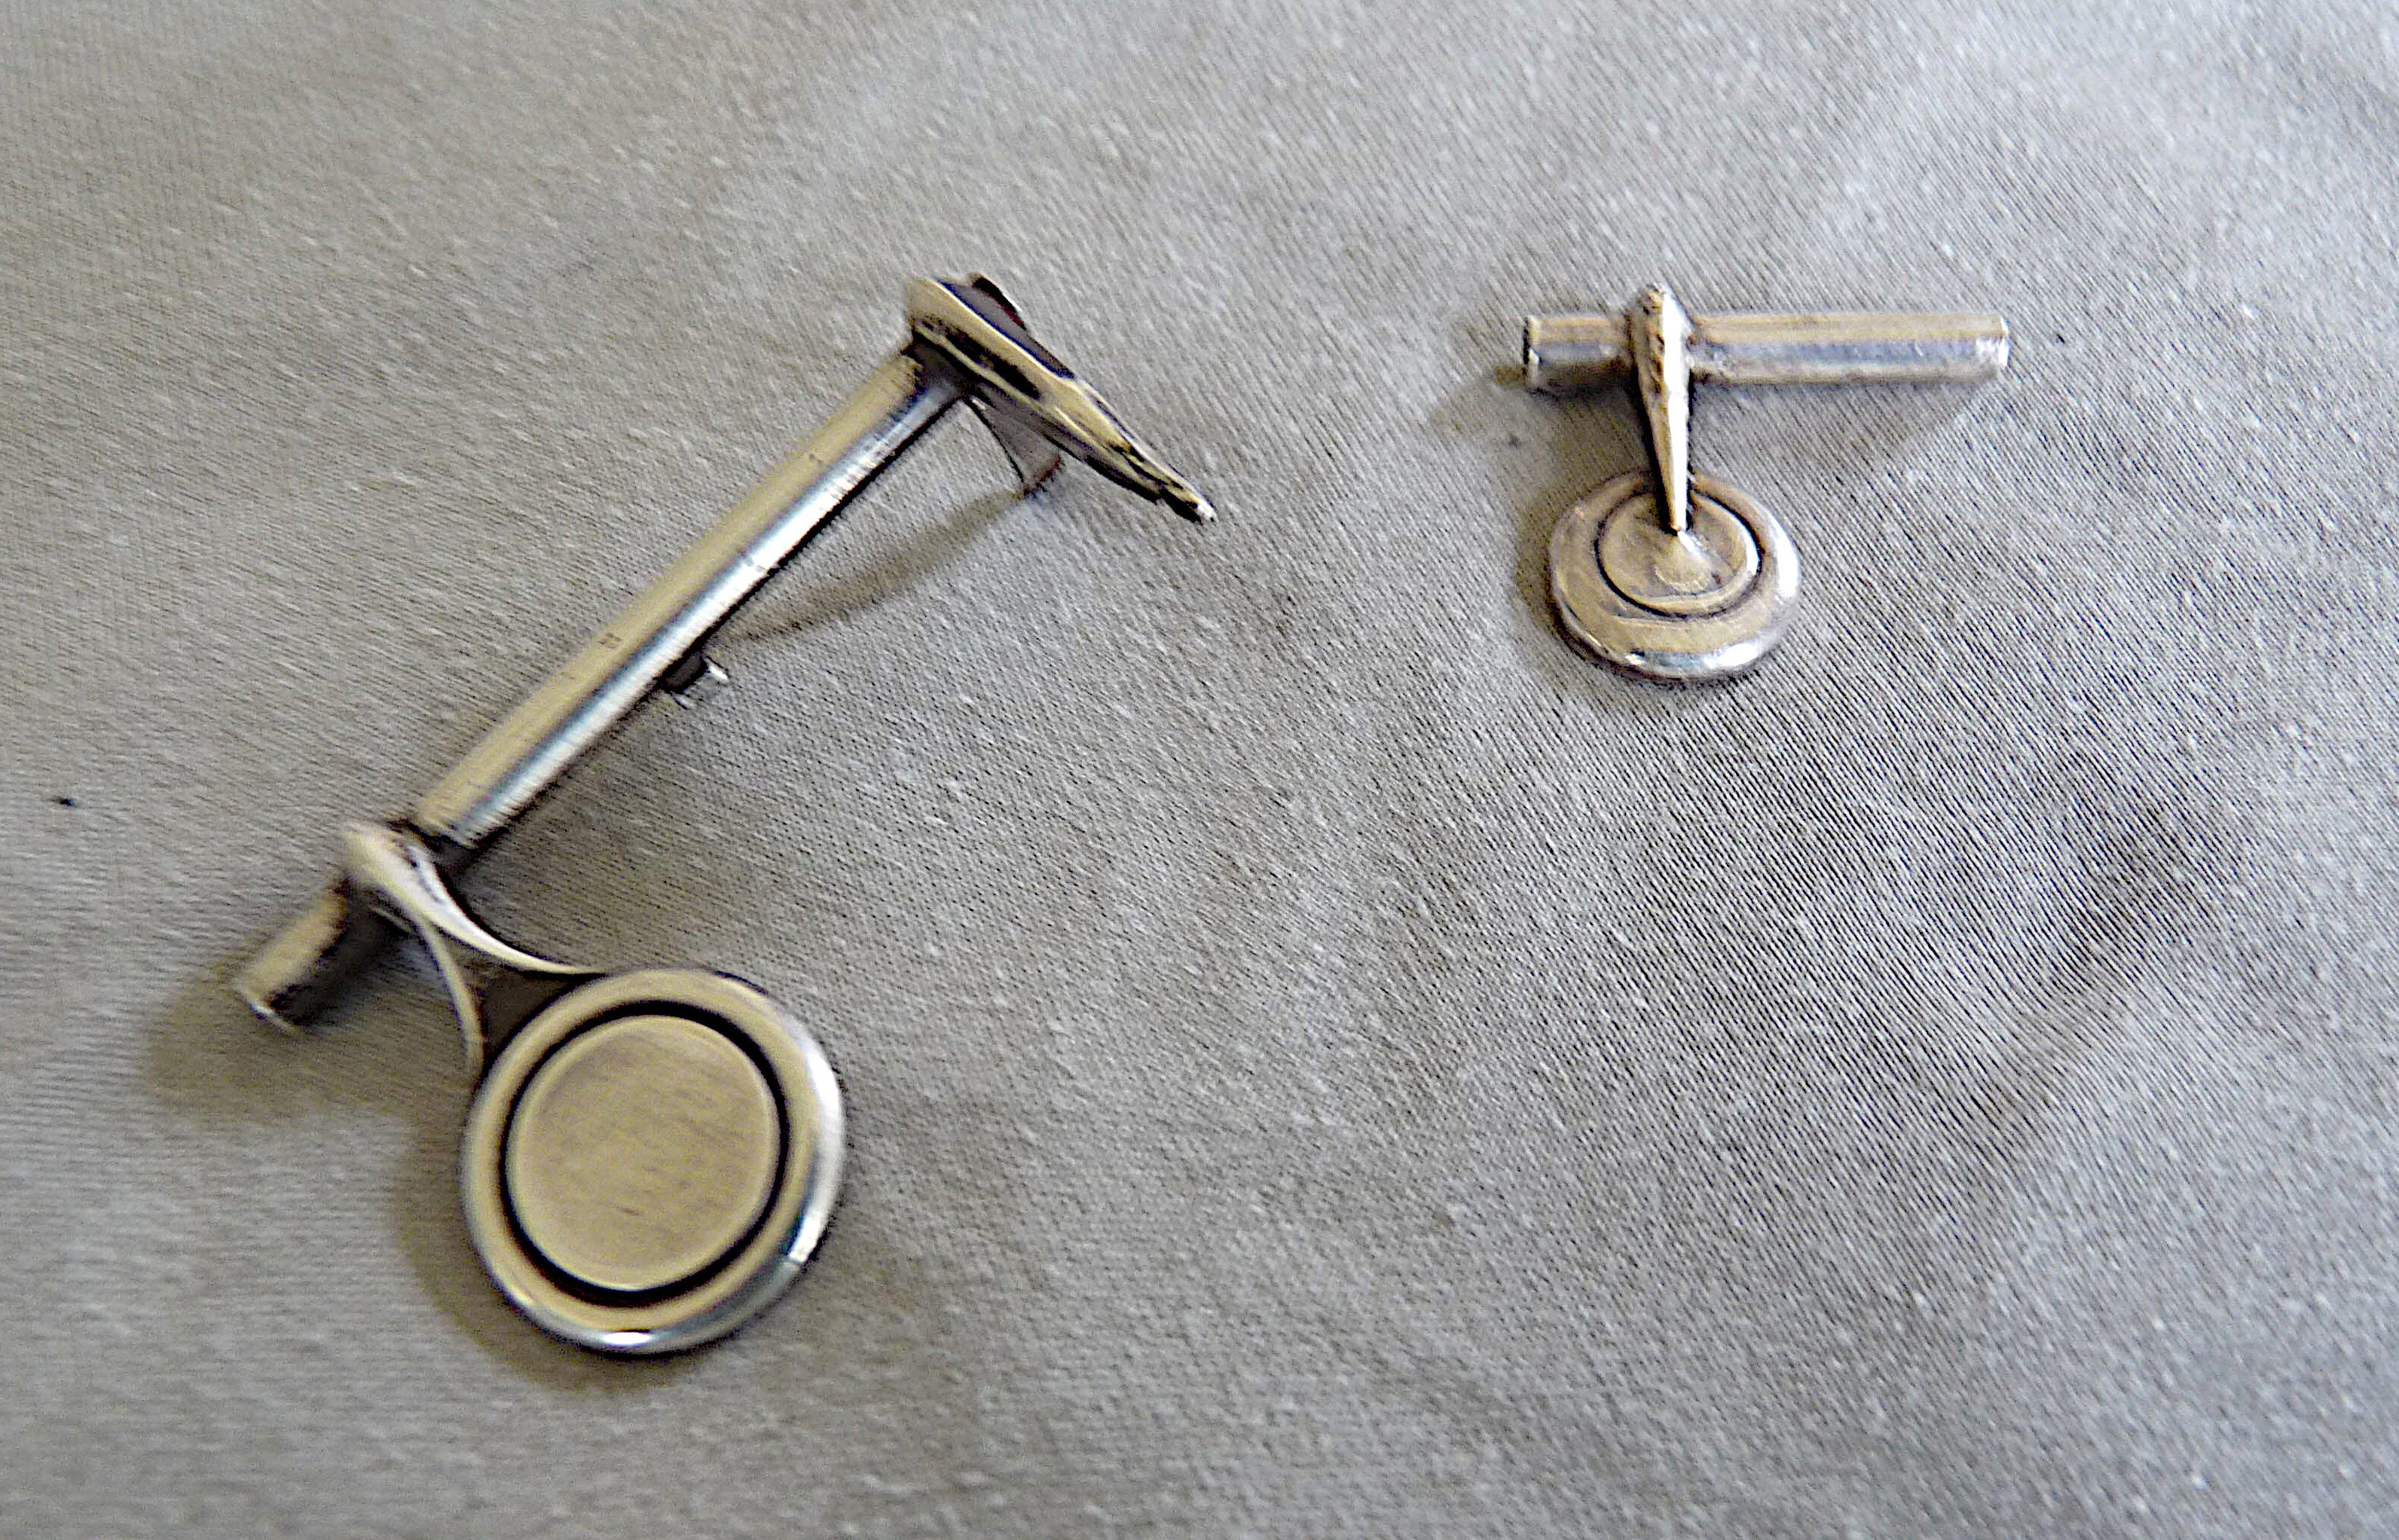
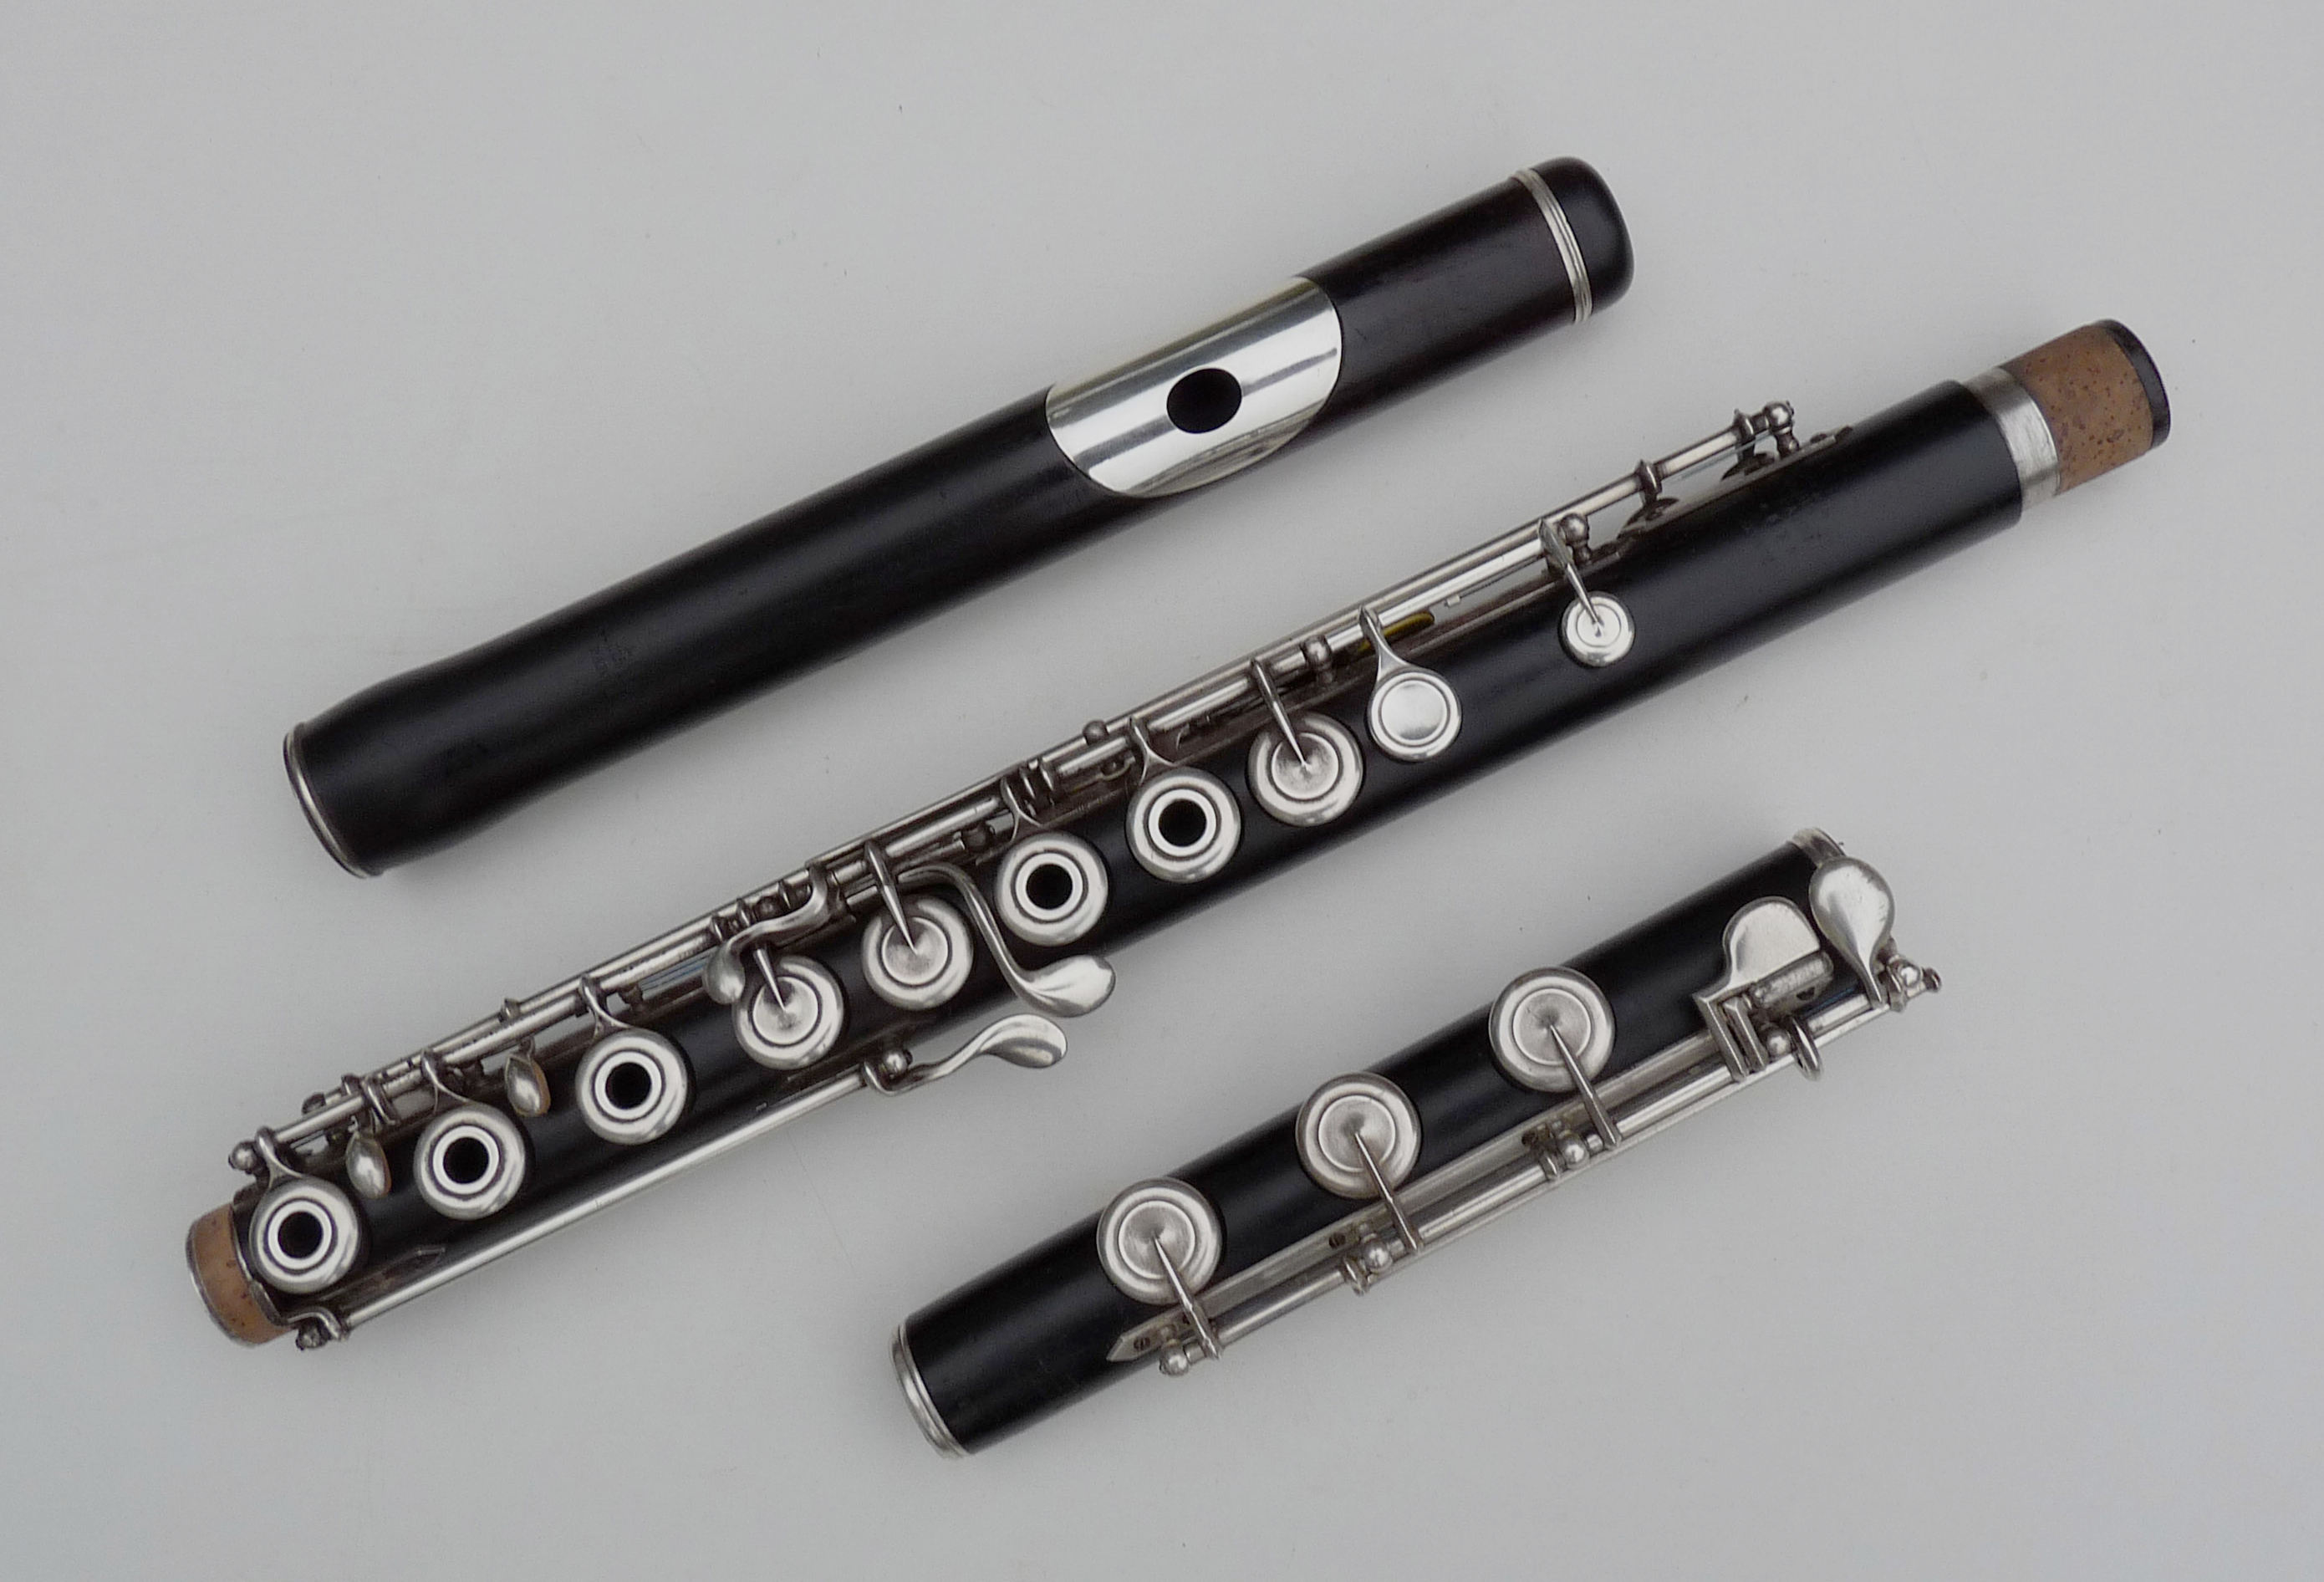
Onto the body. Other than a missing C# cup, all the silver parts were present. Crooked parts were straightened, the out of round tenon ring was trued up, bent tubing was burnished, rusted steels and springs were scrubbed, etc. Luckily, a small cup and arm from another Louis Lot flute was available. It was just a matter of soldering it in place.
At first, the wood looked worse than it actually was, but it rubbed out quite nicely with just some oil on a cloth. From this point forward, the centerjoint would simply need an overhaul, which was still a lot of work.
The headjoint had a sizeable crack that had been poorly repaired. It was also missing the lipplate, a ring, the inner silver tube, as well as the crown and cork assembly hardware. I measured the taper, and it was within specifications. The wood had shrunk, but the crack had widened the bore somewhat in an area where the change might be more forgiving. The crucial bore dimension immediately under the embouchure hole was correct. There was no telling how the headjoint would fair on the restored body. Any deficiencies might hopefully be remedied by the final embouchure hole cut.
A good, original embouchure hole on a vintage flute is the Holy Grail. Many headjoints were ruined by flute players who attempted to improve playability by recutting the embouchure holes. Almost all the examples of this sort that I have seen were done by amateurs, not professional headjointmakers. In truth, only embouchures holes that are undersized may marginally be “improved” or reworked. It is almost always a losing proposition.
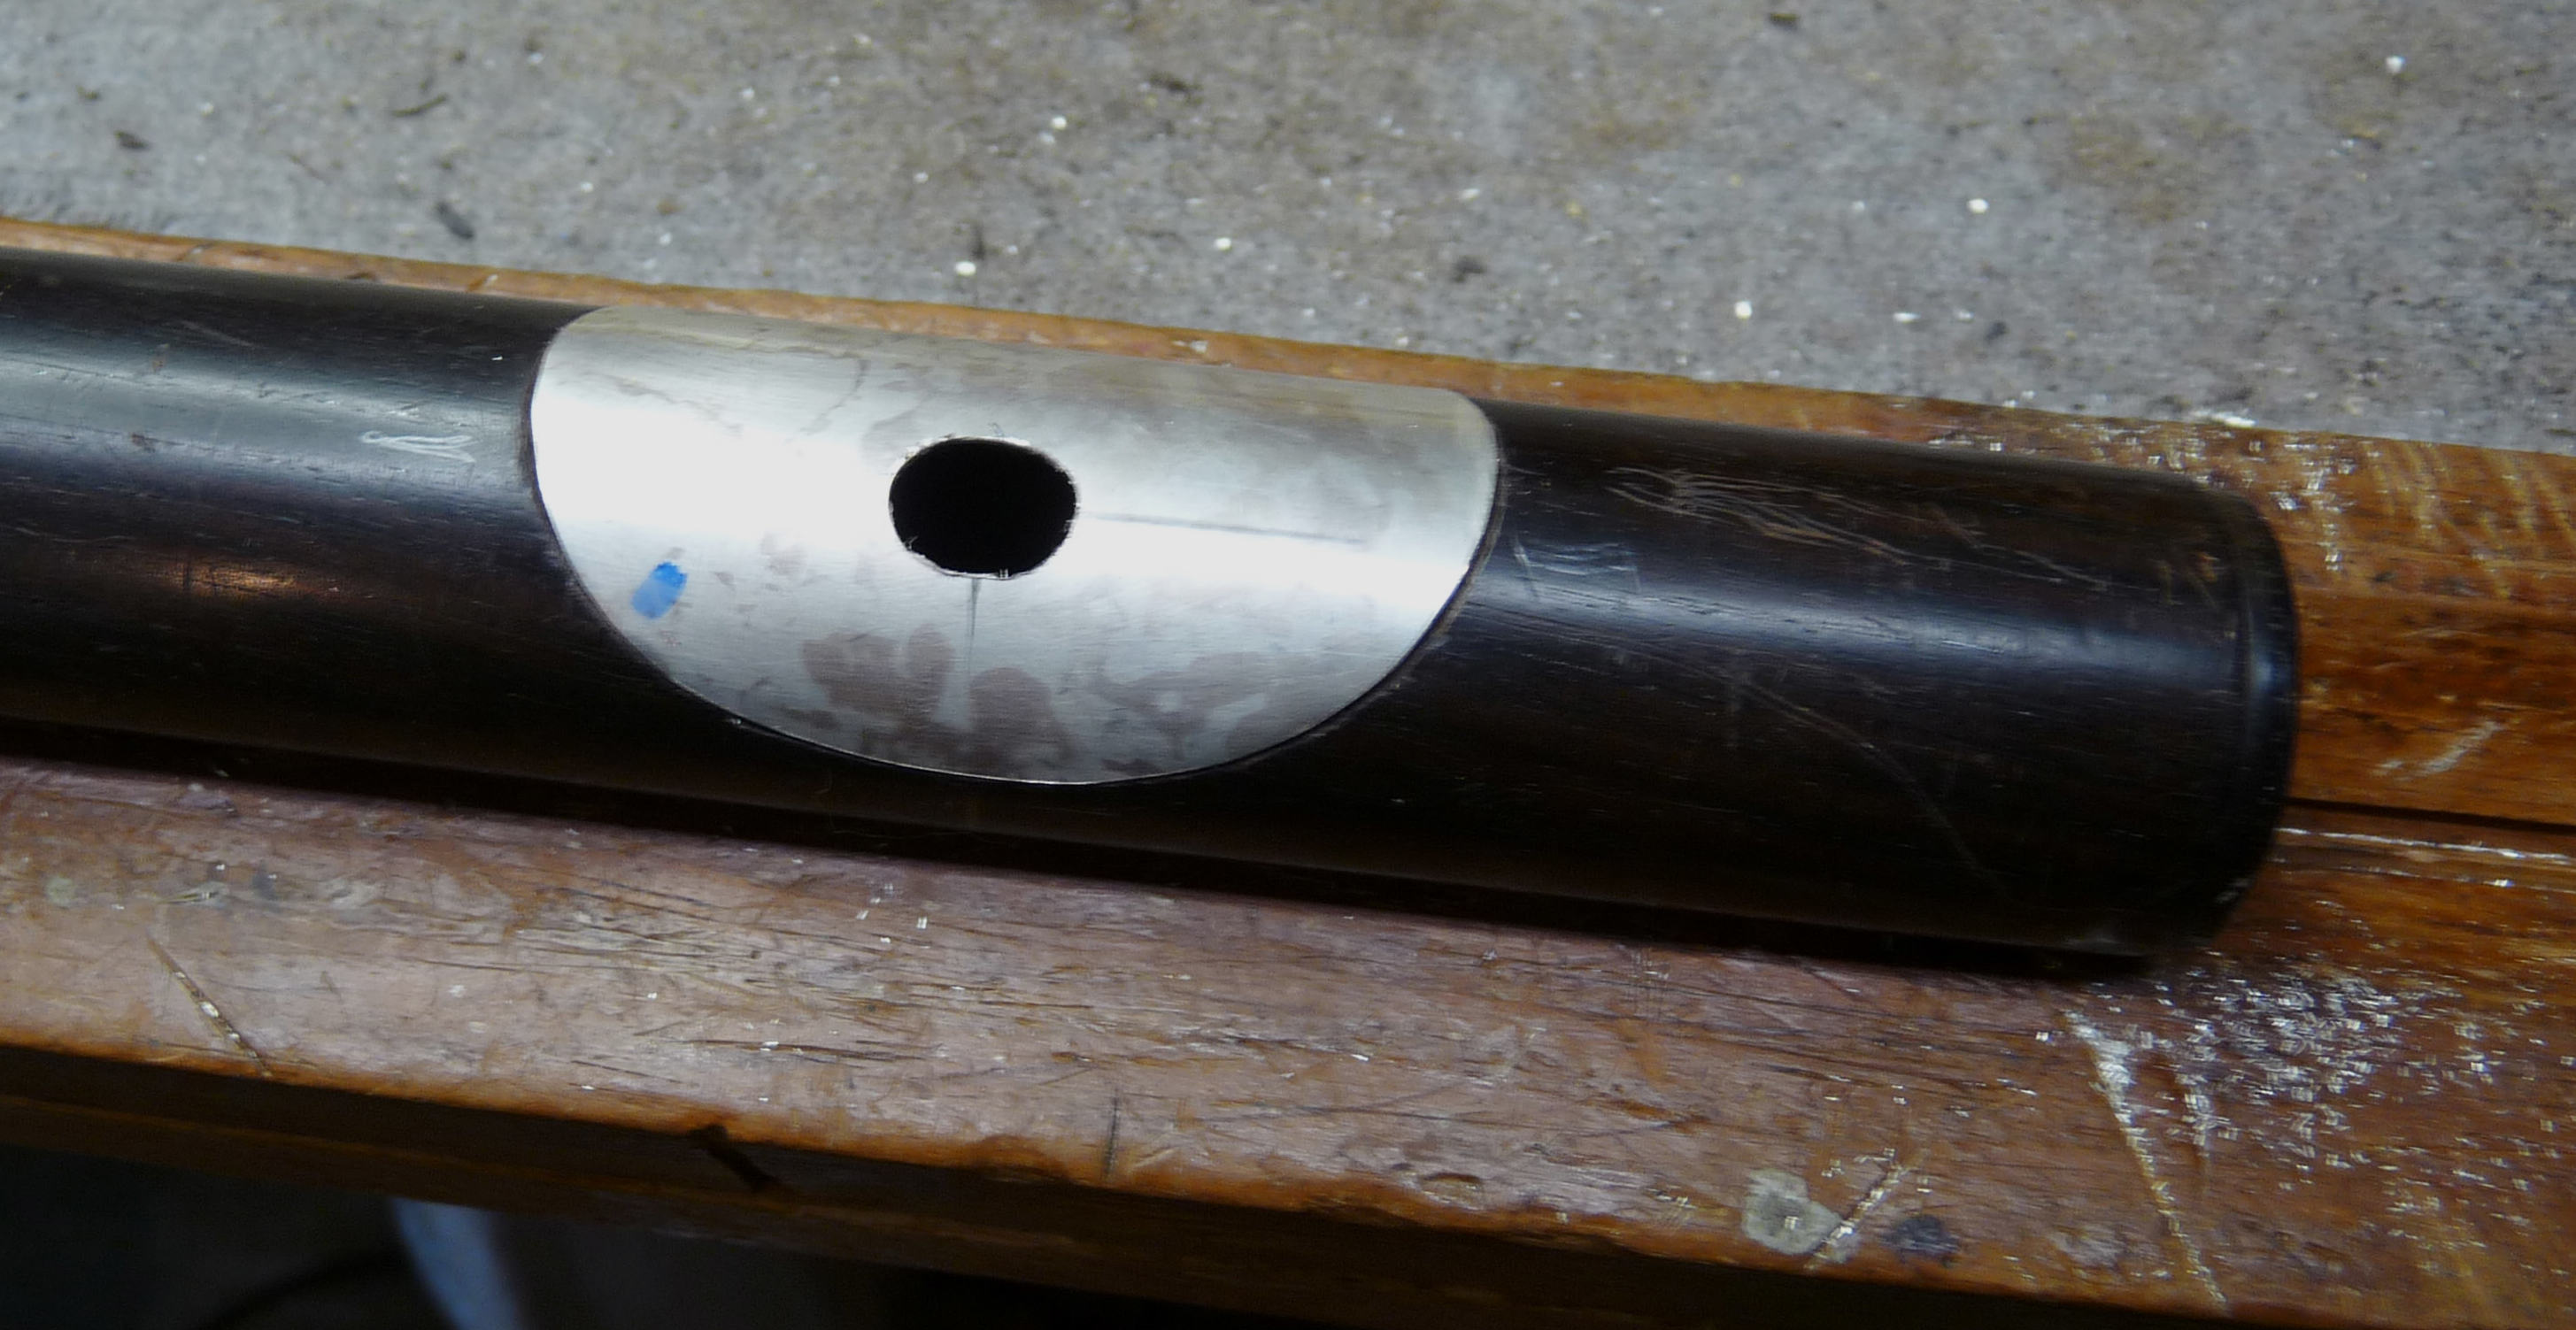
The walls inside the embouchure of Lot #4339 looked original. Perhaps I could put on a replacement silver lipplate and follow the inside shape when opening the embouchure hole on top. This way, at least I would not be far off in obtaining the correct shape.
As a wood headjointmaker, I have developed an embouchure shape that is akin to my favorite Louis Lot silver flute, #3086, a Villette. I primarily play on original French flutes. I don’t claim that I make Louis Lot copies because no amount of measuring could perfectly replicate an original embouchure hole. I consider my work to be inspired by Louis Lot. A key difference is that Louis Lot used the elongated rectangle shape on their silver flutes, while their wood flutes received an oval embouchure. By putting the Lot embouchure hole design intended for their silver flutes on my wood headjoints, I am doing something that Louis Lot themselves never did.
The intention of this restoration was to bring a Louis Lot flute back to playing condition. Modifying the shape of the original embouchure hole was never considered. The Final Cause of making the restored flute play like a Louis Lot was a tall order. The goal was not to “improve” it. Opportunities existed to turn the flute into a modern instrument with a modern scale and a modern embouchure. That would have been a different project altogether. The success or failure of the current flute could only be revealed upon completion. Its first note would tell me if the sound and feel resembled a Louis Lot flute. If so, how closely?
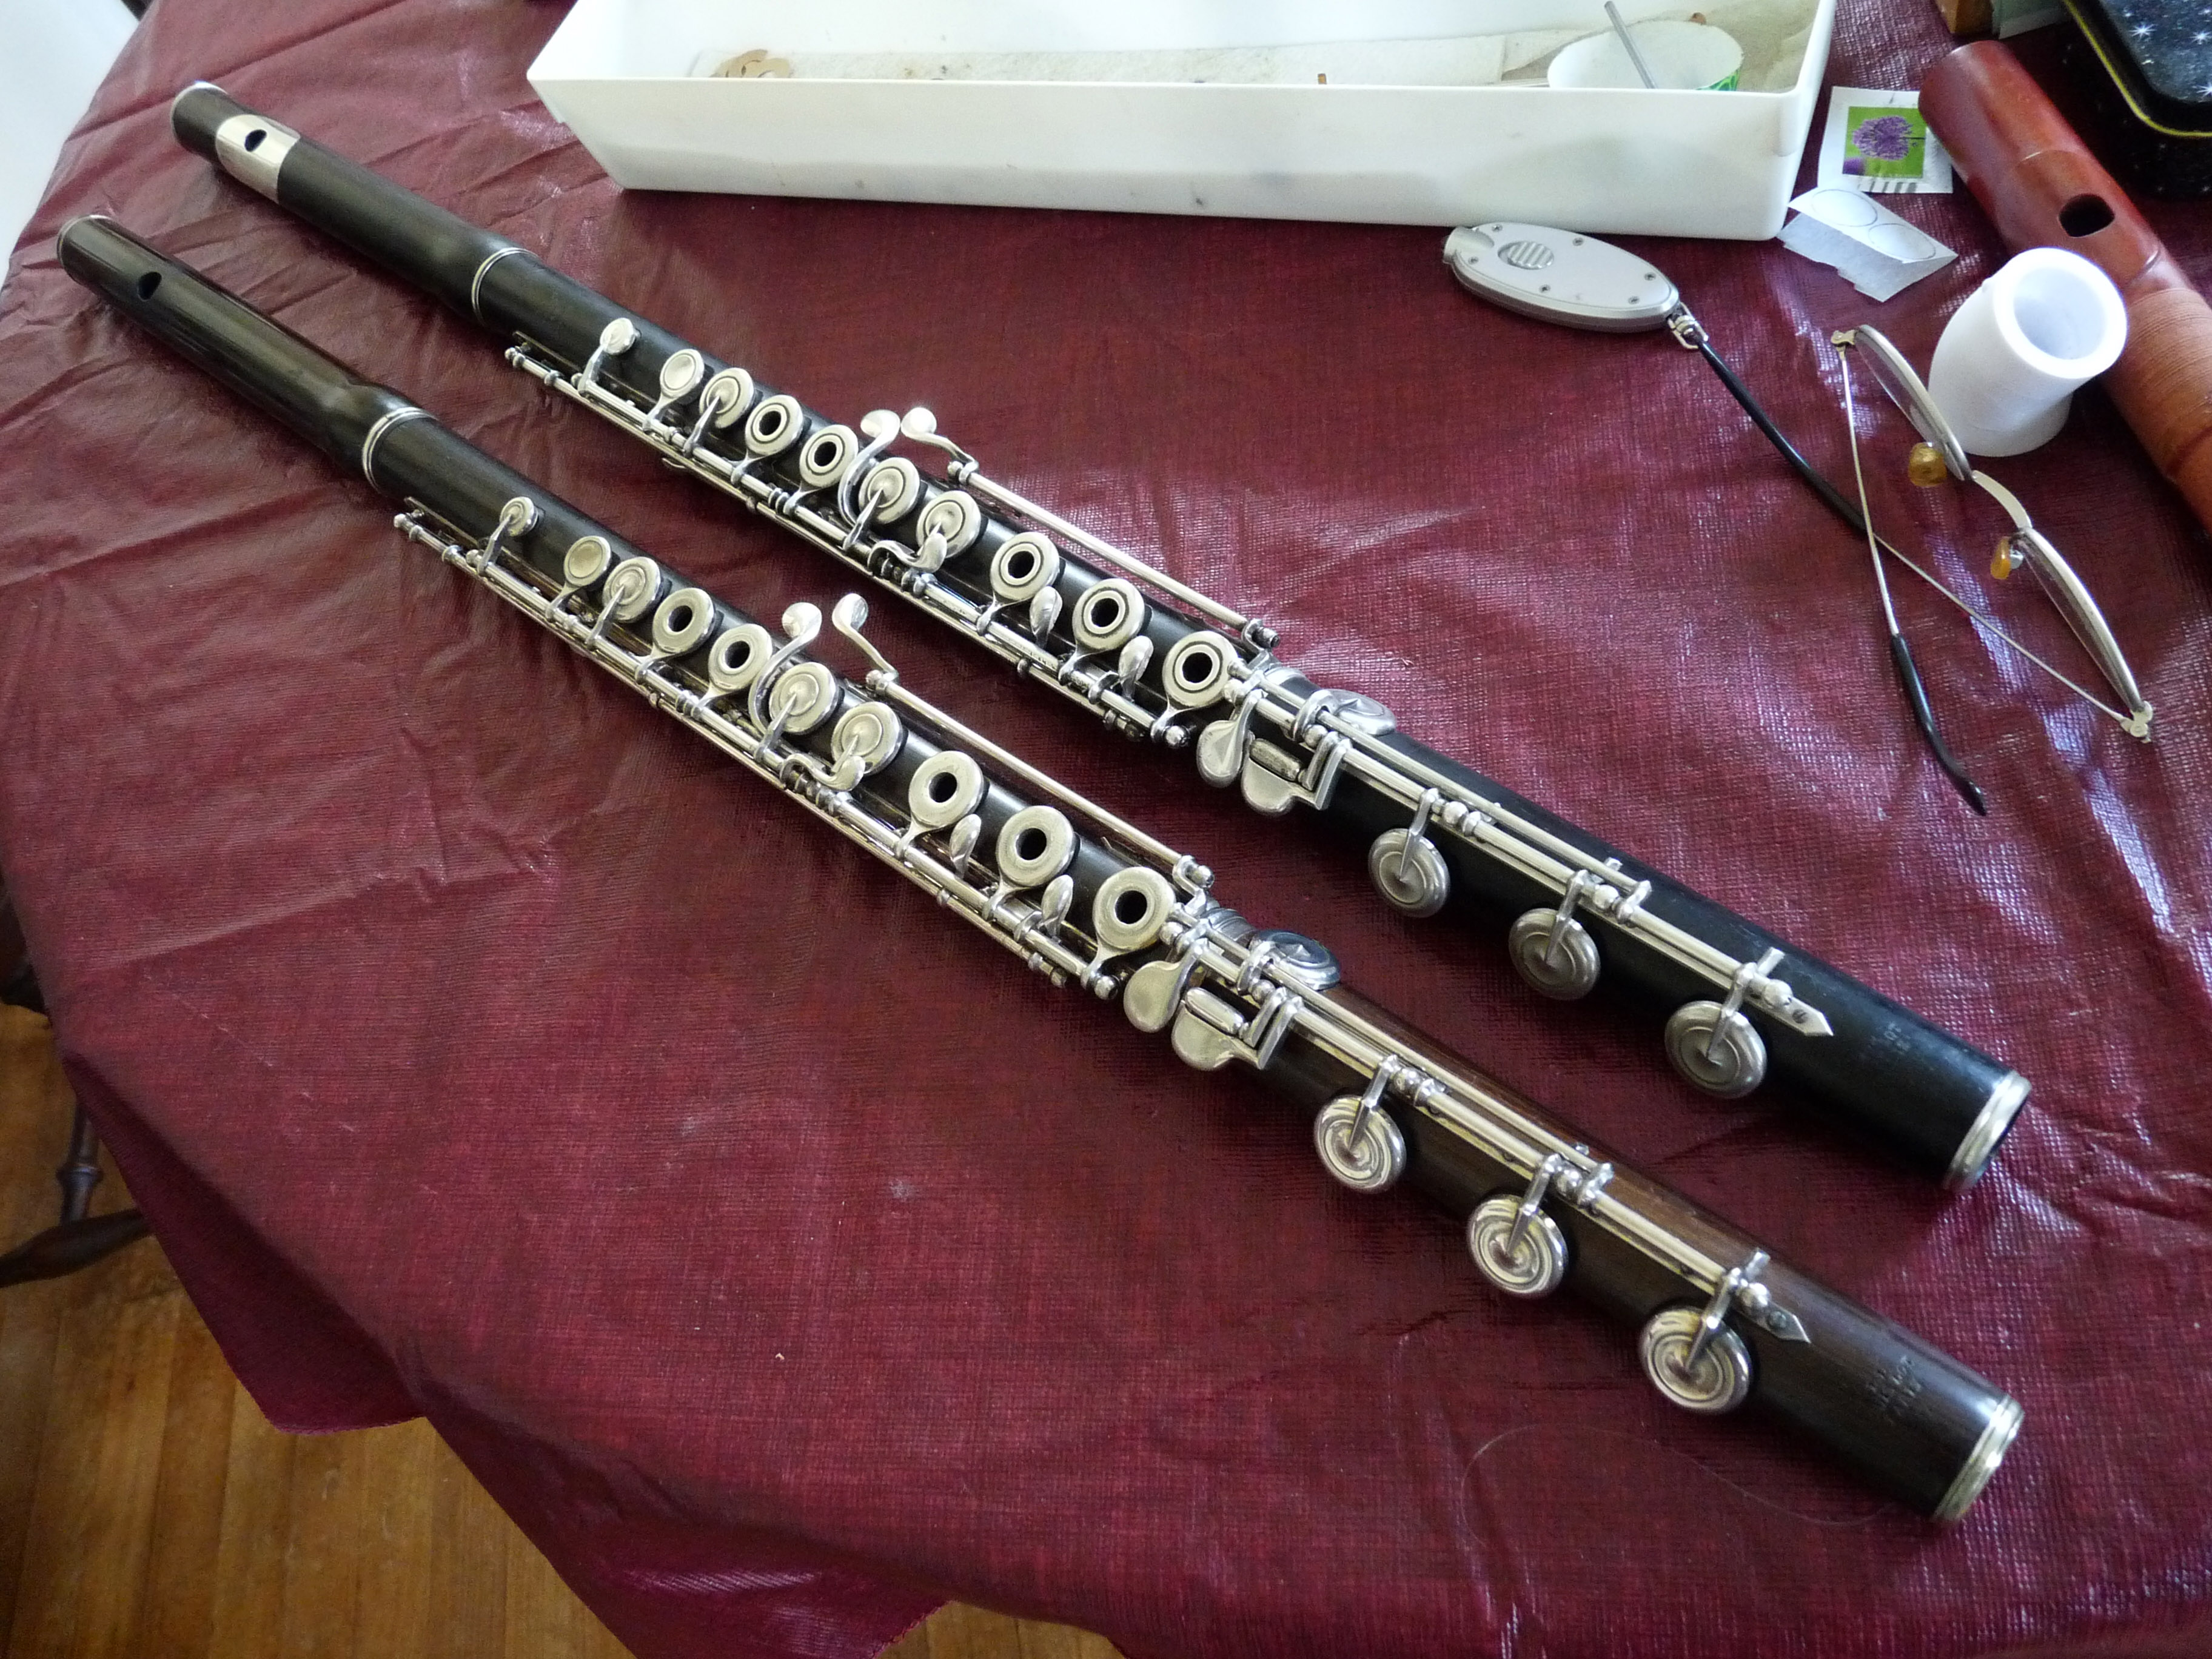
Playing Lot #4339 and #4041 side by side, I found their sound quality and response quite similar. Louis Lot flutes, whether wood or silver, posses various qualities that give each flute a unique identity. Louis Lot and French flutes in general, share a common soundscape. I call this family resemblance. This could easily be understood after playing a great number of fine examples.
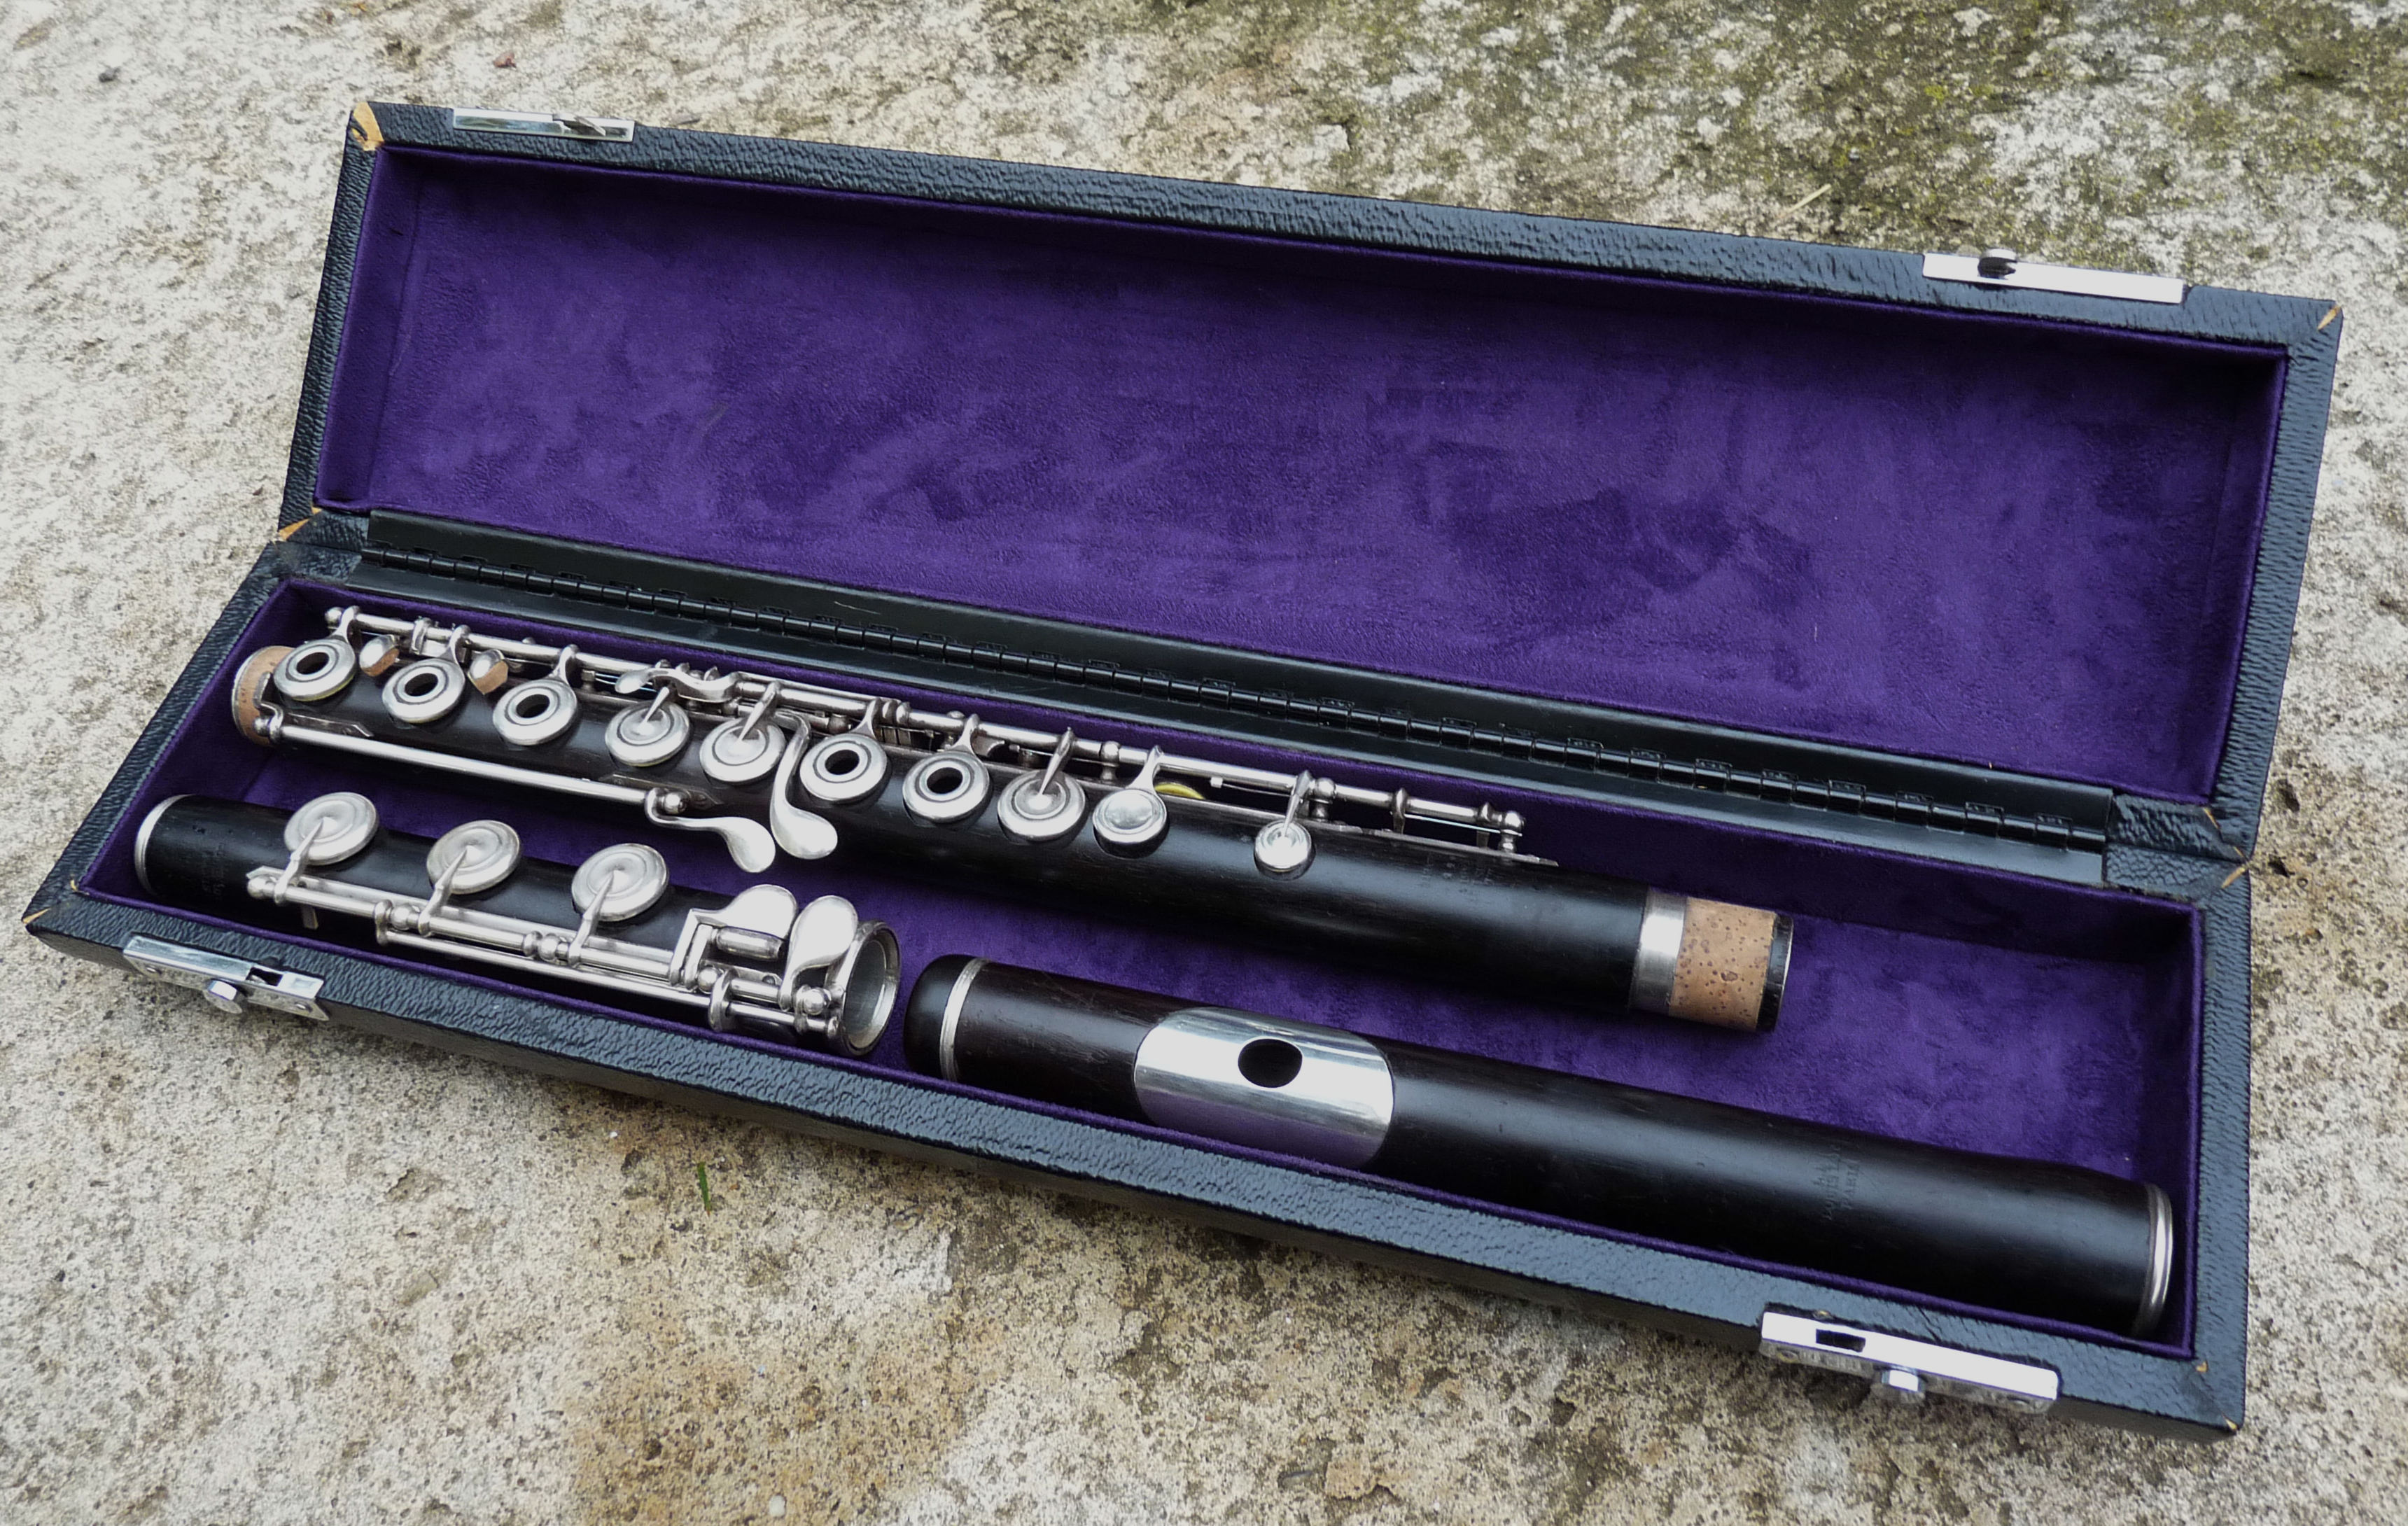
My goal for this restoration was to recover the playability of the flute, make it play as close to an original flute as possible, in this case, its sister flute #4041. #4041 is a wonderful playing instrument, originally ordered in 1890 by Harald W. Jensen, a professional flutist in the Royal Danish Orchestra. It would have been easier to make a new footjoint and headjoint, but it would completely delete the Efficient Cause of the work of Louis Lot. This kind of change happens to most instruments over time, in varying degrees. The approach of the repairer significantly influences the flute’s future. I am pleased that my restoration will enable Louis Lot #4339 to make music, more or less like an original flute, again for many years to come.
by David Chu, 2026, Maynard, Massachusetts
Copyright
© 2026 David Chu
For more information please email Alan Weiss at alan@vintagefluteshop.com